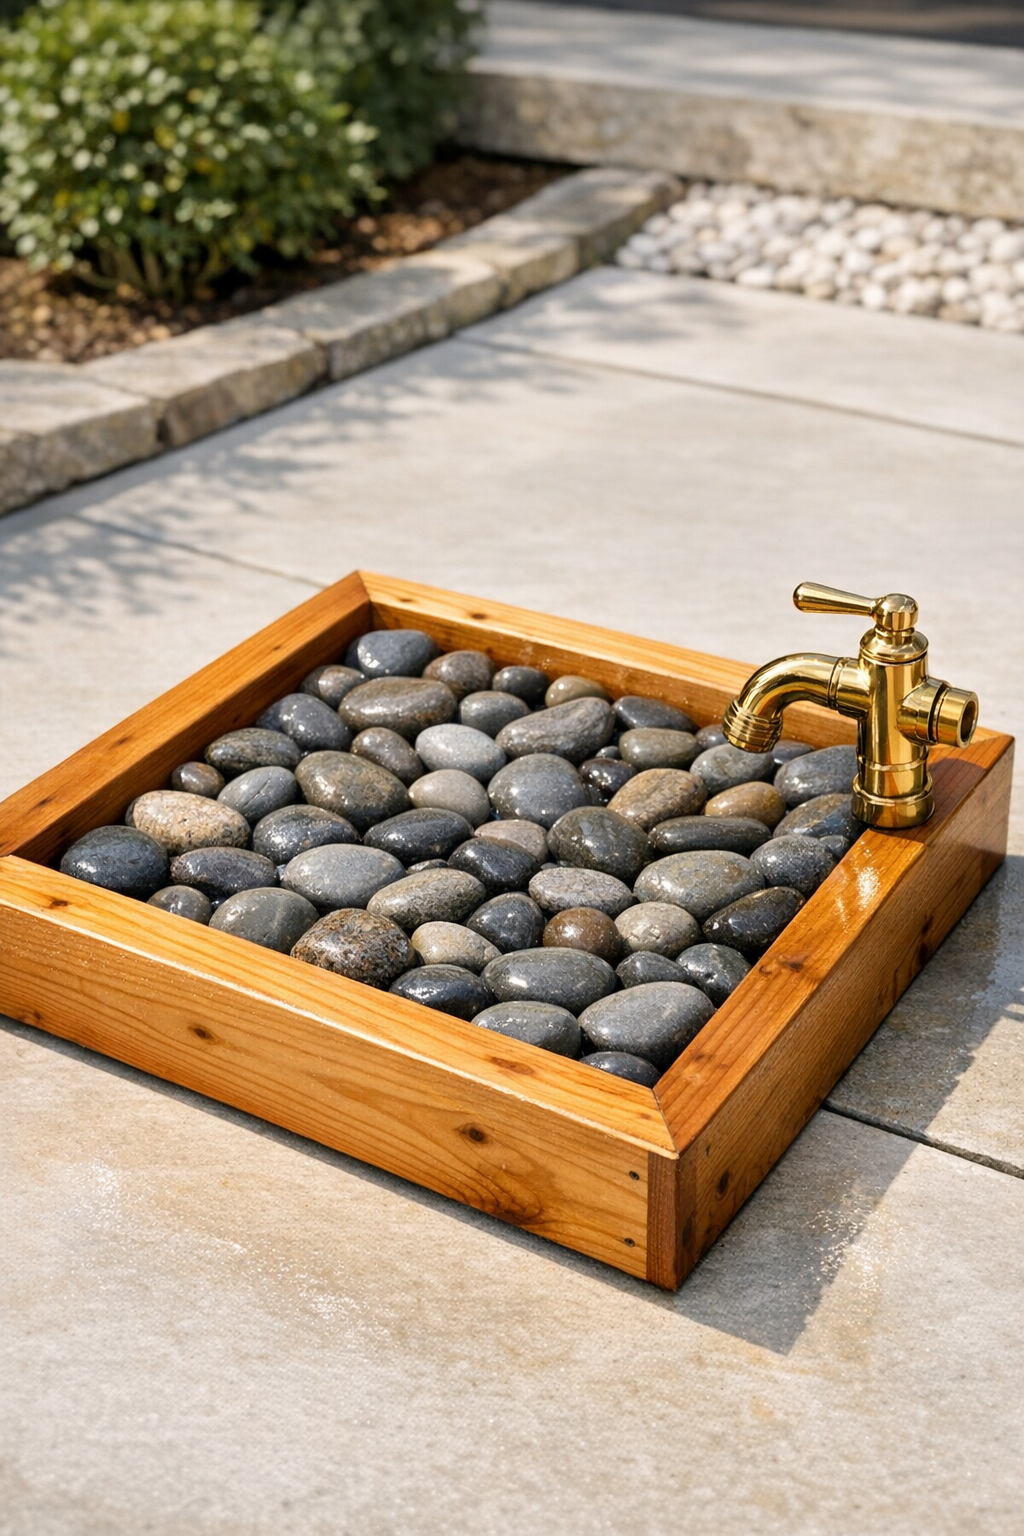
There’s something especially satisfying about a patio project that solves a real, everyday problem without looking like a clunky add-on. This outdoor foot wash station is a shallow cedar frame filled with smooth river rocks and fitted with a brass hose spout, so you can rinse off dusty feet, sandy sandals, or muddy garden clogs before tracking the mess indoors. It’s practical, compact, and attractive enough to leave out as part of your outdoor setup.
I love projects like this because they sit right at the intersection of utility and good design, much like a well-plated meal that also happens to be deeply comforting. If you spend time gardening, grilling, entertaining outside, or shuttling kids in and out of the yard, this is an easy build that feels surprisingly polished when it’s done.

Materials
2 cedar boards, 1 in. x 4 in. x 36 in.
Instructions
1. Cut the cedar boards to length if needed, then sand all faces and edges with 120-grit followed by 220-grit so the frame feels smooth on bare feet.
2. Arrange the 36-inch boards as the long sides and the 24-inch boards between them to form a shallow rectangle measuring 24 by 36 inches.
3. Pre-drill the corners, then fasten the frame together with #8 x 1 1/4-inch galvanized screws, using two screws per corner to keep the box square.
4. Center the plywood base under the frame, pre-drill around the perimeter every 6 to 8 inches, and screw it to the bottom of the frame.
5. Flip the tray over and attach one rubber foot or spacer near each corner underneath, which lifts the station slightly so water can drain and the wood can dry more evenly.
6. Choose one short side for the hose spout, then drill a hole sized to your brass bulkhead fitting or threaded connector about 2 inches down from the top edge and centered side to side.
7. Install the brass fitting and hose spout through the hole, then seal around both sides with exterior silicone so water stays directed where you want it.
8. Brush or wipe exterior sealer onto the cedar frame and let it dry fully according to the product directions before adding the interior layers.
9. Line the inside of the tray with landscape fabric, trimming it so it covers the plywood base and comes just slightly up the sides without bunching.
10. Dry-fit the river rocks across the fabric to create an even walking surface, placing larger stones first and filling gaps with smaller ones.
11. Lift and glue the rocks a section at a time with exterior construction adhesive, pressing each one firmly into place while keeping the top surfaces as level as possible.
12. Let the adhesive cure completely, then connect the brass spout to your water source using the leader hose and a Y-splitter if you want to share the faucet with a regular garden hose.
13. Set the station on a level patio spot with drainage, turn on the water gently, and test the flow so it rinses over the stones without splashing wildly out of the tray.
Variations & Tips
Make drainage easier: If you expect heavy use, drill several 1/4-inch drainage holes through the plywood before adding the fabric, spacing them evenly so rinse water escapes more quickly.
Choose the right rocks: Look for smooth, flattened river stones rather than very rounded ones; they’re more comfortable underfoot and create a steadier surface.
Use rot-resistant wood: Cedar is ideal here, but redwood or pressure-treated lumber rated for outdoor use also works if that’s easier to find locally.
Keep the spout low-pressure: This station works best with a gentle rinse, not a blasting stream. A modest flow is enough to wash feet clean without soaking the whole patio.
Add a cleaner finish: If you want a more tailored look, sort the rocks by color before gluing. I often do this with ingredients before cooking, and the same principle applies here: a little organization up front makes the final result feel intentional.
Think about placement: Set the station near the patio edge, garden gate, pool path, or back entry where dirty feet naturally pause. The more convenient it is, the more often everyone will actually use it.
Winter care: In freezing climates, disconnect the hose and drain the spout before hard frost so trapped water doesn’t damage the fittings.