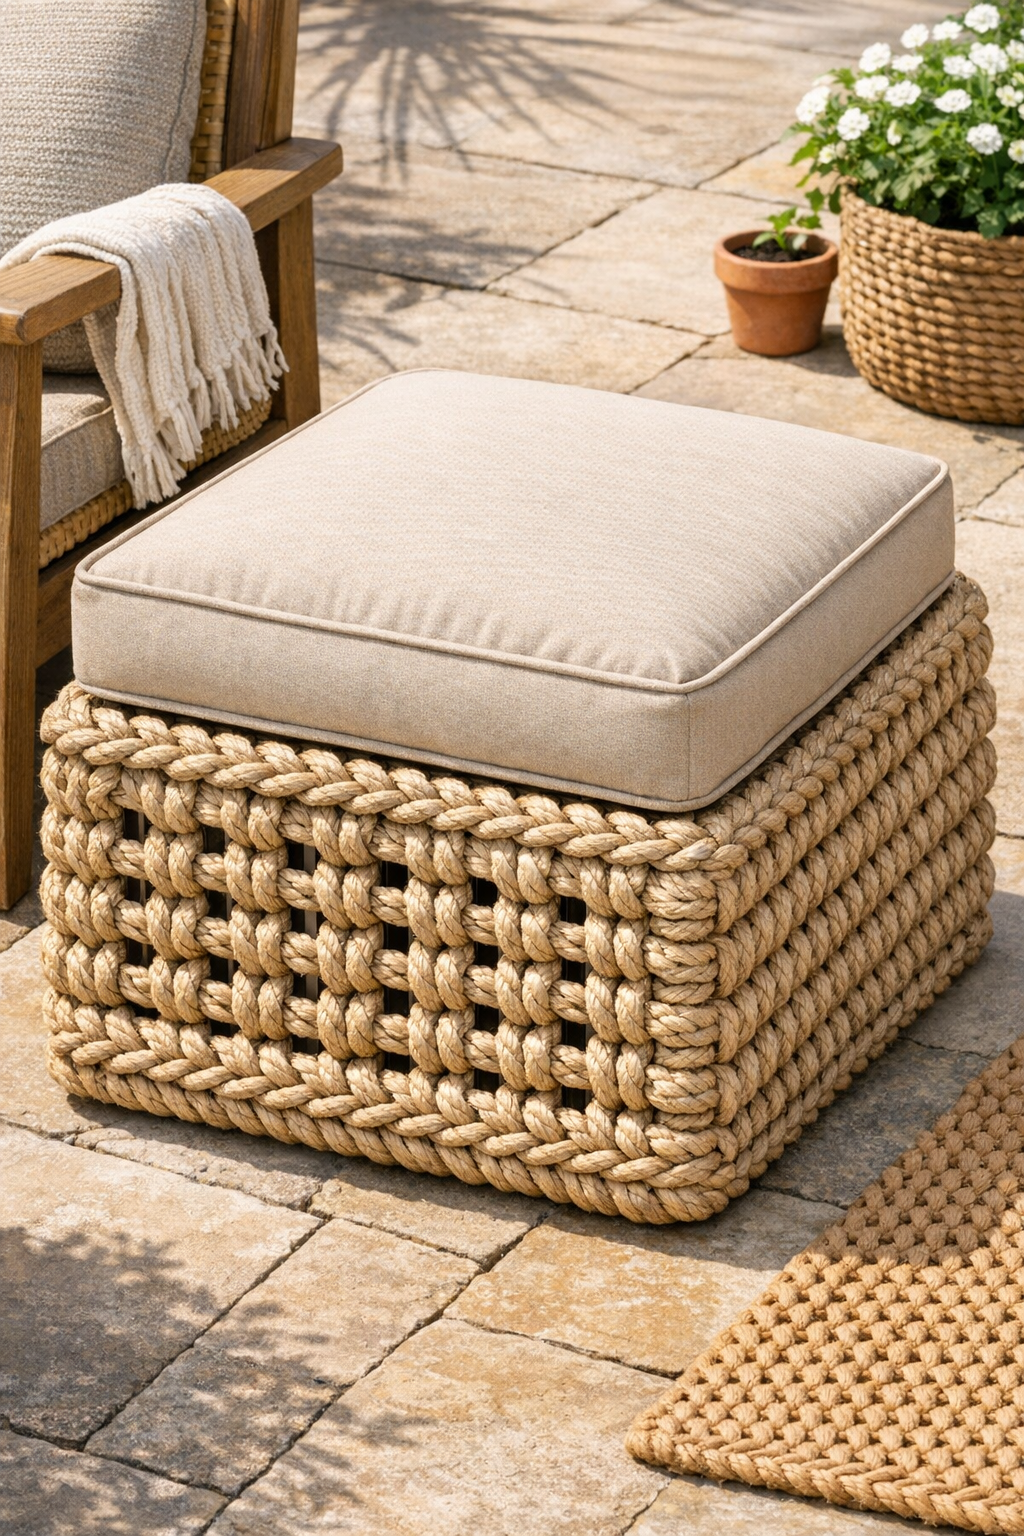
This outdoor ottoman is one of those projects that looks clever the minute you see it, but it’s even better once you realize how practical it is. By crocheting thick nautical rope through the holes of a plastic milk crate turned on its side, you get a sturdy little patio piece with lots of texture, a casual coastal feel, and a surprising amount of strength for such simple materials.
I love projects like this because they make a small porch or patio feel pulled together without spending a fortune. If you’re comfortable with basic crochet or even just patient enough to work rope through a repeating pattern, this is very doable for a weekend. It’s especially nice for families, too, because the finished ottoman is lightweight enough to move around for extra seating, a footrest, or even a spot to set a tray during outdoor snack time.
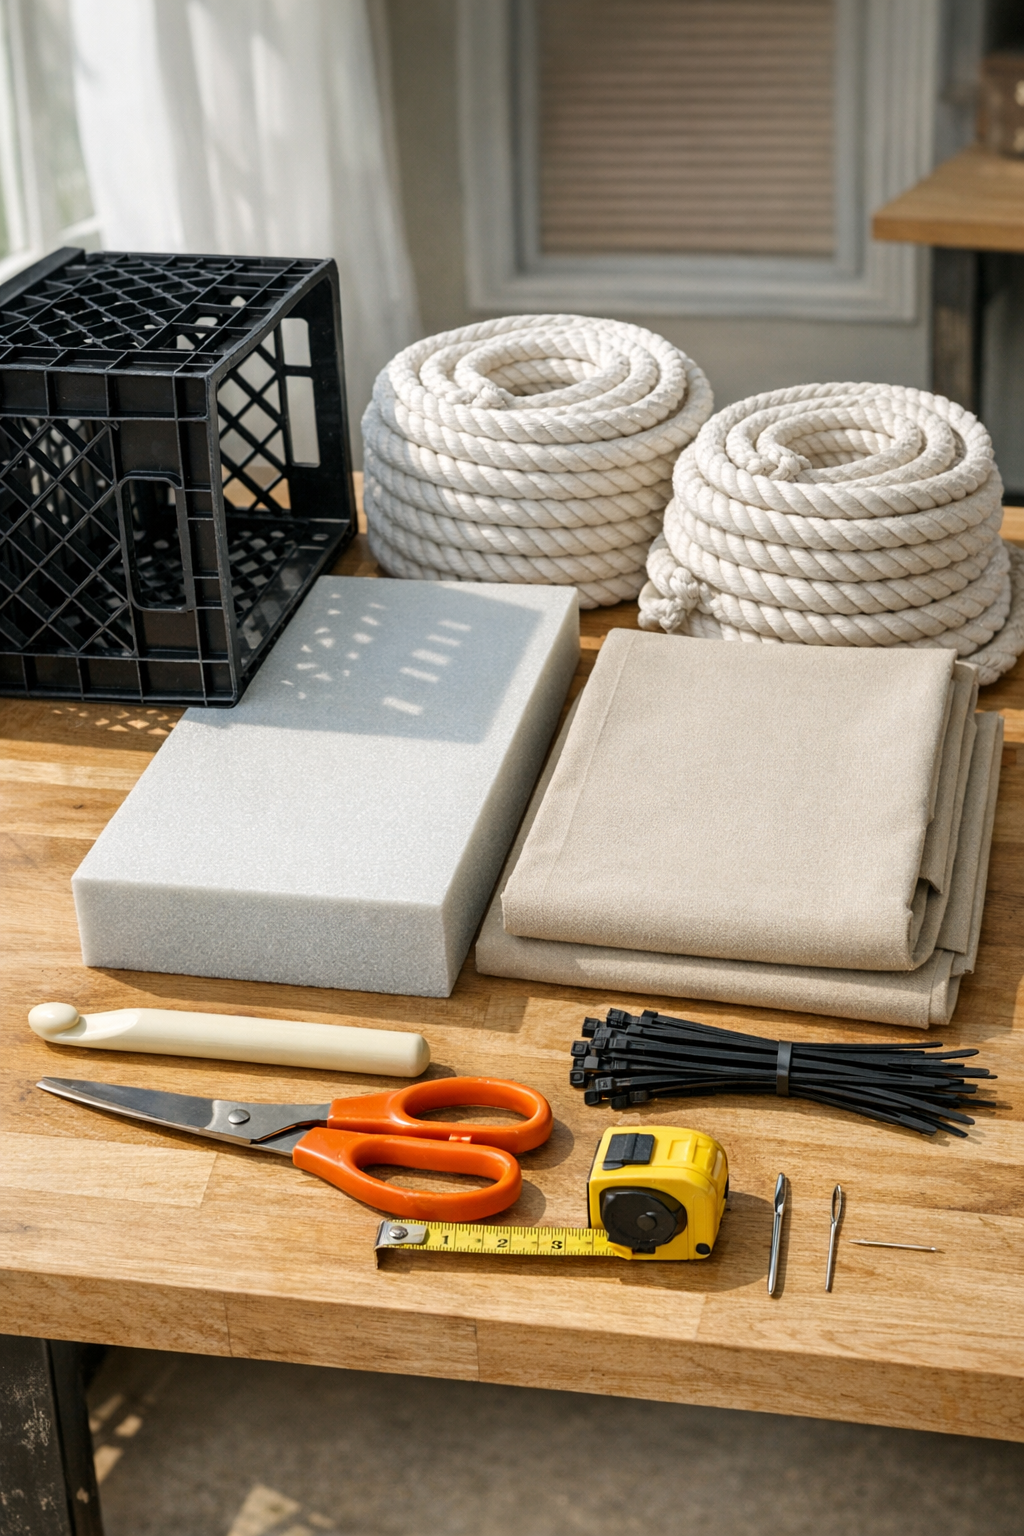
Materials
1 plastic milk crate, approximately 13 inches x 13 inches x 19 inches
Instructions
1. Turn the milk crate on its side so the open face points outward and check that it sits level on your patio or work surface. Wipe it clean and trim any sharp plastic flashing around the holes.
2. Measure and cut your rope into workable lengths of about 15 to 20 feet each, then lightly melt the ends to prevent fraying. Shorter lengths are much easier to manage than wrestling with the full coil.
3. Start on one side panel near a bottom corner and single crochet directly through the crate holes, using each hole like a stitch anchor. Work one stitch per opening, pulling the rope snug so it begins to cover the plastic grid.
4. Continue across the first side panel in even rows, covering every hole and edge until very little plastic shows. Keep the tension firm but not so tight that the crate bows inward.
5. Join a new rope length as needed by overlapping the ends on the inside of the crate and securing them neatly within the crochet path. Tuck the cut ends toward the interior so the outside stays clean and comfortable to touch.
6. Repeat the same crochet-through-hole method on the top, bottom, and both end panels, leaving the open front uncovered. Check each panel as you go so the rope pattern looks balanced from one side to the next.
7. Add an extra border round of rope crochet around the front opening to soften the exposed rim and give the ottoman a finished look. Work slowly around the corners so they stay rounded and tidy.
8. Cut the outdoor foam to fit the top of the sideways crate, then test it in place with the non-slip liner underneath. The liner helps keep the cushion from shifting when someone props up their feet.
9. Sew a simple cushion cover by wrapping the 18-inch square of outdoor fabric around the foam like a gift, stitching the sides closed on the underside. Keep the seams snug so the cushion looks full and tailored.
10. Center the cushion on top of the crate and thread zip ties down through the cushion seam allowance or fabric tabs, then through the top crate openings to secure it. Tighten the ties firmly and trim the tails so they don’t scratch.
11. Press on all sides of the ottoman to make sure the rope is secure, the cushion sits evenly, and the crate does not wobble. If needed, add a few extra stitches or zip ties anywhere that feels loose.
12. Set the finished ottoman on your patio, porch, or deck and style it with a small tray or next to a chair. It’s ready to use as a footrest, casual extra seat, or a handy little outdoor perch for summer lounging.
Variations & Tips
For picky color preferences: If your family is anything like mine, everyone has an opinion about outdoor decor. Use navy, sand, gray, or striped outdoor fabric for the cushion so the ottoman works with the rest of your patio without any fuss.
Make it softer: If you want a cushier footrest, use 4-inch foam instead of 3-inch foam. I like the 3-inch version for a cleaner profile, but a thicker cushion feels especially nice after a long day.
Choose the right rope: Polypropylene nautical rope is a smart choice because it handles moisture better than natural fiber rope. It also dries faster, which matters a lot if your patio gets surprise summer rain.
Keep it stable: If the crate flexes more than you like, add a snug scrap-wood panel inside the top before attaching the cushion. That gives the seat extra firmness without changing the look from the outside.
Try a storage version: Leave the cushion unattached and make it removable if you want to use the crate opening for storing citronella candles, garden gloves, or outdoor toys. That hidden storage is a lifesaver on small patios.
Protect your hands: Rope crochet can be tough on fingers, especially with thicker cord. I find it helps to take breaks every few rows and keep my tension relaxed rather than forcing the hook through too tightly.
Add patio personality: For a more finished furniture look, make two matching ottomans instead of one. Side by side, they can work almost like a little bench, and they make a porch feel welcoming in such an easy, budget-friendly way.