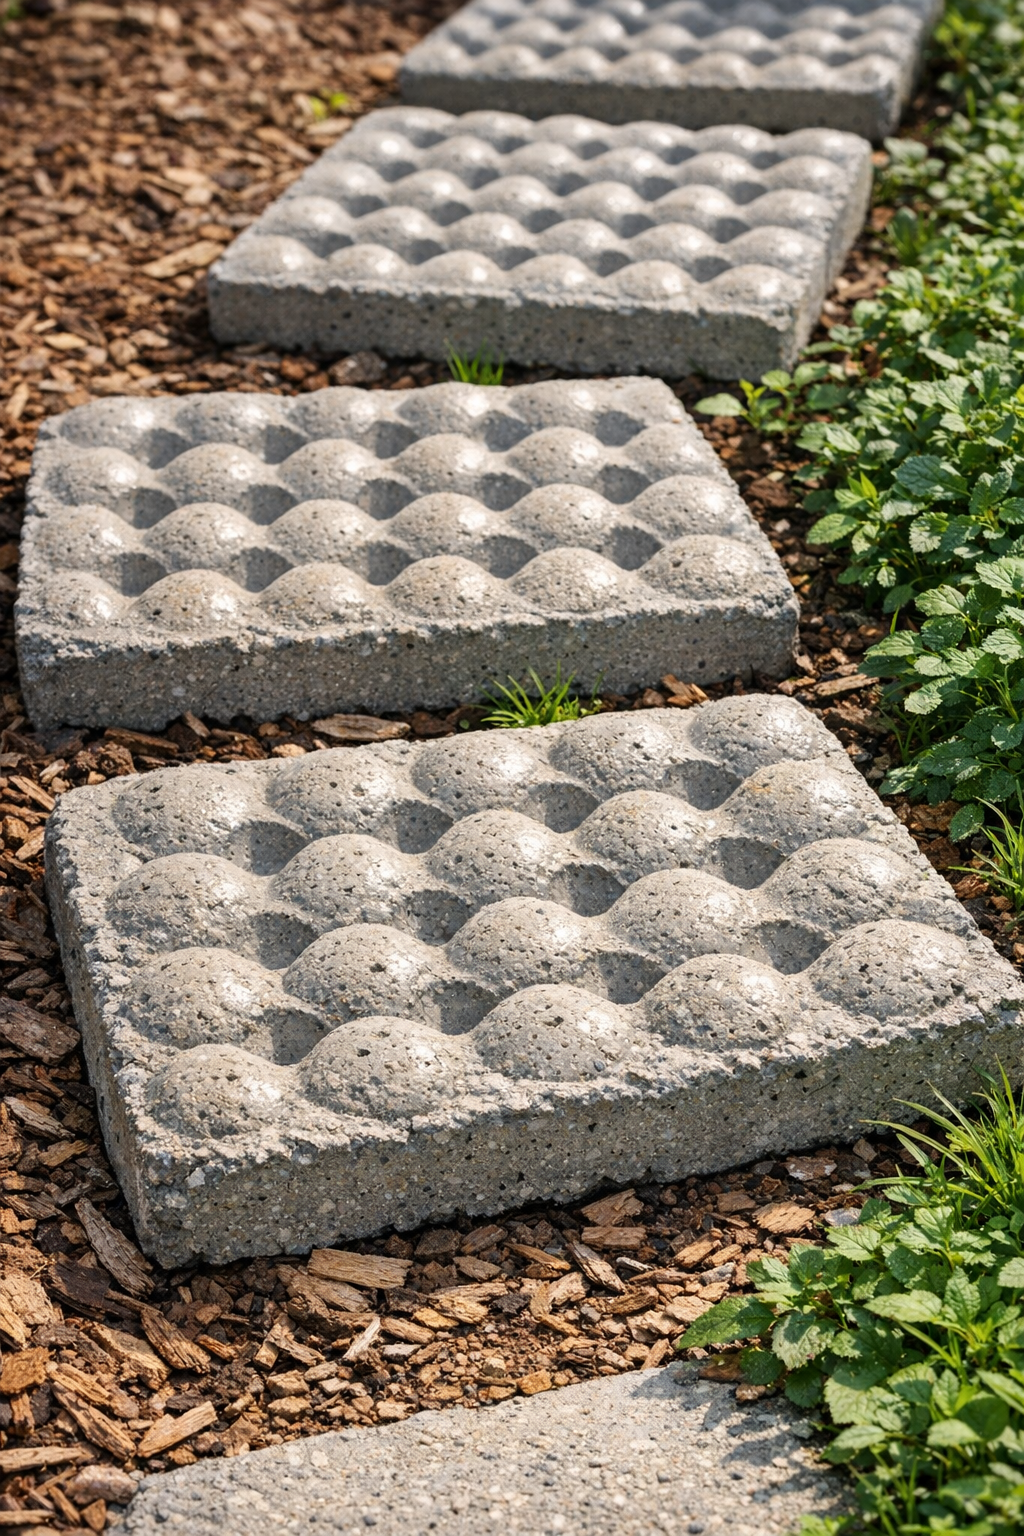
I love a project that looks a little unusual but is almost ridiculously simple to pull off, and these heavy dimpled garden slabs are exactly that. By using rigid cardboard egg cartons as the mold and cement as the second main ingredient, you get sturdy stepping slabs with a beautiful texture that feels part cottage garden, part modern organic design.
This is a great weekend DIY if you want to add a path through mulch, create a stable spot near a hose bib, or just make your yard feel a little more finished without buying pricey pavers. I’m always looking for projects that fit into a busy week, and this one is especially satisfying because the materials are inexpensive, the hands-on time is short, and the finished slabs look much more custom than they have any right to.
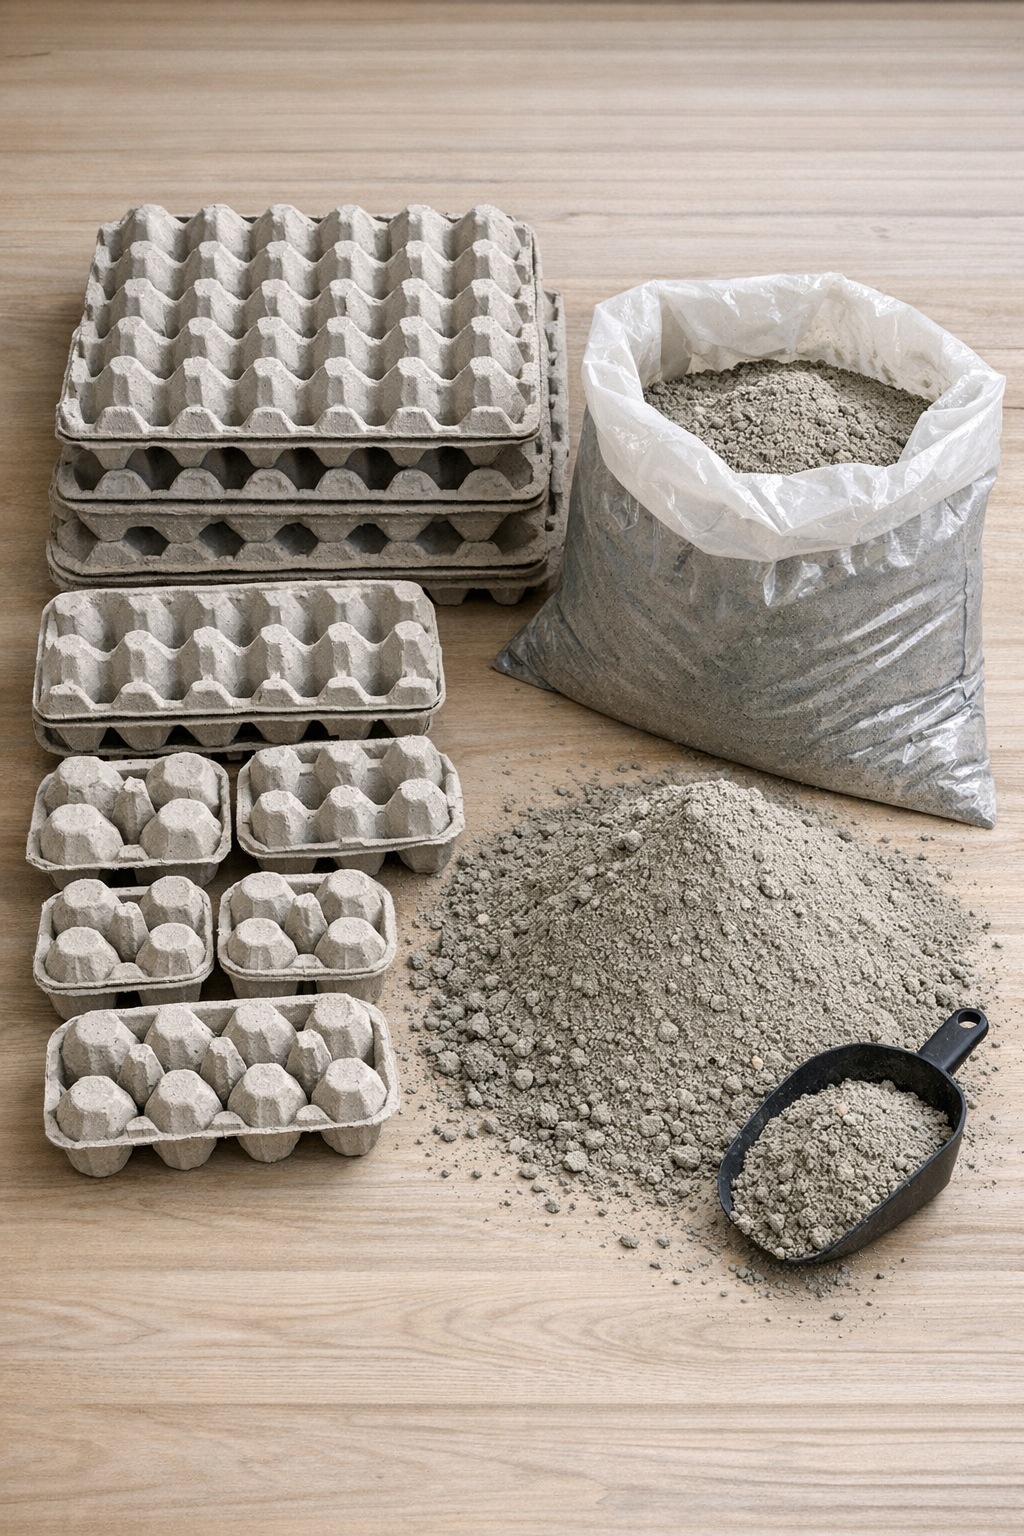
Materials
Instructions
1. Set up a flat work area outdoors or in a garage, and cover it with the plastic drop cloth to keep the slabs from sticking and to make cleanup easier.
2. Open the egg cartons and trim off any loose tabs so each carton sits flat and stable with the cup side facing up.
3. Lightly brush or rub the inside of the cartons with a thin coat of cooking oil so the cardboard releases more easily after the cement cures.
4. Mix the cement in a bucket or tub, adding water a little at a time until it reaches a thick brownie-batter consistency that can be packed without turning runny.
5. Scoop the wet cement into each egg cup and over the top surface of the carton, pressing firmly so the mix fills every cavity and connects into one solid slab.
6. Level the top with a trowel or scrap board, aiming for a slab thickness of about 1 1/2 to 2 inches so it has enough weight and strength for garden use.
7. Tap the sides of the carton gently and lift one edge an inch or two off the table a few times to settle the mix and release trapped air bubbles.
8. Let the slab sit undisturbed for 24 to 36 hours, or until it feels hard and cool but not crumbly when you touch the surface.
9. Peel away the cardboard slowly, starting at the edges and working into the dimples; if a few bits stick, dampen them lightly and rub them off after another day of curing.
10. Cure the slabs for an additional 5 to 7 days in a shaded spot, misting once or twice a day if the weather is hot and dry, then place them in the garden with the dimpled side facing up for traction and style.
Variations & Tips
Make larger slabs: Place two filled cartons side by side and bridge a little extra cement across the seam to create a wider stepping stone for bigger pathways.
Adjust the texture: For softer dimples, leave the carton intact and fill normally; for a more rugged, natural look, crumple the carton slightly before filling so the surface ends up less uniform.
Add strength: If you want these in a high-traffic spot, press a piece of galvanized hardware cloth or fiberglass mesh into the center of the slab before leveling the top.
Prevent cracking: Don’t make the mix too wet, and keep the slabs out of direct sun while curing. I’ve rushed cement projects before, and fast drying is almost always what causes disappointing hairline cracks.
Clean edges easily: Once the slab is partly cured but not rock hard, scrape the edges with a putty knife for a neater shape without much effort.
Use them creatively: These work nicely as stepping stones, a plant pot base, a birdbath pedestal topper, or even a sturdy landing pad under a garden bench leg where the soil stays soggy.