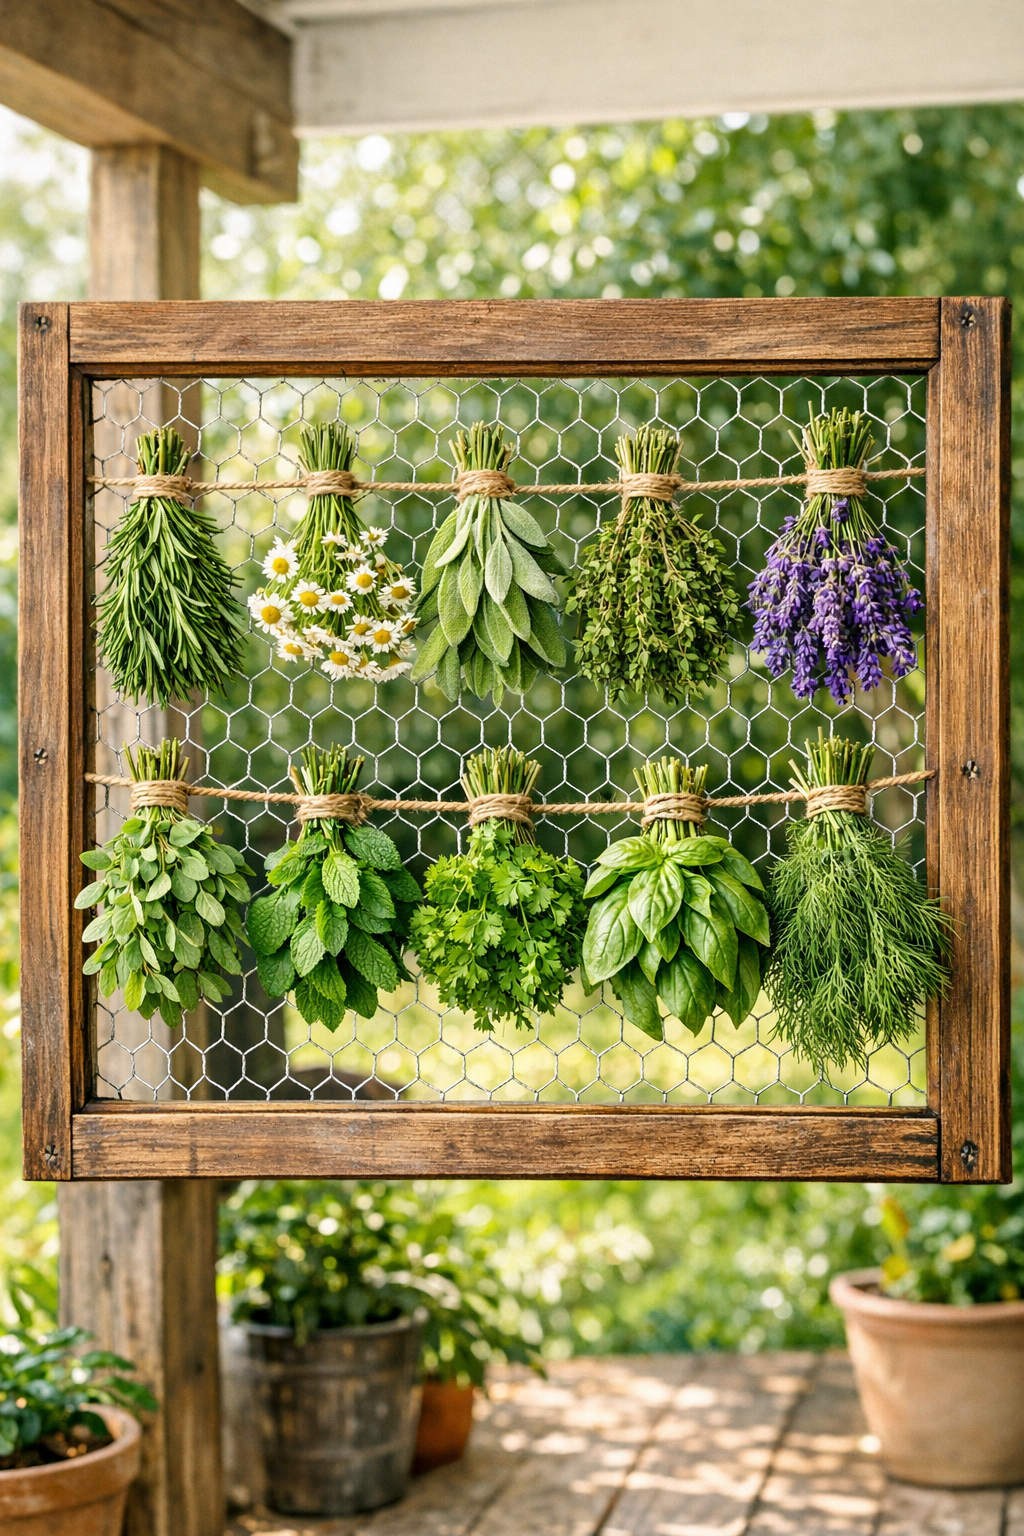
Every summer, my kitchen seems to overflow with basil, oregano, mint, thyme, and whatever else I’ve convinced myself I can use by the armful. One of the simplest ways I’ve found to preserve that abundance is to turn an old wooden window frame into an outdoor herb drying rack by stretching chicken wire across the back. It’s practical, charming, and it gives new life to a vintage piece that might otherwise sit in the garage collecting dust.
I especially love this project for gardeners, home cooks, and anyone who enjoys a useful backyard DIY with a little character. The wire grid lets air move freely around the herbs, and the frame makes it easy to hang or lean the rack in a covered outdoor spot. If you can measure, staple, and trim wire, you can make this in an afternoon.
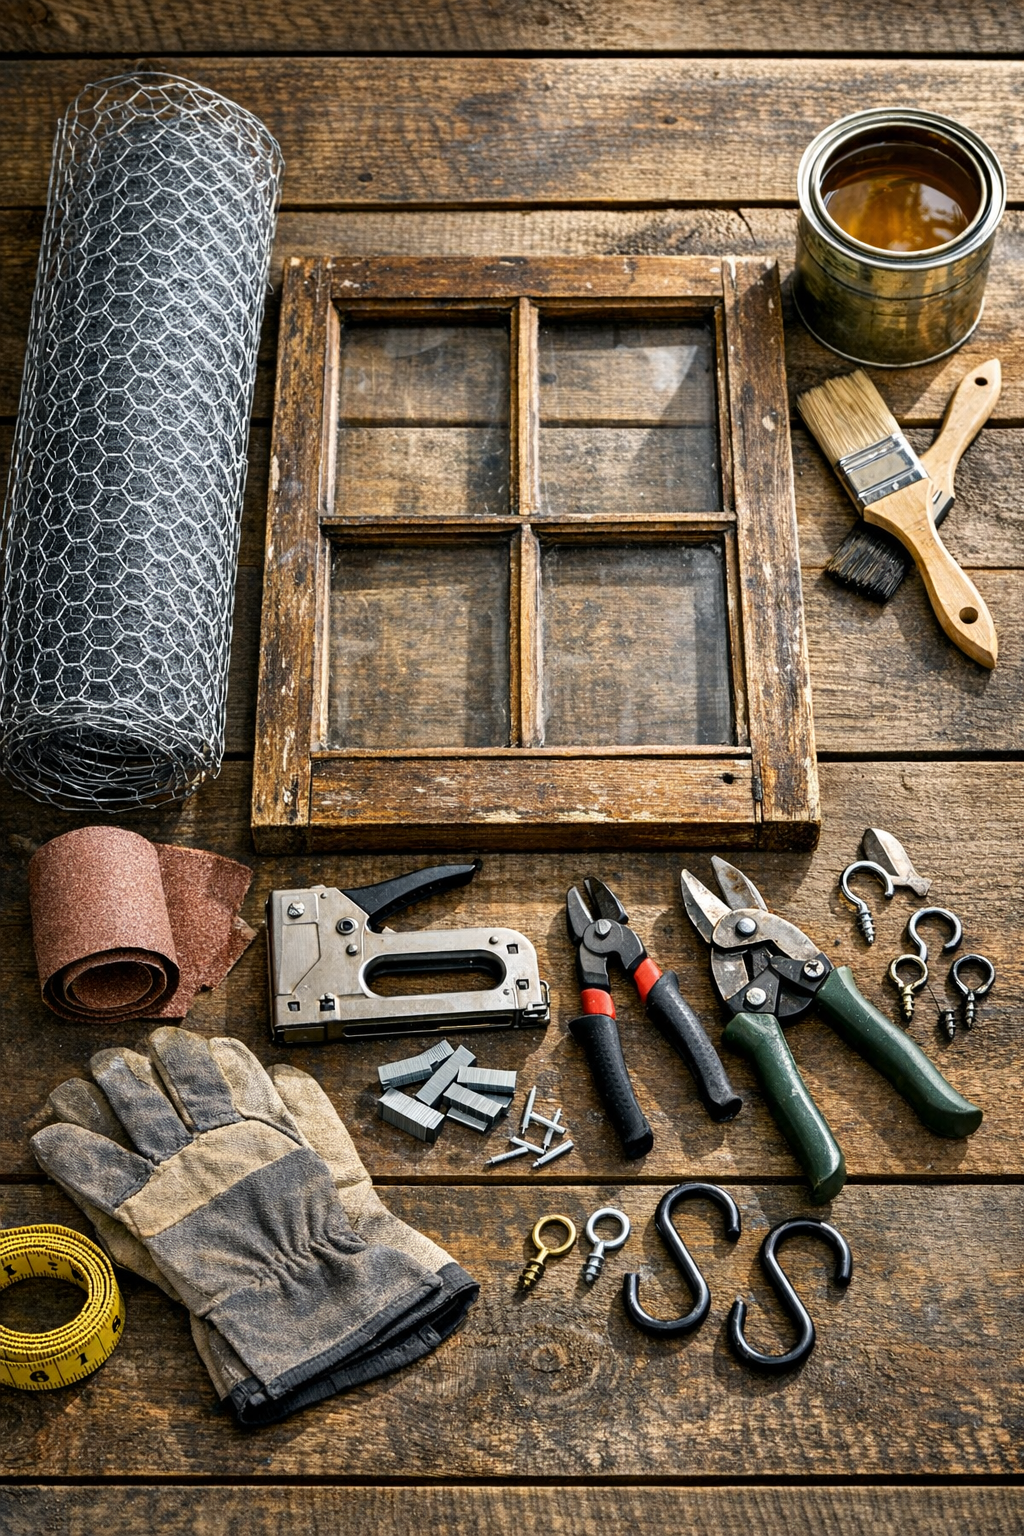
Materials
1 vintage wooden window frame, approximately 24 x 36 inches
Instructions
1. Inspect the vintage window frame and make sure the wood is solid, dry, and free of loose nails, broken glazing points, or flaking debris that could catch on the wire or your herbs.
2. Remove any remaining glass carefully, then sand the front, back, and inner edges of the frame with 120-grit sandpaper until smooth enough to handle comfortably.
3. Brush on a thin coat of exterior clear sealer over the sanded frame, especially on the back and inner edges, and let it dry fully according to the product directions.
4. Measure the back opening of the frame and cut the chicken wire so it overlaps the wood by about 2 inches on all sides for secure fastening.
5. Put on work gloves, lay the chicken wire across the back of the frame, and center it so the mesh sits evenly over the entire opening.
6. Pull the wire taut along one long side and staple it in place every 2 to 3 inches, starting in the center and working outward to keep the mesh straight.
7. Move to the opposite side, pull the wire snug without warping the frame, and staple every 2 to 3 inches; repeat on the two short sides.
8. Add extra staples at the corners and anywhere the wire lifts, then trim the excess mesh close to the staples with tin snips or wire cutters.
9. Fold or pinch down any sharp wire ends so the back is neat and safe to handle when you move or hang the rack.
10. Attach D-ring hangers or screw hooks to the top back corners if you plan to mount the rack, making sure the hardware is rated for the frame’s weight.
11. Hang the rack in a covered outdoor area with good airflow and indirect sun, or lean it securely on a porch wall where it will stay dry.
12. To use it, spread clean, dry herb sprigs in a single layer across the wire or tie small bundles through the mesh, leaving space between bunches so air can circulate well.
Variations & Tips
For smaller herbs: If you dry tiny leaves like thyme or marjoram, lay a piece of food-safe mesh or clean cheesecloth over part of the chicken wire so small bits don’t fall through.
Best placement: I avoid direct, intense sun for delicate herbs because it can fade both color and flavor; a shaded porch with moving air works much better.
Frame finish: If your vintage frame has beautiful chippy paint, keep it for character, but make sure it is stable and not flaking where herbs might touch.
Food safety: Always place only fully dry, clean herbs on the rack, and skip any bunches with surface moisture, since trapped water can lead to mildew.
Alternative wire: Hardware cloth with a smaller grid can be used instead of chicken wire if you want a flatter surface, though it has a more utilitarian look.
Storage tip: Once the herbs are crisp and fully dry, strip the leaves and store them in airtight glass jars away from heat and light; in my kitchen, that little step makes summer flavors last deep into winter.