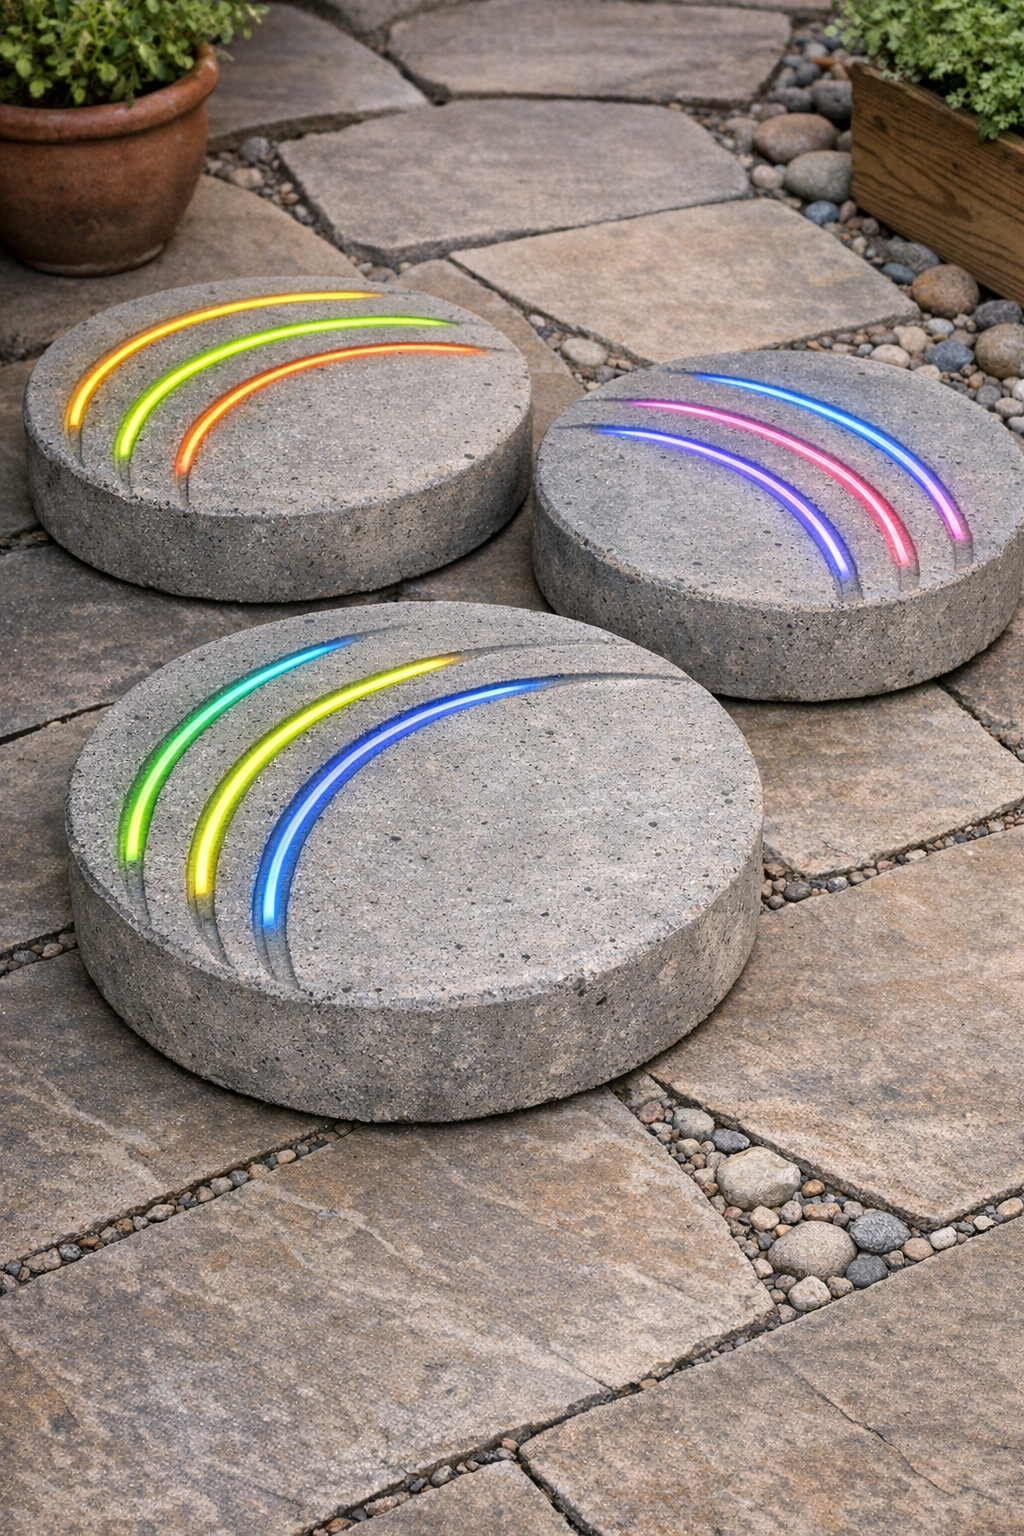
There’s something mighty satisfying about turning a handful of inexpensive odds and ends into something weighty, useful, and handsome enough to set out on the patio. In this project, I’m making heavy decorative patio forms by pressing cracked plastic glow sticks into thick cement, using just two other cheap items to shape and support the pour. The finished pieces have soft streaks and channels that catch the light in the prettiest way, almost like weathered stone with a bit of whimsy worked in.
I’m especially fond of projects like this because they feel a little like old farmstead ingenuity—using what you have, making it sturdy, and ending up with something that can handle the outdoors. These forms can be used as small stepping pads, potted plant risers, or decorative patio accents. If you’re comfortable mixing cement and want a simple weekend project with a surprising finish, this one is very doable.
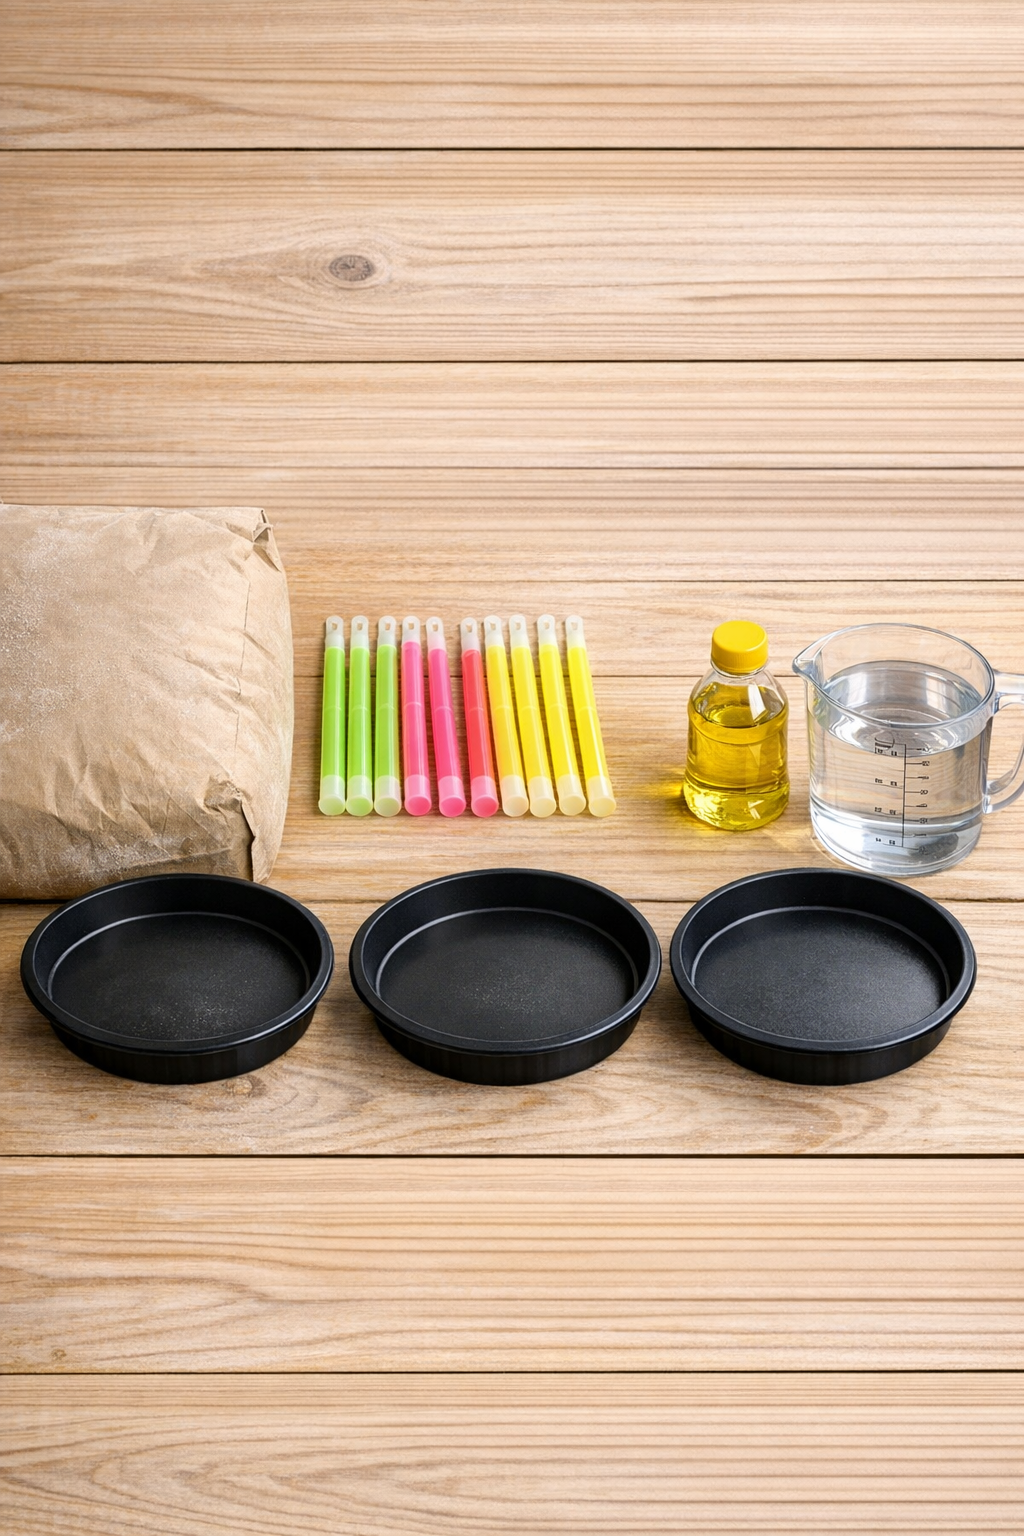
Materials
Instructions
1. Set your three plastic trays on a flat, protected work surface and coat the insides lightly with cooking oil or petroleum jelly so the cement releases easily later.
2. Pour the cement mix into a bucket or mixing tub and add water a little at a time until it reaches a thick, scoopable consistency similar to stiff mashed potatoes.
3. Spoon the cement evenly into the three trays, filling each one to about 1 1/2 inches deep, then tap each tray firmly on the table several times to release trapped air.
4. Bend and crack the glow sticks gently along their length without snapping them apart, then press them halfway into the surface of the wet cement in loose streaked lines, arcs, or sunburst patterns.
5. Let the cement sit for 20 to 30 minutes until it begins to firm up, then adjust any glow sticks that shifted and smooth the surrounding cement lightly with a damp finger or small trowel.
6. Allow the forms to cure undisturbed for 24 hours, then carefully flex the plastic trays to release each piece and pull out the glow sticks if you want recessed streaks rather than embedded accents.
7. Cure the pieces for another 2 to 3 days in a shaded spot, misting them lightly once or twice a day, then set them on the patio as plant stands, stepping accents, or decorative bases.
Variations & Tips
Make them square: If you prefer a more formal patio look, use square plastic food containers or dish tubs instead of round trays. The same depth and method work just fine.
Leave the glow sticks in place: For a more playful accent piece, you can embed the plastic sticks permanently instead of removing them. I’d reserve that version for decorative use rather than stepping on it regularly.
Add a rustic edge: Don’t over-smooth the top if you like old stone character. A slightly uneven finish gives these forms the kind of charm I’ve always loved in older garden paths and porch pieces.
Use proper curing time: Cement gains strength slowly, and patience matters here. I know it’s tempting to set them out right away, but waiting the extra couple of days makes a sturdier finished form.
Keep the patterns simple: A few well-placed streaks look better than overcrowding the surface. I’ve learned over the years, whether in the kitchen or out on the porch, that a little restraint often makes the prettiest result.