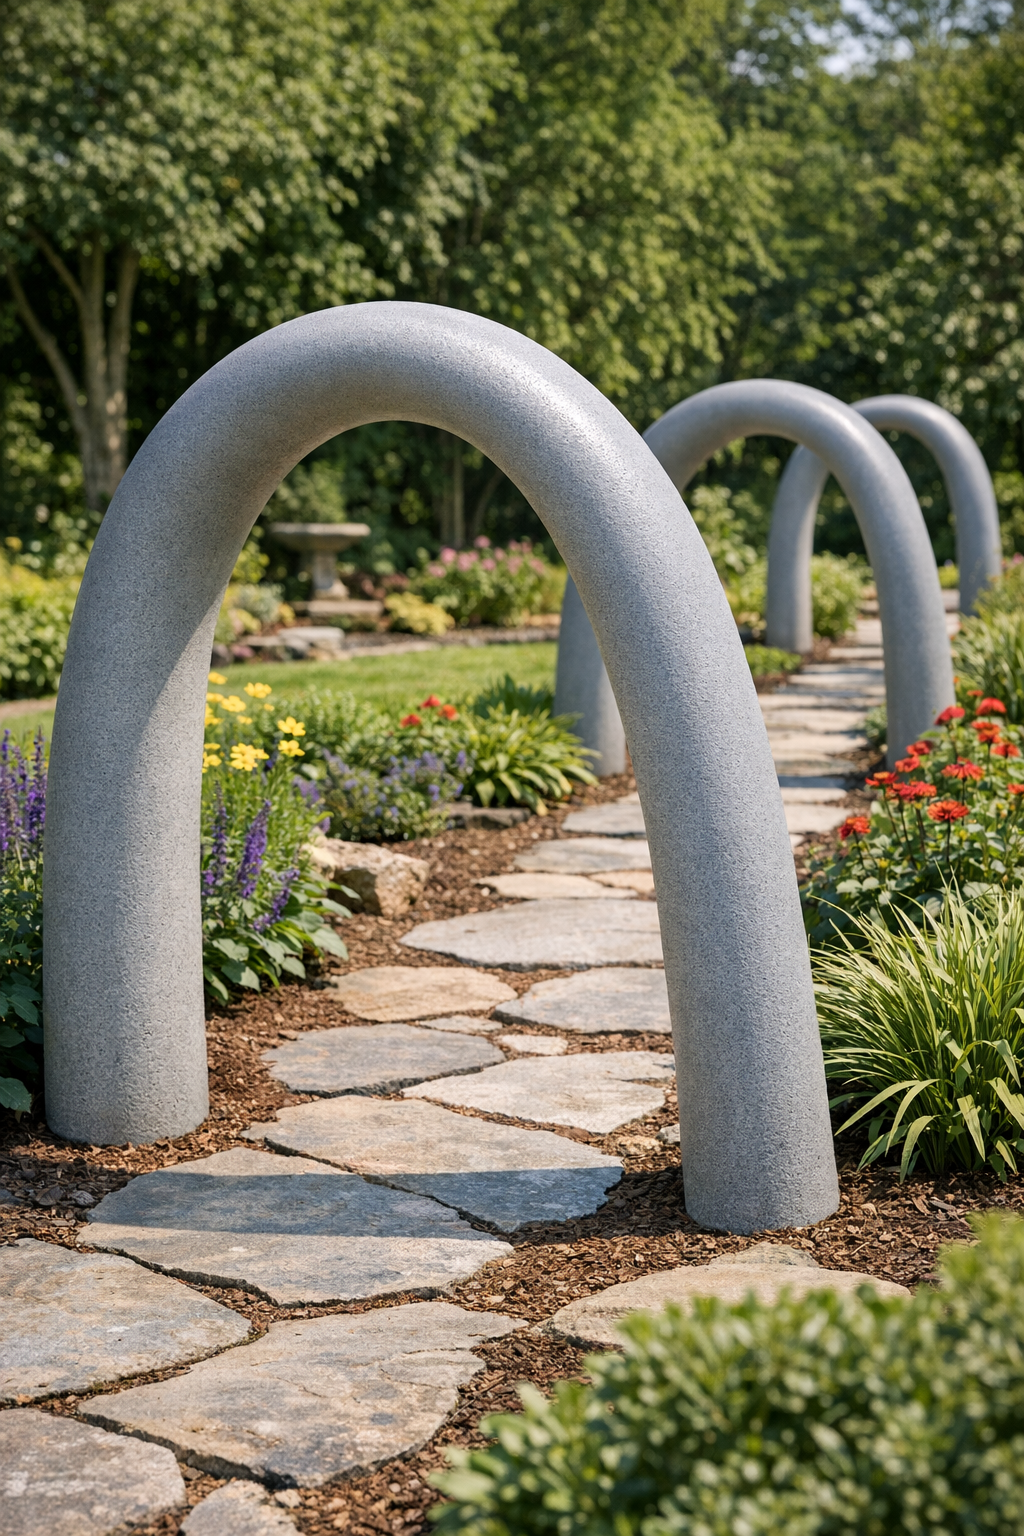
If you want a fast, inexpensive way to add big impact to your yard, these heavy curved garden arches are one of those projects that look far more complicated than they really are. By filling hollow pool noodles with wet cement and using two simple household helpers to shape and support them, you can make sturdy decorative arches that frame a walkway, edge a flower bed, or give your front yard a playful sculptural look.
I love projects like this because they use easy-to-find materials and don’t require a workshop full of tools. As a parent, I’m always drawn to outdoor projects that make the yard feel a little more inviting for family dinners, summer gatherings, and kids running around barefoot, and these arches do exactly that.
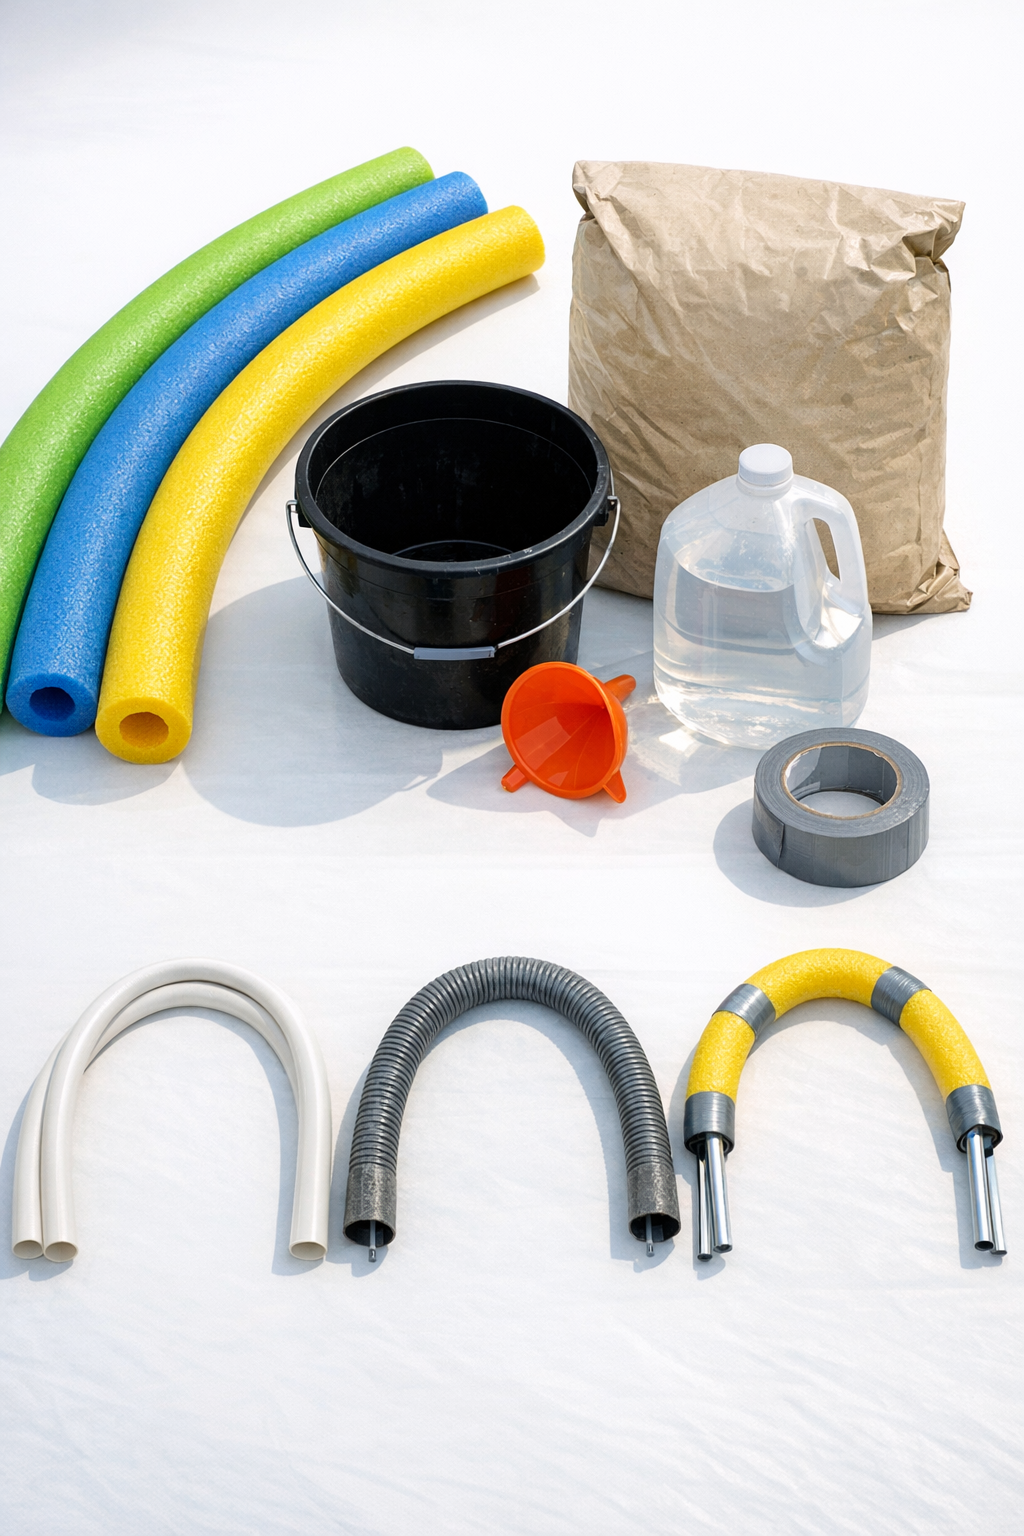
Materials
Instructions
1. Open the cardboard boxes and bend each one into a smooth arch shape about 24 to 30 inches tall. Wrap the cardboard with plastic wrap or slide it into plastic bags so wet cement won’t stick while the noodles cure.
2. Tape one end of each pool noodle closed with a double layer of duct tape, pressing firmly around the opening so the wet cement cannot leak out. Set the taped ends upright in a bucket or against a wall for filling.
3. In the bucket, mix the quick-setting concrete with water a little at a time until it reaches a thick pancake-batter consistency. Keep it wet enough to pour but not so thin that it separates.
4. Place the funnel into the open end of the first noodle and slowly pour or scoop in the wet cement. Tap the sides gently as you fill to help the mixture settle and remove trapped air pockets.
5. Fill the noodle to within 1 inch of the top, then tape the open end shut. Repeat with the remaining two noodles, working steadily so the cement stays workable.
6. While each noodle is still flexible, bend it gently over a prepared cardboard form to create a smooth arch. Tape the noodle loosely to the form in two or three spots so it holds its curve without getting flattened.
7. Leave the arches undisturbed on their forms for 24 hours, or according to the concrete package directions, until the cement hardens fully. If the weather is very hot, keep them in a shaded spot so they cure more evenly.
8. Remove the tape holding the arches to the forms and lift them off carefully. If needed, patch any small tape-end gaps with a little extra mixed cement and let that set before placing them in the yard.
9. Press the ends of each finished arch 2 to 3 inches into soft soil or nestle them firmly into mulch for display. Space them evenly along a path or garden edge for the biggest visual impact.
Variations & Tips
For a more polished look: Choose pool noodles in the same color for all three arches, or paint the cured foam exterior with an outdoor spray paint labeled safe for foam after testing a small spot first.
For picky-style yard décor preferences: If bright colors feel too playful for your space, go with neutral-toned noodles when you can find them, or wrap the finished arches with faux greenery, ribbon, or string lights for a softer garden look.
To make filling easier: Set the noodle upright inside a tall bucket or laundry basket while you pour in the cement. That little bit of support makes the whole job much less messy.
For extra weight: If you want the arches to stay put in windy spots, slightly overfill each noodle and tamp it gently on the ground to settle the cement before sealing the top.
To avoid cracks and weak spots: Don’t bend the noodles too sharply once they’re filled. A broad, gradual curve holds best and gives the prettiest finished arch.
Placement tip: I like grouping all three arches in a row where guests naturally walk, because the repetition makes them look intentional and surprisingly upscale for such a simple project.