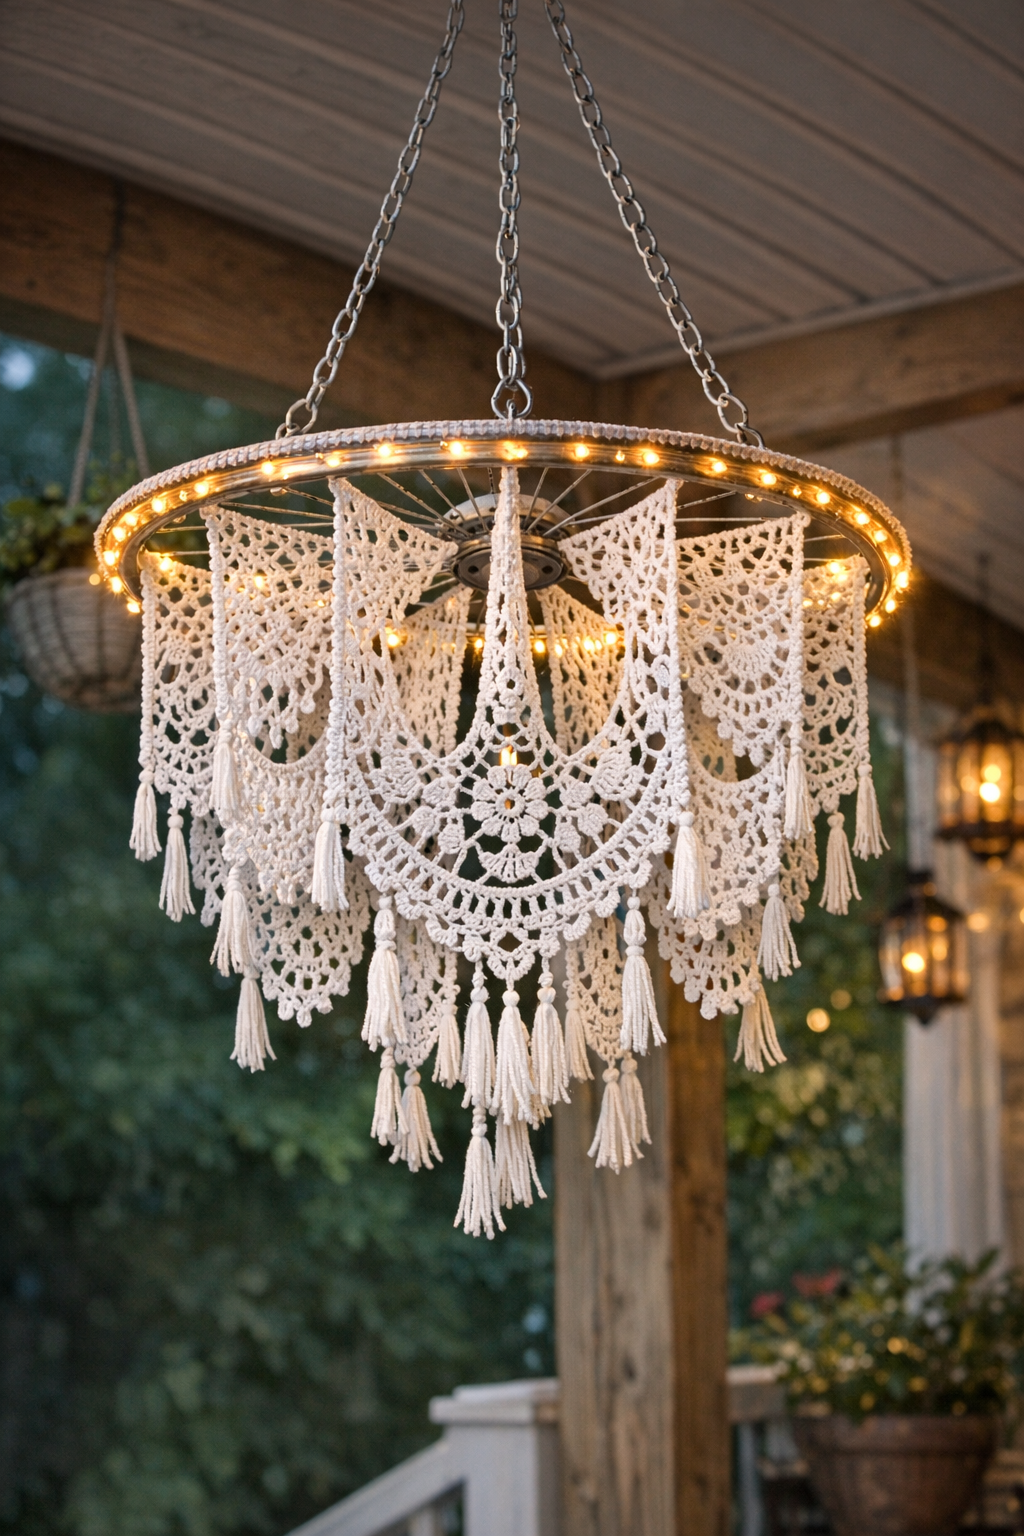
I love a project that makes people do a double take, and this one absolutely does. Turning an old bicycle wheel into a crochet-style outdoor chandelier is one of those satisfying trash-to-treasure projects that looks far more complicated than it really is. By weaving cotton lace thread through the spokes and suspending the wheel horizontally, you end up with an airy, handmade piece that feels part vintage, part cottage garden, and perfect for summer evenings on a patio or porch.
This is a great project if you enjoy crochet, upcycling, or just want a statement piece without spending a fortune. I’m always looking for ways to make outdoor spaces feel more inviting without adding one more plastic store-bought decoration, and this one has that soft, handmade look I gravitate toward when I want a space to feel special but still relaxed.
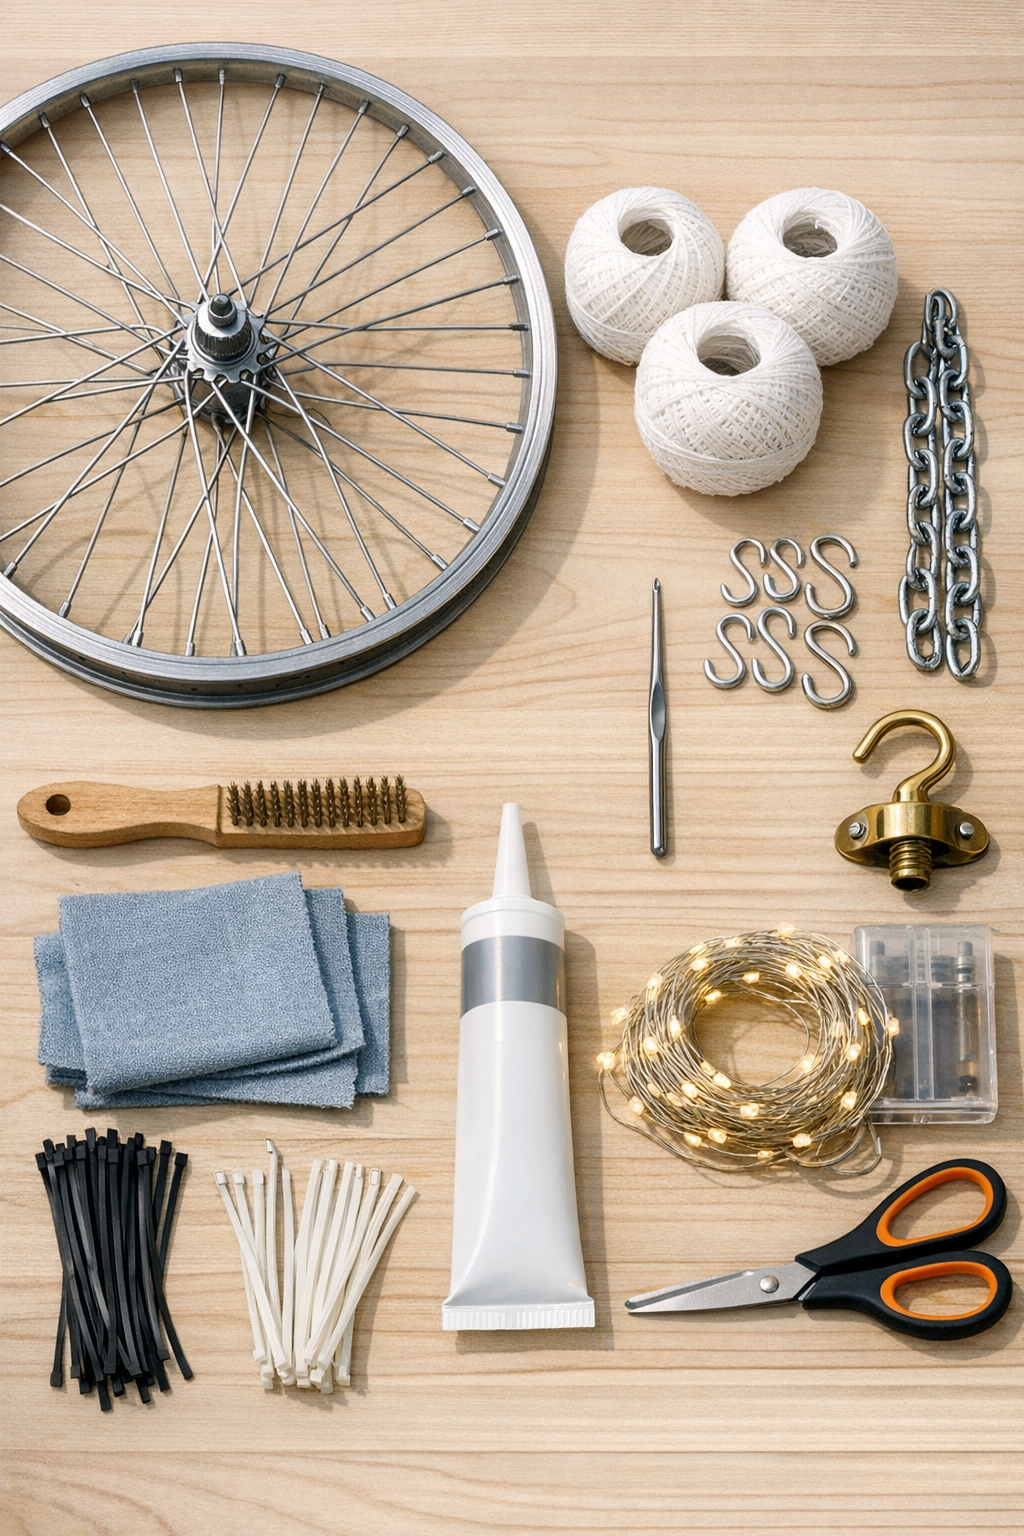
Materials
Instructions
1. Remove the tire, inner tube, and any rim tape from the bicycle wheel so you’re left with only the metal rim, hub, and spokes. Check that the wheel is structurally sound and tighten or remove any dangerously loose spokes before you begin.
2. Scrub the wheel with warm soapy water and a wire brush to remove dirt, grease, and flaky rust, then wipe it dry with a microfiber cloth. If you like a more polished look, give the rim one extra wipe so the metal has a cleaner finish.
3. Spray the wheel lightly with clear outdoor sealant and let it dry completely according to the product directions. This helps protect the metal, especially if your chandelier will hang on a covered porch where summer humidity still sneaks in.
4. Tie the crochet thread securely around the center hub, then begin crocheting chains and looping them outward toward the rim between the spokes. Work your way around the wheel, using the spokes like guides so each section forms a wedge shape.
5. Continue filling each spoke section with simple chain loops, single crochet, or mesh-style stitches until the entire wheel has an even lace pattern. Keep the thread snug but not overly tight so the wheel stays flat and the design looks airy instead of warped.
6. Fasten off the thread at the rim and weave in the end securely around a spoke. Add more thread as needed during the project by knotting it discreetly near a spoke and crocheting over the join to hide it.
7. Wrap the fairy lights around the rim and lightly through a few open lace sections, spacing them evenly for a soft glow. Secure the battery pack and any loose sections with clear zip ties placed near the rim where they’ll be less noticeable.
8. Attach three S-hooks evenly around the rim, spacing them at roughly equal distances to keep the chandelier level. Clip or knot the hanging chain to those three points so they meet at the top center.
9. Install the heavy-duty ceiling hook in a secure overhead surface, then hang the wheel horizontally and adjust the chains until it sits balanced. Turn on the lights and make any final tweaks to the crochet or light placement while it’s hanging.
Variations & Tips
Color change: Use ecru, soft sage, pale blue, or dusty rose cotton thread if bright white feels too crisp for your space. I tend to like white for summer because it catches evening light so nicely, but a natural ivory gives it a beautiful vintage feel.
Beginner-friendly stitch option: If you don’t want to fuss with a detailed doily pattern, stick to chain loops and single crochet meshes. The open design is forgiving, and once it’s hanging overhead, the overall effect matters more than tiny stitch perfection.
Weather tip: This project holds up best in a covered outdoor area rather than fully exposed rain. Cotton thread is lovely for the handmade lace look, but keeping it sheltered will help it stay prettier through the season.
Lighting swap: Battery-operated fairy lights are the easiest option, especially if you’re hanging this where there’s no outlet nearby. I like warm white bulbs because they make patios feel cozy without being harsh or too blue.
Balance check: Before hanging it permanently, test the wheel by lifting it from the chain connection point. If one side dips, reposition the S-hooks slightly until the chandelier sits flat.
Make it your own: You can hang a few small crystal drops, shells, or wooden beads from the rim for extra movement. Just keep embellishments lightweight so the lace and spokes remain the star of the project.