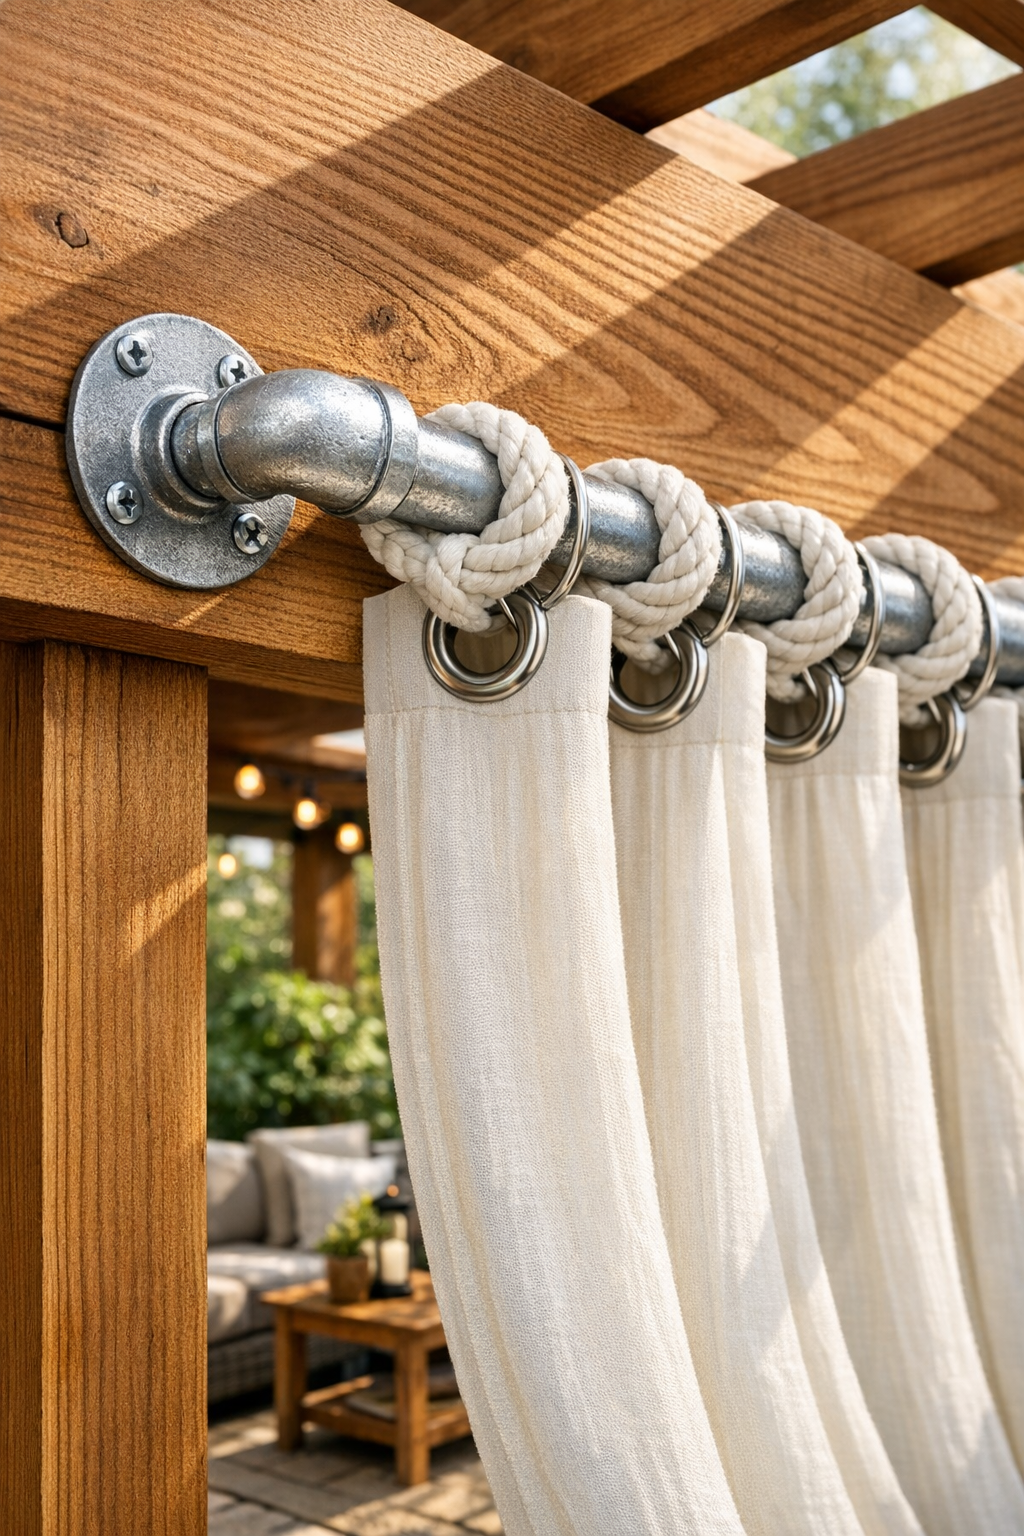
If your patio needs a little softness and shade, this outdoor curtain rod is one of those simple projects that makes the whole space feel finished. I love practical upgrades that also make a backyard feel welcoming, and threading white rope through galvanized pipe on a wooden pergola does exactly that. It gives you a sturdy, weather-friendly way to hang outdoor curtains without the project getting too fussy or expensive.
This is a great DIY for anyone who wants more privacy, better sun protection, or just a cozier place to gather with family and friends. I’m especially fond of projects like this because they change how a space feels almost immediately, and once the curtains are up, the patio starts reading like an outdoor room.
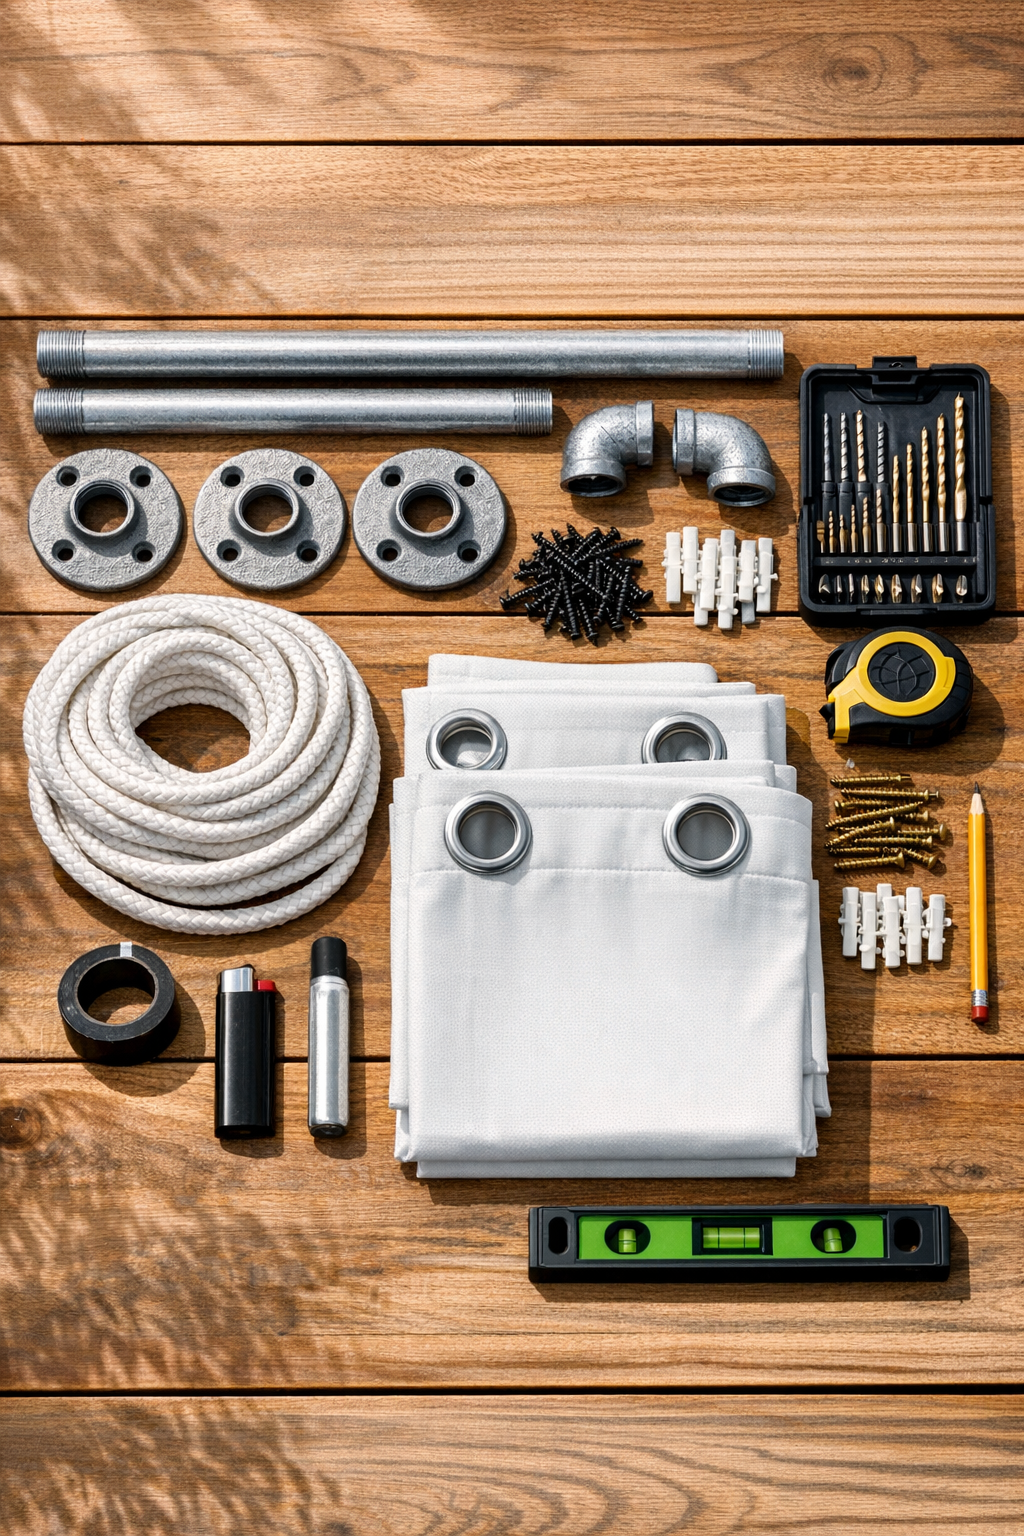
Materials
Instructions
1. Measure the pergola opening where you want the curtains to hang, and decide whether you want one curtain panel per side or panels that meet in the middle. Mark the pipe placement on the inside face or underside of the pergola beam so the curtains can slide freely without rubbing posts or furniture.
2. Hold one flange in place at the first mark, check it with a level, and mark the screw holes with a pencil. Repeat on the opposite side for the matching flange, making sure both flanges line up straight across.
3. Drill pilot holes into the wooden pergola at each screw mark to help prevent splitting. If your pergola wood is older or extra dry, add a small dab of construction adhesive behind each flange before mounting.
4. Screw the flanges firmly to the pergola using the exterior-grade wood screws, tightening each one evenly. Give each flange a tug when finished so you know it is seated securely.
5. Thread one galvanized pipe into the mounted flange on one side, turning it clockwise until snug. Install the second pipe on the opposite side if you are creating a longer run or a second curtain section.
6. Cut the white rope into two equal lengths if you are hanging two curtain panels, or keep it as one long length if your curtain layout needs a continuous pull-through. Wrap the cut points with electrical tape first, then cut, and lightly melt the rope ends to keep them from fraying.
7. Feed the rope through the galvanized pipe so an even amount extends from both ends, or position the rope to suit your curtain arrangement. The rope should slide through smoothly but still feel substantial enough to support the curtain weight.
8. Thread the curtain grommets onto the rope, arranging the panels so the finished side faces outward toward the patio. If you want the curtains to open from the center, load one panel from each side toward the middle.
9. Tie a large stopper knot at each rope end so the curtains stay centered and the rope cannot slip back through the pipe. Adjust the knot placement to leave just enough slack for the curtains to move without sagging too much.
10. Spread the curtains out along the rope and test how they open and close. If they drag or bunch, retie the knots or shift the rope until the panels hang evenly and glide the way you want.
11. If your patio gets strong wind, add simple tie-backs or anchor points on the pergola posts to keep the curtains controlled when not in use. This little step makes a big difference, especially if you’ve got kids running in and out like I usually do at my house.
12. Step back and make final adjustments so the curtain hem sits level and the panels frame the patio neatly. Once everything looks balanced, your pergola is ready for shade, privacy, and those cozy evening dinners outside.
Variations & Tips
For extra privacy: Use wider curtain panels or add a third panel so the fabric looks full even when closed. Fullness always makes outdoor curtains look a little more polished and helps block more sun, too.
For picky weather: Choose mildew-resistant, UV-rated outdoor curtains and polypropylene rope, since both hold up better through rain and strong sun. Around a busy family patio, less maintenance is always a win.
For a softer look: Swap bright white rope for natural tan marine rope if you want a warmer, more relaxed style. It pairs especially nicely with stained wood pergolas and neutral cushions.
For easier sliding: Make sure the curtain grommets are large enough to move freely along the rope without catching. If needed, use fewer panels per section so the weight stays manageable.
For windy spaces: Install small exterior hooks or cleats on the pergola posts to secure tie-backs when the curtains are open. This keeps the fabric from blowing into seating or the dinner table.
For longer spans: Add a center support flange and a second pipe section if your pergola opening is especially wide. That extra support helps prevent sagging over time.
Budget tip: Galvanized pipe is often less expensive than specialty outdoor curtain hardware, and it has a simple industrial look that works with farmhouse, modern, or casual backyard spaces. It’s one of those practical choices I really appreciate when I want something sturdy but still nice enough for family get-togethers.