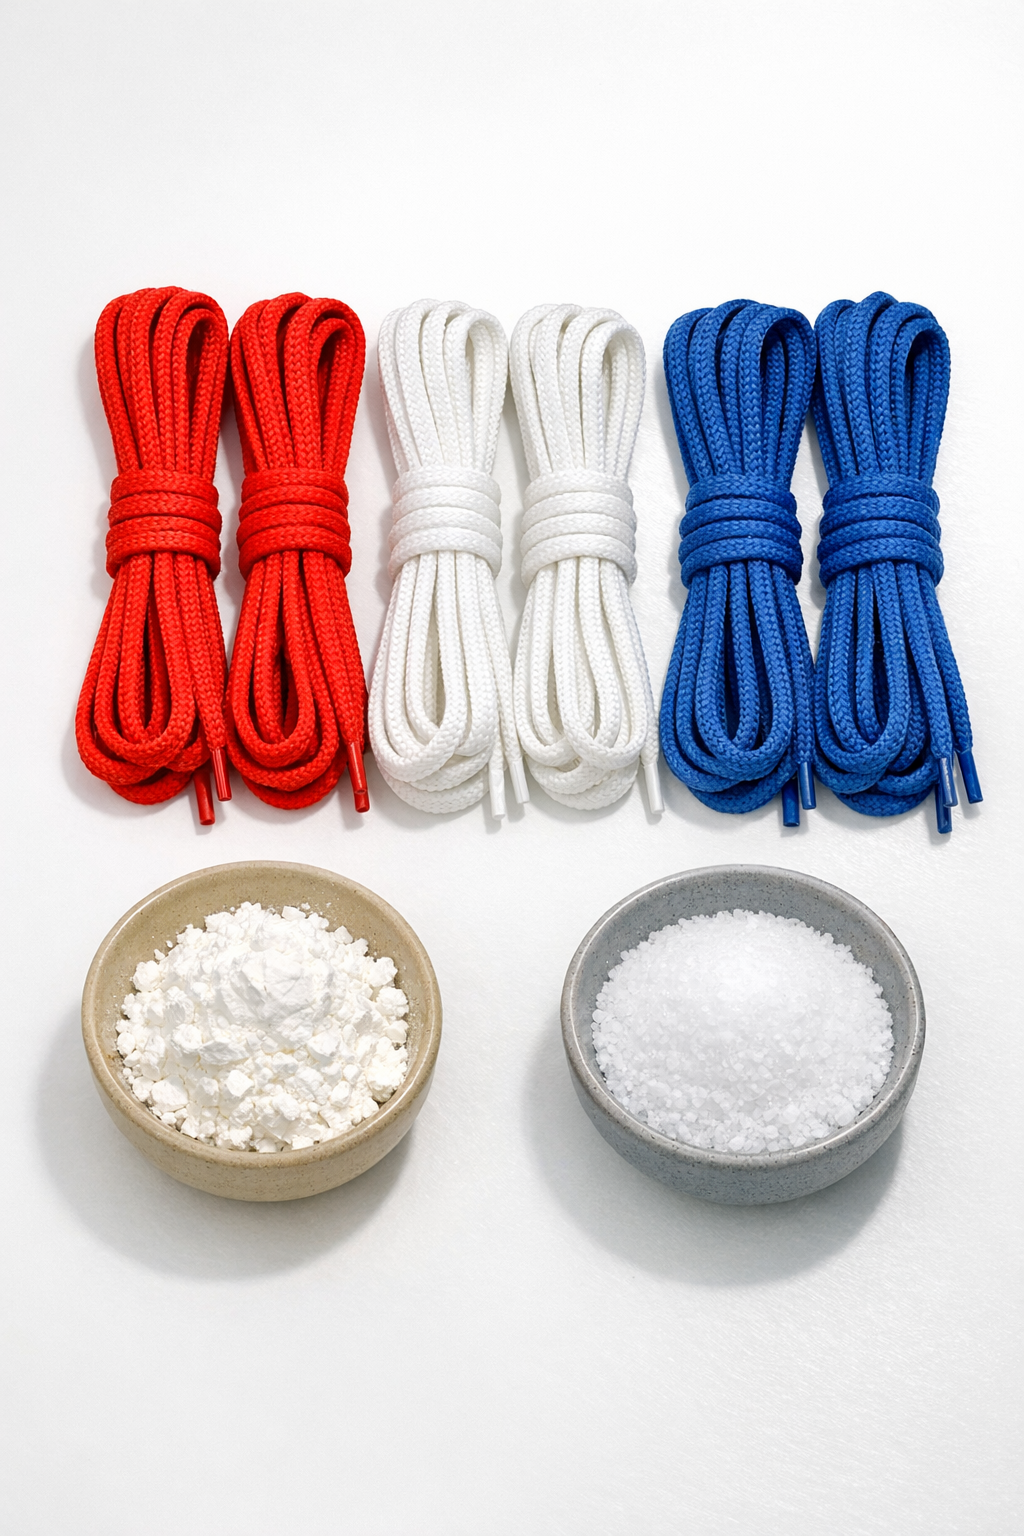
There’s something especially satisfying about turning a few humble supplies into something sturdy and genuinely useful, and this project does exactly that. In this tutorial, I’ll show you how to make a piece of heavy-duty DIY strapping by melting red, white, and blue nylon shoelaces together with two inexpensive pantry staples to help shape and control the process.
I love projects like this because they feel a little scrappy, a little clever, and very practical once they’re done. If you like upcycling, making workshop helpers, or just experimenting with simple materials, this is a fun one to try. It’s best for adults or very closely supervised older teens, since melted nylon gets extremely hot.
Materials
4 red nylon shoelaces, 54 inches long each
Instructions
1. Cut off any plastic aglets if they are thick or damaged, then straighten all 12 nylon shoelaces and line them up by color so they’re easy to stack evenly.
2. Mix the cornstarch and table salt in a shallow bowl or tray, then set aside a generous layer to use as a dusting bed that helps keep softened nylon from sticking too aggressively while you shape it.
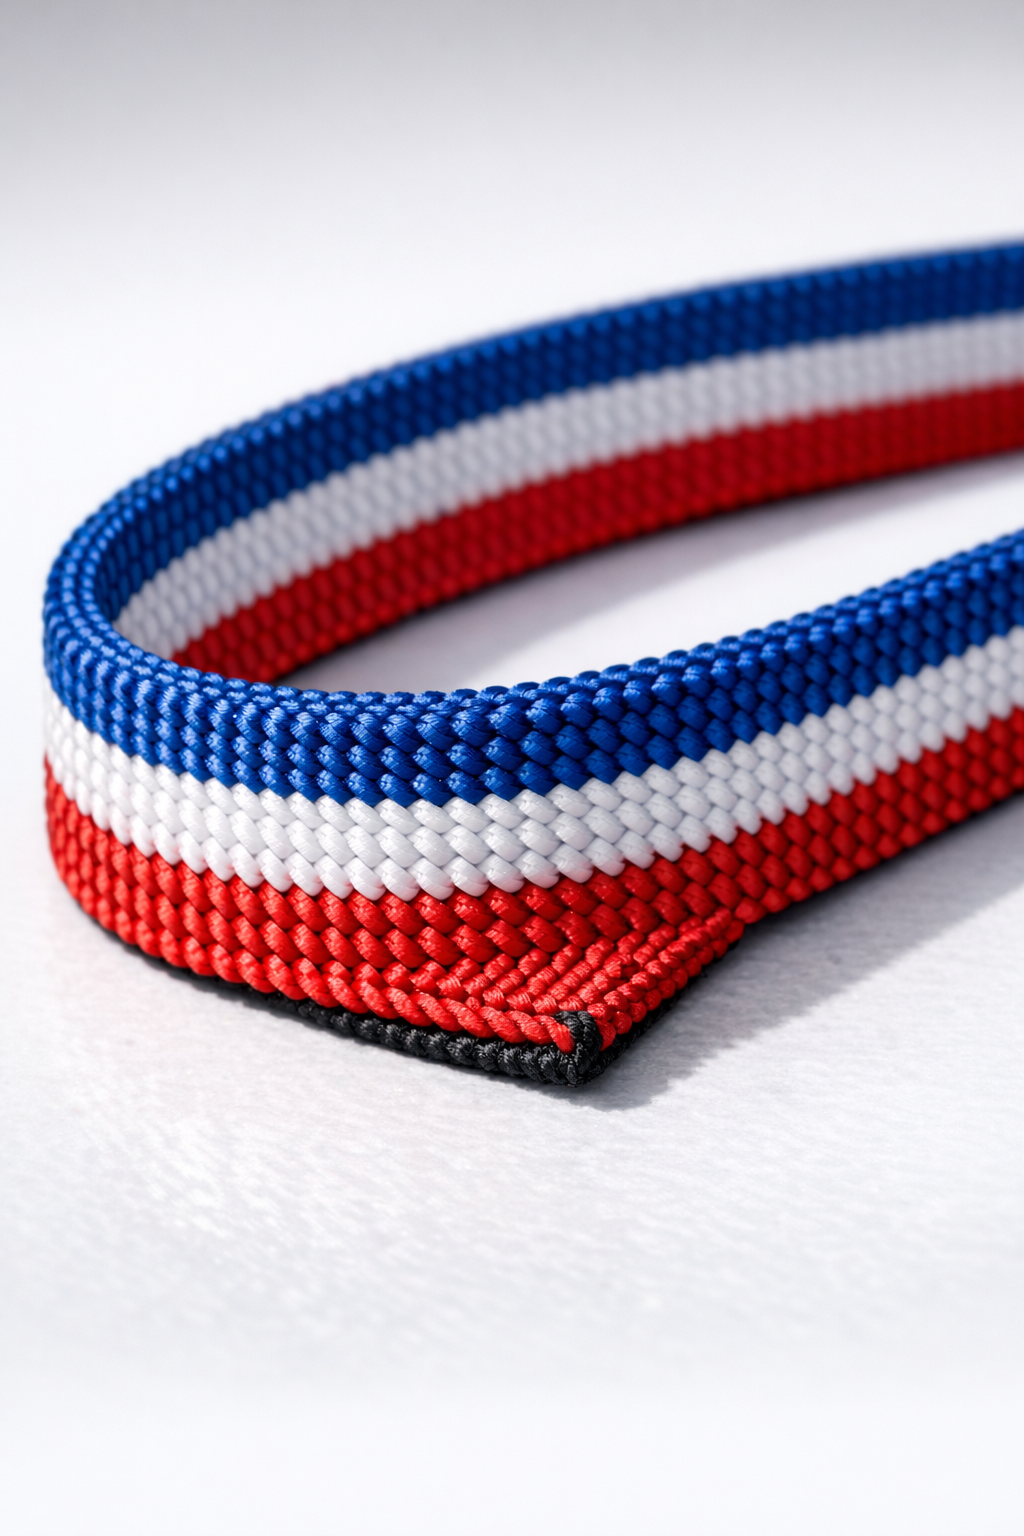
3. Arrange the shoelaces side by side in a flat band, alternating red, white, and blue until you have a striped strap layout about 2 to 2 1/2 inches wide.
4. Dust the top and bottom lightly with the cornstarch-salt mixture, pressing just enough to coat the surfaces without burying the laces.
5. Heat the shoelace band carefully with a controlled heat source until the nylon begins to soften and gloss over, then press it flat so the laces fuse into one continuous strap; work slowly in sections to keep the width even.
6. As each section softens, sprinkle on a little more of the pantry mixture if needed and continue pressing so the surface stays relatively smooth and the strap doesn’t weld itself to the work area.
7. Overlap the ends slightly if you want a shorter, extra-thick loop strap, or keep the full length straight for a long utility strap; fuse any overlaps thoroughly so there are no weak points.
8. Let the finished piece cool completely until firm, then flex it gently and trim any thin melted frays from the edges for a cleaner, stronger final shape.
Variations & Tips
For extra thickness: Use 15 to 18 shoelaces instead of 12 and make the strap in two pressed layers for a denser, more rigid result.
For a softer strap: Use fewer laces and press a little less firmly so the finished piece stays more flexible for wrapping or bundling light items.
For cleaner stripes: Stack the colors in a repeated pattern before heating and avoid over-melting, which can muddy the color lines together.
Safety first: Melt nylon only in a well-ventilated area and handle heated material with care, because it can stick to skin and cause serious burns in a split second.
Best uses: This homemade strapping works well for non-critical bundling, gear organization, craft builds, or workshop odds and ends, but I would not trust it for climbing, towing, or any safety load.
If your family is helping: In my house, I’d keep the kids on “layout duty” and leave the heating entirely to the grown-up, since this is the kind of project that rewards patience much more than speed.