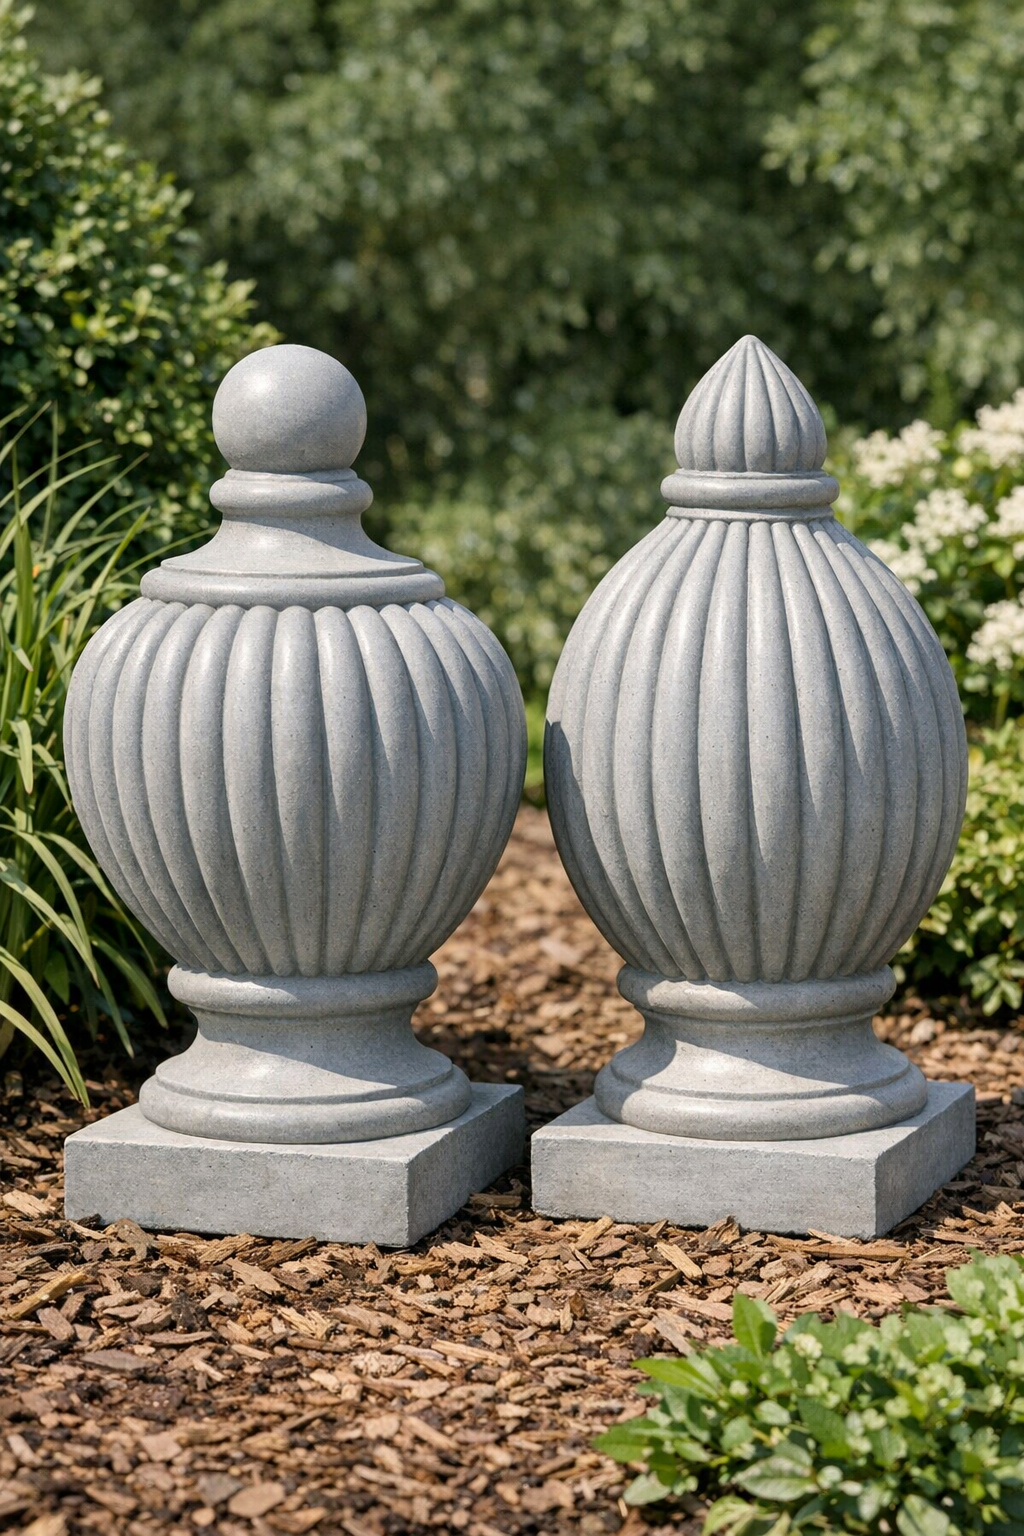
If you love giving a garden or front walk a little extra personality without spending boutique-garden-store money, these heavy ribbed yard finials are such a satisfying project. I’m using empty plastic squeeze bottles as the mold, cement as the body, and one simple secret item to create that decorative finial shape people always assume came from an expensive outdoor shop.
I especially like this kind of project because it’s simple, sturdy, and wonderfully forgiving. If you can mix cement and pour it carefully, you can make these. They’re great for anyone who wants a pair of statement pieces for flower beds, porch steps, gate posts, or patio décor, and they hold up beautifully outdoors.
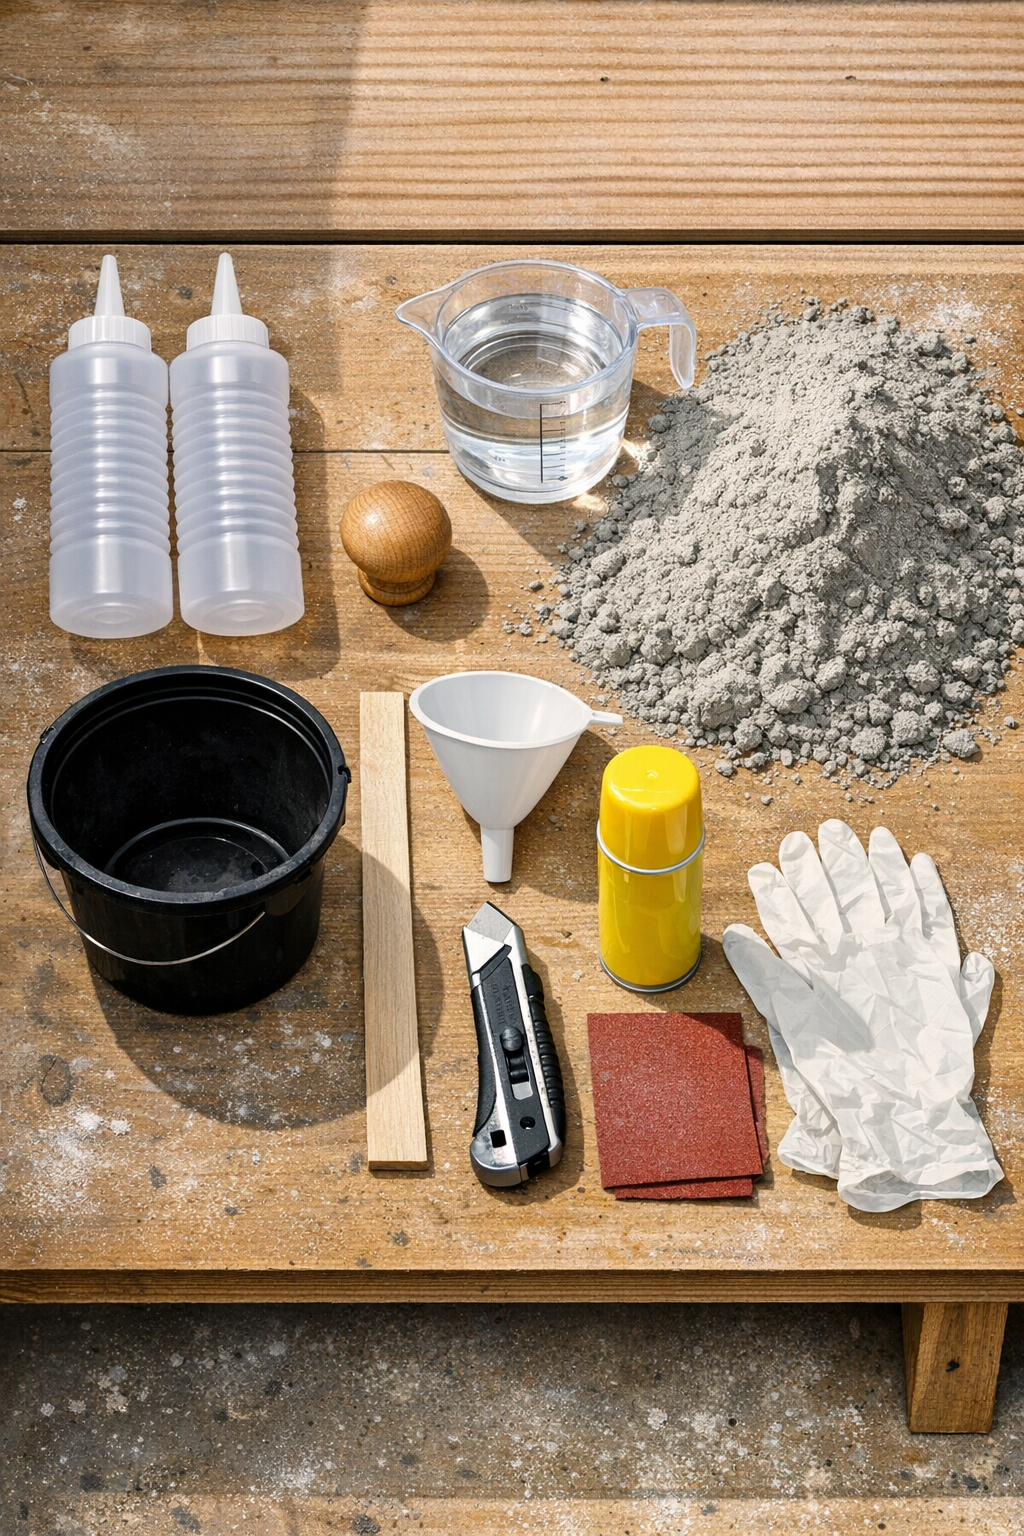
Materials
Instructions
1. Wash and dry the two empty squeeze bottles thoroughly, then remove any caps or inner seals so the openings are completely clear.
2. Lightly coat the inside of each bottle opening and the lower inside walls with cooking spray to help the cured cement release more easily later.
3. Set the bottles upright on a flat surface, and use painter’s tape to steady them together if they wobble.
4. In a bucket, mix the cement with water until it reaches the texture of thick pancake batter; it should pour slowly but still settle into the ribbed shape.
5. Using a funnel, fill each bottle almost to the top, tapping the sides several times to release trapped air bubbles.
6. Press the wooden drawer knob gently into the top center of one filled bottle so part of the knob remains visible above the cement; this creates the classic finial top.
7. Leave the second bottle plain if you want a simpler matching shape, or press the knob in and remove it after 5 minutes to leave a rounded impression for a paired design.
8. Let the cement cure undisturbed for 24 hours, or according to the package directions if your mix needs longer.
9. Carefully cut down the side of each plastic bottle with a utility knife and peel the plastic away from the hardened cement.
10. Sand any rough edges around the top and bottom until the finials feel neat and even, then let them dry another 24 hours before placing them outdoors.
11. Set the finished finials in garden beds, on either side of porch steps, or on sturdy pedestals where their weight and ribbed texture can really stand out.
Variations & Tips
For a matched pair: Use two identical wooden knobs and leave both embedded in the cement. I think this looks especially pretty flanking a walkway or front steps.
For picky decorators: In my house, everybody has an opinion about outdoor décor, so if you like things more understated, skip the knob and let the ribbed bottle shape be the star.
For extra weight: Add 2 tablespoons of small pea gravel into the center of each pour before the cement fully sets. This gives the finials an even heftier feel in windy areas.
For easier demolding: Don’t skip the light oil spray. It makes a big difference when you’re peeling the bottle away, especially around deep ribs.
For a smoother finish: After demolding, rub the surface with a damp sanding sponge instead of dry sandpaper if you want a slightly softer, more stone-like look.
For color: Once fully cured, dry-brush the raised ribs with outdoor masonry paint in white, charcoal, or aged bronze for a more dramatic garden accent.
Placement tip: These are heavy, but I still place them on a level surface so they don’t rock. Tucking them slightly into mulch helps them look intentional and keeps them stable.