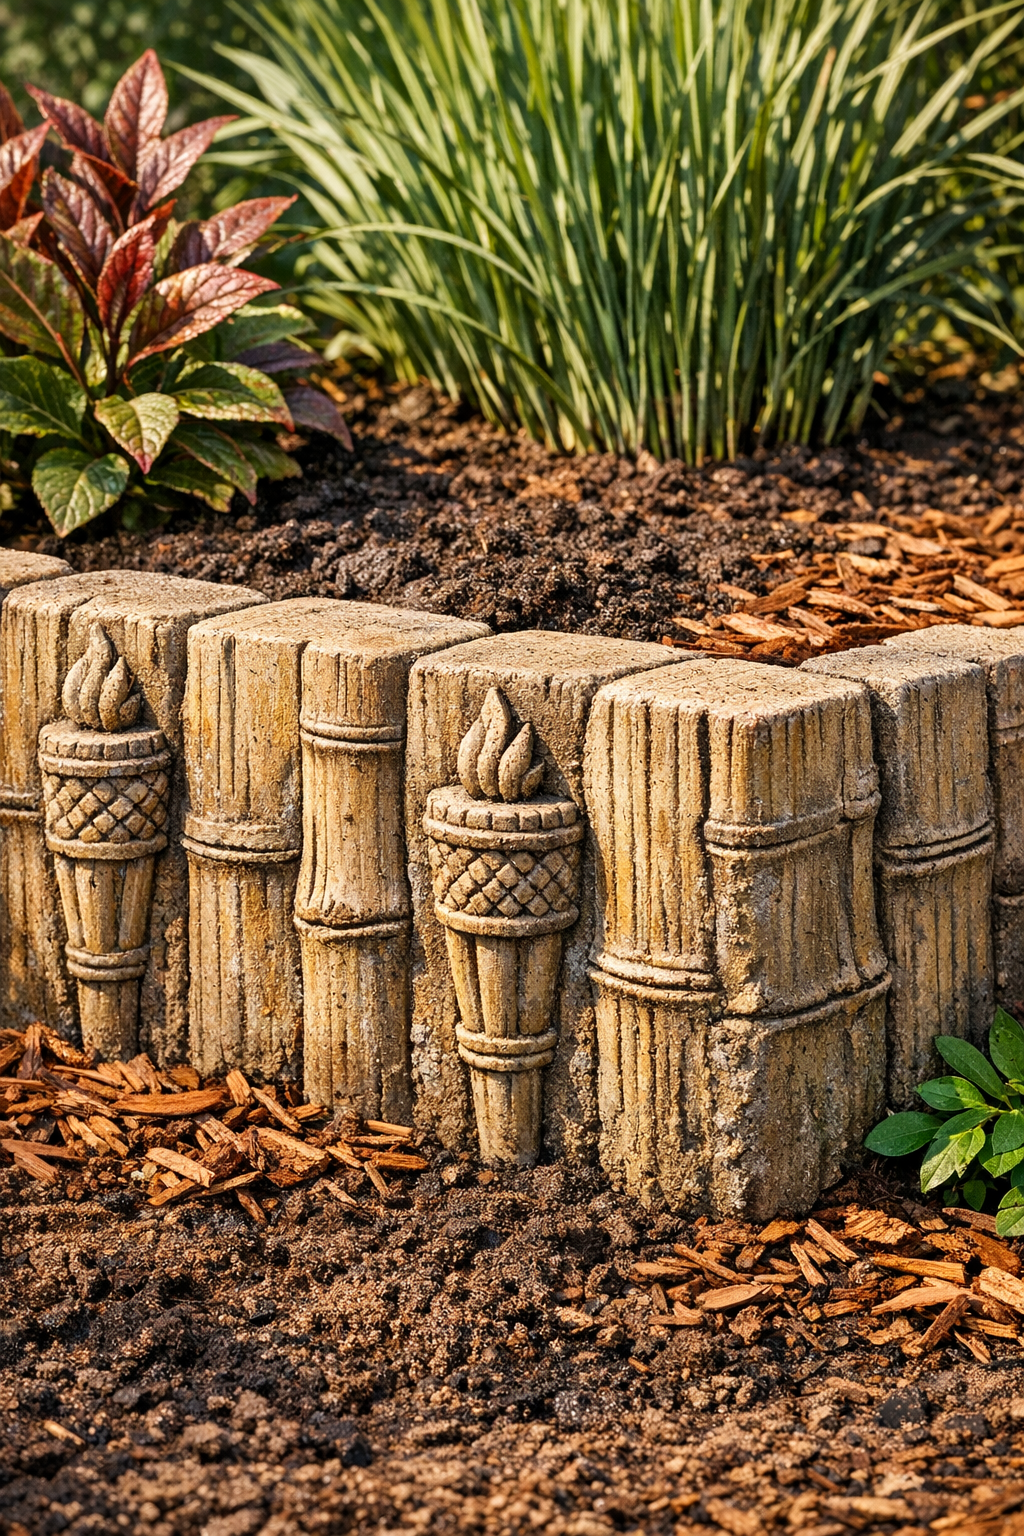
If you want a garden border that looks sculptural, sturdy, and far more expensive than it is, this is one of my favorite low-fuss outdoor projects. By pressing short pieces of bamboo tiki torch into wet cement inside a simple mold, you get chunky, heavily textured edging blocks that read a little rustic, a little tropical, and surprisingly polished once they’re set in the yard.
I’m always drawn to projects that use just a couple of easy-to-find materials but still create real visual impact. This one is ideal for anyone edging a flower bed, outlining a path, or breaking up a plain patch of landscaping without buying premade pavers. The technique is straightforward, but the finished texture is what makes it special.
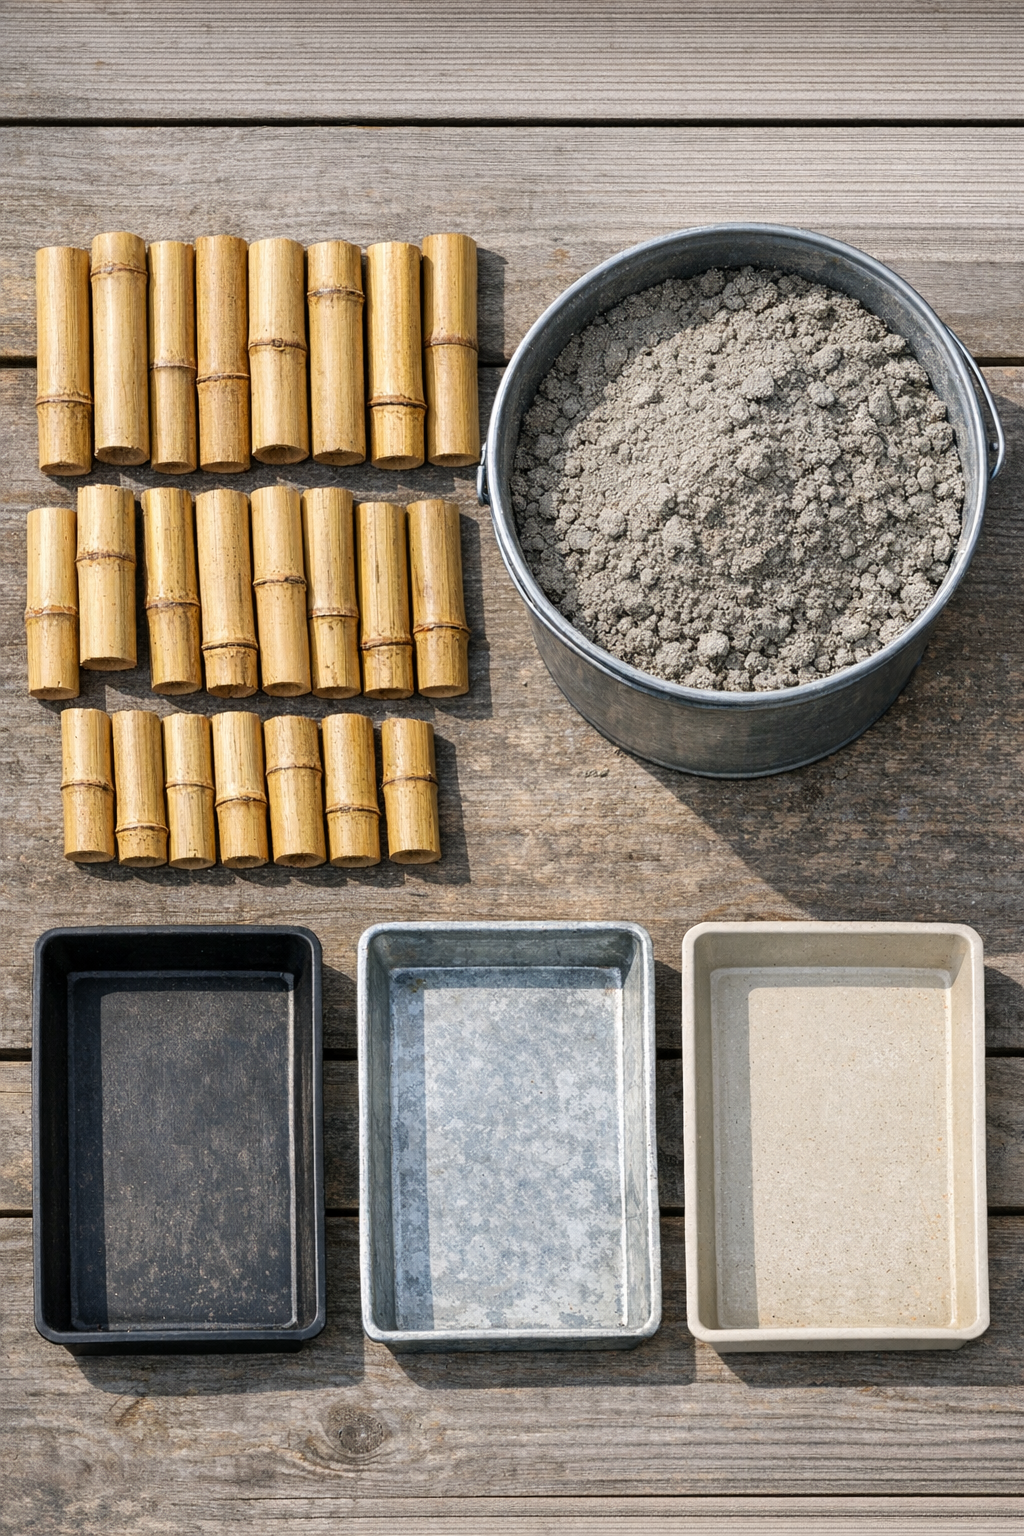
Materials
6 bamboo tiki torches, each 48 inches long, cut into 3-inch sections
Instructions
1. Cut the bamboo tiki torches into 3-inch lengths, aiming for enough pieces to tightly cover the surface of each border block.
2. Wash and dry the plastic containers, then set them on a flat, level work surface where they can stay undisturbed while the cement cures.
3. Mix a small batch of cement according to the package directions until it reaches the texture of thick oatmeal and holds its shape when stirred.
4. Fill each plastic container about 2 1/2 inches deep with wet cement, then tap the sides firmly to release trapped air and level the surface.
5. Press the bamboo sections cut-side down into the wet cement, placing them close together in a snug pattern so the tops create a deeply ridged texture.
6. Push each bamboo piece in until it is embedded securely but still leaves at least 1/2 inch of texture exposed above the cement face.
7. Smooth the back of each block with a trowel or scrap board so the finished piece will sit flat when installed in the garden.
8. Let the blocks cure in the molds for 24 to 48 hours, or until they feel hard and release cleanly from the plastic containers.
9. Flex the containers gently to unmold the blocks, then set them in a shaded spot to continue curing for another 3 to 5 days for full strength.
10. Dig a shallow trench around your garden bed or path, set the blocks side by side with the textured bamboo face showing, and backfill with soil to lock them in place.
Variations & Tips
Container choice: I like using sturdy leftover food tubs because they’re easy to peel away from the cured cement, and they give a consistent size that makes installation much neater.
Texture spacing: For a denser, more dramatic look, pack the bamboo pieces almost shoulder to shoulder; if you leave small gaps, more cement will show and the border reads a bit more stone-like.
Cement mix: Fast-setting cement speeds things up, but standard concrete mix works too if you allow a longer curing time. Just avoid mixes with very large gravel if you want a cleaner surface in smaller molds.
Release help: If your containers tend to grip, wipe the inside lightly with cooking oil before adding cement. As someone who spends plenty of time in the kitchen, I appreciate any trick that keeps cleanup simple and unmolding stress-free.
Weather timing: Make these on a mild, dry day if possible. Very hot sun can dry the surface too quickly, while heavy rain can weaken or pit freshly poured cement.
Installation tip: Set the blocks with about one-third of their height below grade for the most stable border. That extra buried depth helps them stay aligned through rain, foot traffic, and seasonal freeze-thaw cycles.
Look upgrade: If you want a darker, aged finish, let the blocks fully cure and then brush on a diluted outdoor concrete stain. It settles beautifully into the bamboo texture and emphasizes all those ridges.