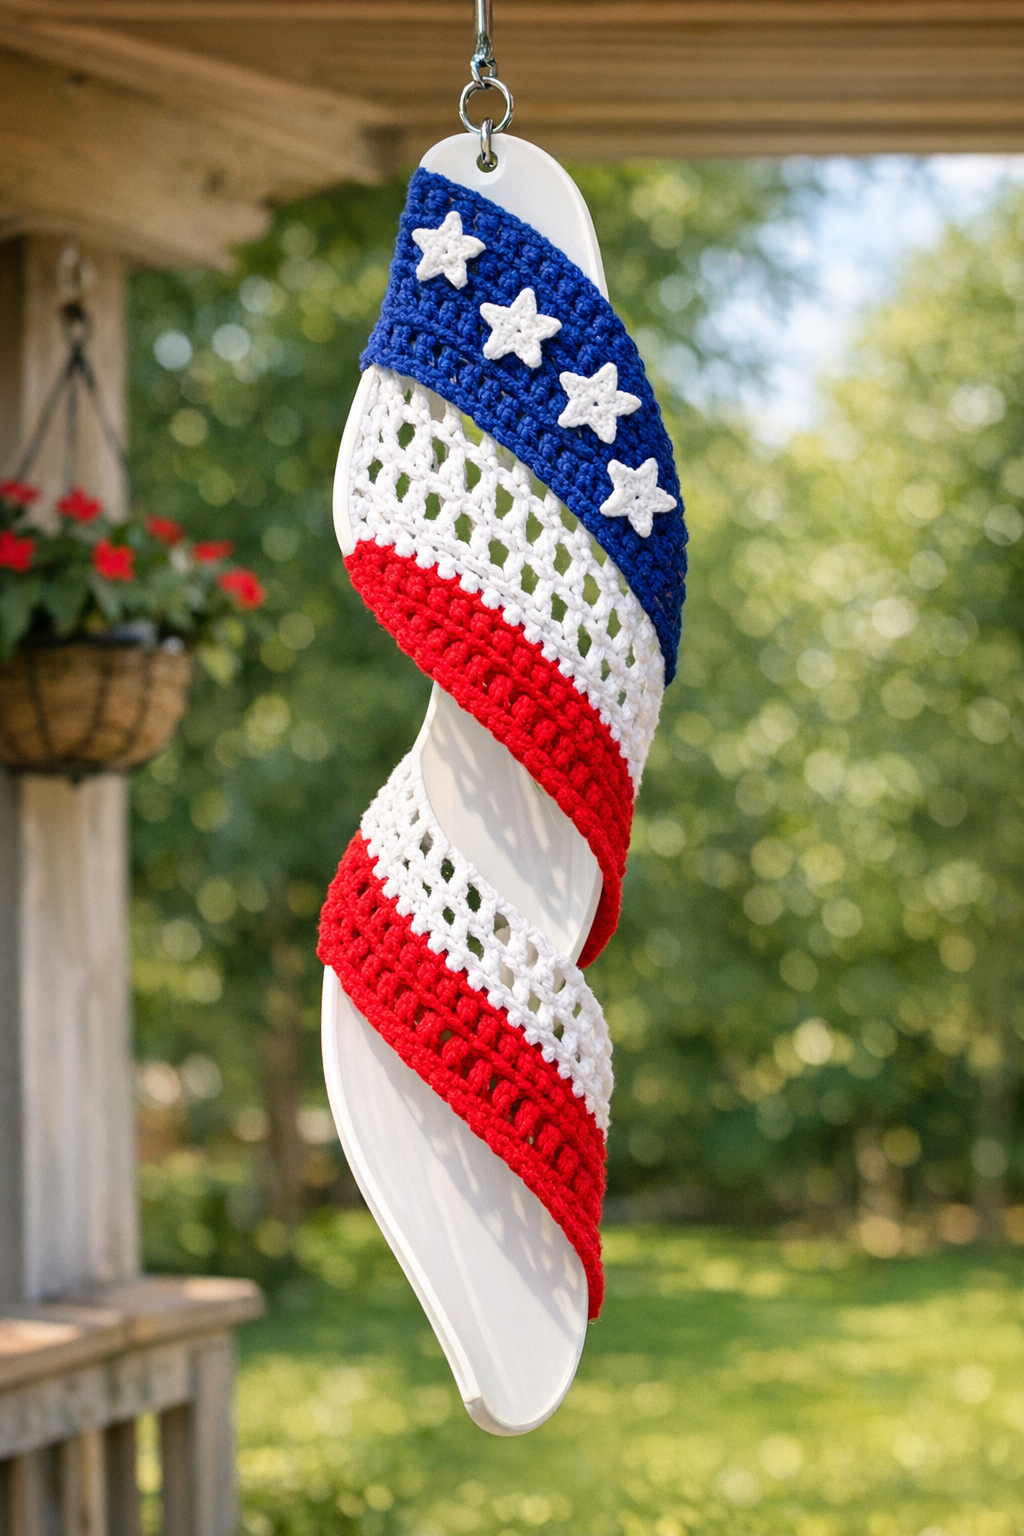
I love a project that rescues something headed for the garage pile and turns it into porch decor that actually makes people stop and ask where I bought it. This patriotic wind spinner does exactly that: an old plastic ceiling fan blade becomes the base, and red, white, and blue yarn gets crocheted right through it to create a breezy outdoor piece with a lot of movement and texture.
This is a great project if you already know basic crochet stitches and want something a little different from blankets or dishcloths. I also like that it fits into real life pretty well—it's affordable, uses small amounts of yarn, and can be finished over a couple of evenings after work. If you have a tired fan blade tucked away from an old fixture, this is such a satisfying way to give it a second life.
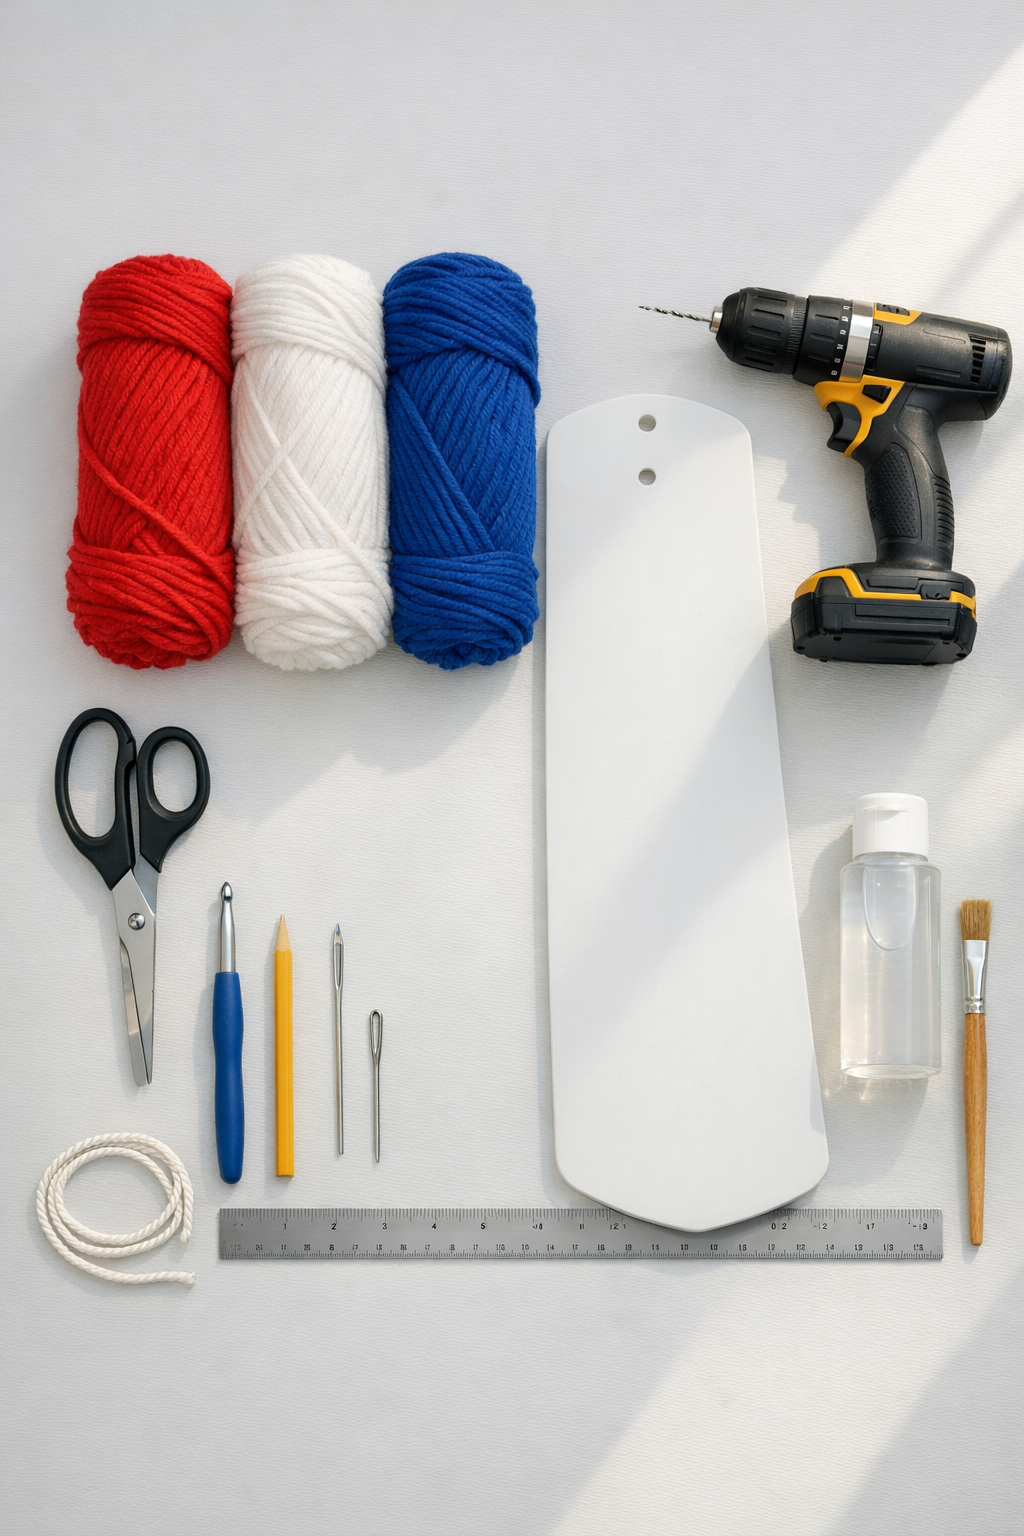
Materials
Instructions
1. Clean the ceiling fan blade thoroughly with warm soapy water, then dry it completely so the yarn and sealer will sit properly. If there are stickers or residue, scrape them off before moving on.
2. Mark a line of evenly spaced holes down the center of the blade, starting about 1 inch from the top and stopping about 2 inches from the narrow tip. Space the marks about 3/4 inch apart so you have room to crochet through them.
3. Drill a 1/4-inch hole at each mark, then lightly smooth away any plastic burrs with scissors or sandpaper if needed. Drill one extra hanging hole at the top center if your blade does not already have a usable opening.
4. Brush a thin coat of clear outdoor sealer over both sides of the blade and let it dry fully according to the product directions. I do this step because outdoor pieces last so much longer when the base is protected first.
5. Starting at the widest end, attach blue yarn through the first hole and work a small chain loop to anchor it. Crochet single crochet stitches through each hole, wrapping and connecting across the center line so the yarn begins to form a filled band.
6. Continue with blue for the top third of the blade, adding 2 to 3 single crochet stitches in each hole as needed to cover the plastic between openings without pulling too tight. Keep the tension snug but not stiff so the spinner can still flex a little in the breeze.
7. Switch to white yarn for the middle third, joining it tightly at the next hole and trimming the blue tail to weave in later. Work the same single crochet pattern through each hole until you have a solid white band.
8. Change to red yarn for the lower third of the blade and repeat the same stitching pattern down toward the tip. At the final hole, fasten off securely and weave all yarn tails to the back with a yarn needle.
9. To create the spinner shape, gently twist the blade lengthwise so the narrow end turns slightly away from the top, then hold that curve while checking that the crochet sections are not overstretched. Plastic fan blades usually keep a bit of shape once twisted carefully, but work slowly to avoid cracking.
10. Thread the hanging cord through the top hole and knot it into a secure loop about 10 to 12 inches long. If you want more movement, add a small swivel clip between the cord and the hook where you'll hang it.
11. Hang the spinner outside on a porch, shepherd's hook, or tree branch and adjust the twist until the blade catches the breeze evenly. Once it's up, step back a few feet—the movement is what really makes the crochet texture stand out.
Variations & Tips
Use different color themes: This same method works beautifully for summer porch decor, team colors, or even a neutral farmhouse palette if patriotic decor is not your style year-round.
Choose acrylic yarn for outdoors: Cotton can stay damp longer outside, so I prefer acrylic for this project because it dries faster and holds color well in changing weather.
Keep the holes evenly spaced: The more consistent your drilled holes are, the easier the crochet section will be. I learned this the hard way on an early upcycle project—crochet can hide a lot, but uneven spacing makes the stitching fight you.
Try a stitch upgrade: If you are comfortable with crochet, you can alternate single crochet and half double crochet for more texture, but keep the stitches compact so they do not sag outdoors.
Add a tail if you want more movement: Tie 3 to 5 strands of leftover yarn, each 12 to 16 inches long, through the bottom hole for a streamer effect that really spins nicely on windy days.
Protect it seasonally: If you live somewhere with snowy winters like I do in the Midwest, bring the spinner into the garage or covered porch during the harshest months to help it last longer.