Some projects make me smile because they turn the plainest little hardware-store finds into something you’d gladly set on a front porch with pride. These modern porch plant stands do exactly that. With a pair of round wooden cutting boards, six inexpensive wooden toilet plungers, and a few coats of spray paint, you can make two simple stands that look tidy, current, and surprisingly high-end.
I’ve always had a soft spot for projects like this—ones that remind me of the old Midwestern habit of making something useful and handsome out of whatever was affordable and close at hand. If you want an easy weekend project that doesn’t require fancy woodworking skills, this one is a fine place to start. These stands are especially nice for small to medium potted plants near a porch chair, front door, or sunny corner.
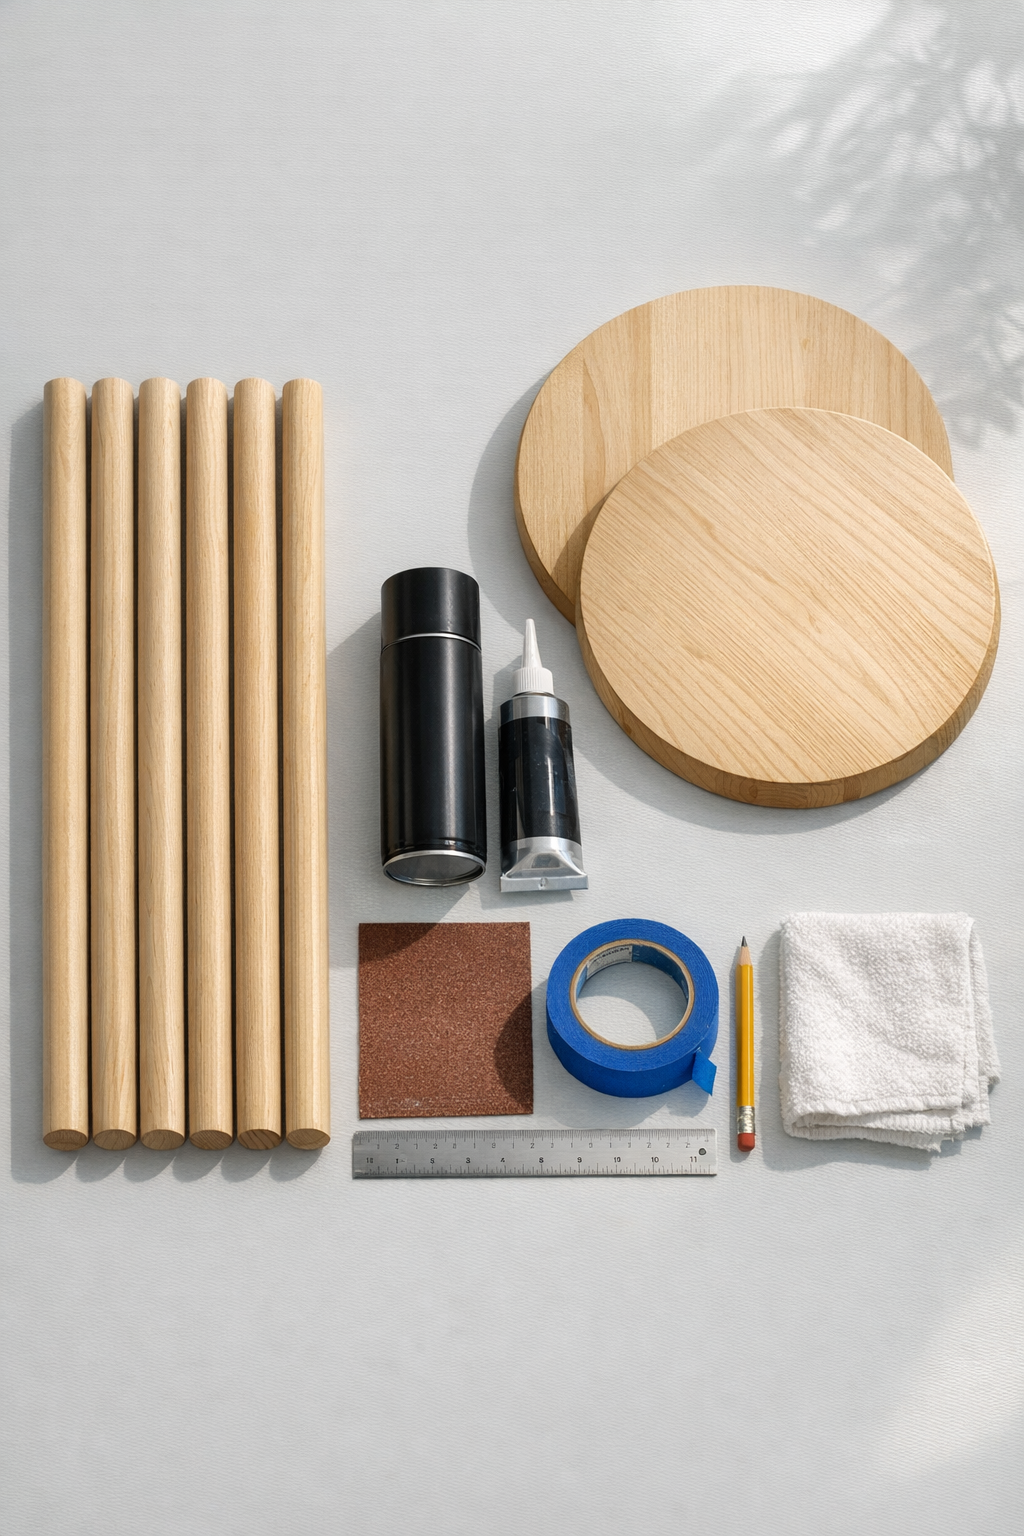
Materials
6 cheap wooden toilet plungers, standard size, with wooden handles and rubber cups
Instructions
1. Pull the rubber cups off all 6 toilet plungers, keeping only the wooden handles for the legs. Wash the handles and the cutting boards with mild soap and water, then let everything dry completely.
2. Sand each plunger handle and both cutting boards with 120-grit sandpaper to remove rough spots and help the paint and glue hold better. Follow with 220-grit sandpaper for a smoother finish, then wipe away the dust with a clean cloth.
3. If your cutting boards have handles or hanging holes you don’t want visible, place them so that side becomes the underside or back of the stand. Mark the underside center area of each board lightly with pencil.
4. Divide the 6 plunger handles into two sets of 3 and arrange one set in a triangle under each cutting board. Keep each leg about 1 to 1 1/2 inches in from the board’s outer edge so the stand looks balanced and has room for a flowerpot on top.
5. Wrap painter’s tape around any areas you want to keep free of paint, then set the pieces on a protected surface outdoors or in a well-ventilated spot. Spray light, even coats on the cutting boards and the plunger handles, letting each coat dry before adding the next, until the finish looks solid and smooth.
6. Let the painted pieces dry fully according to the spray paint directions before assembly. Don’t rush this step, because tacky paint can weaken the glue bond and leave fingerprints in the finish.
7. Apply a generous bead of construction adhesive to the top end of each painted plunger handle. Press three legs onto the underside of one cutting board in your marked triangle pattern, then repeat for the second stand.
8. Check that all three legs on each stand touch the surface evenly and adjust right away if needed. Leave the stands upside down while the adhesive cures for the full time listed on the package.
9. Turn the stands upright and add felt pads to the bottom of each leg to protect your porch floor and help the stands sit neatly. Set a potted plant on each stand and test for stability before placing them in their final spot.

Variations & Tips
Natural Wood Look: If you prefer a softer farmhouse feel, stain the wood instead of spray-painting it black. A warm walnut or light oak tone looks lovely with terracotta pots.
Outdoor Durability: For a porch that gets rain or strong sun, finish the stands with a clear outdoor sealer after the paint dries. That extra coat helps the color last longer through the seasons.
Board Size: A 10-inch board works well for smaller pots, while a 12-inch board gives you a bit more room and a sturdier footprint. Just keep the legs evenly spaced so the stand doesn’t wobble.
Adhesive Choice: Use a construction adhesive rated for wood and heavier decorative projects rather than a light craft glue. In my experience, the stronger glue is what makes a quirky idea like this hold up like it ought to.
Color Options: Matte black gives these stands that modern look people love, but white, sage green, or a muted clay color would be just as pretty on a porch. Choose a shade that suits your door, planters, or outdoor cushions.
Safety Tip: Keep these stands for lightweight to medium-weight pots, not oversized concrete planters. They’re charming little helpers, but like most clever upcycles, they do best when not overburdened.