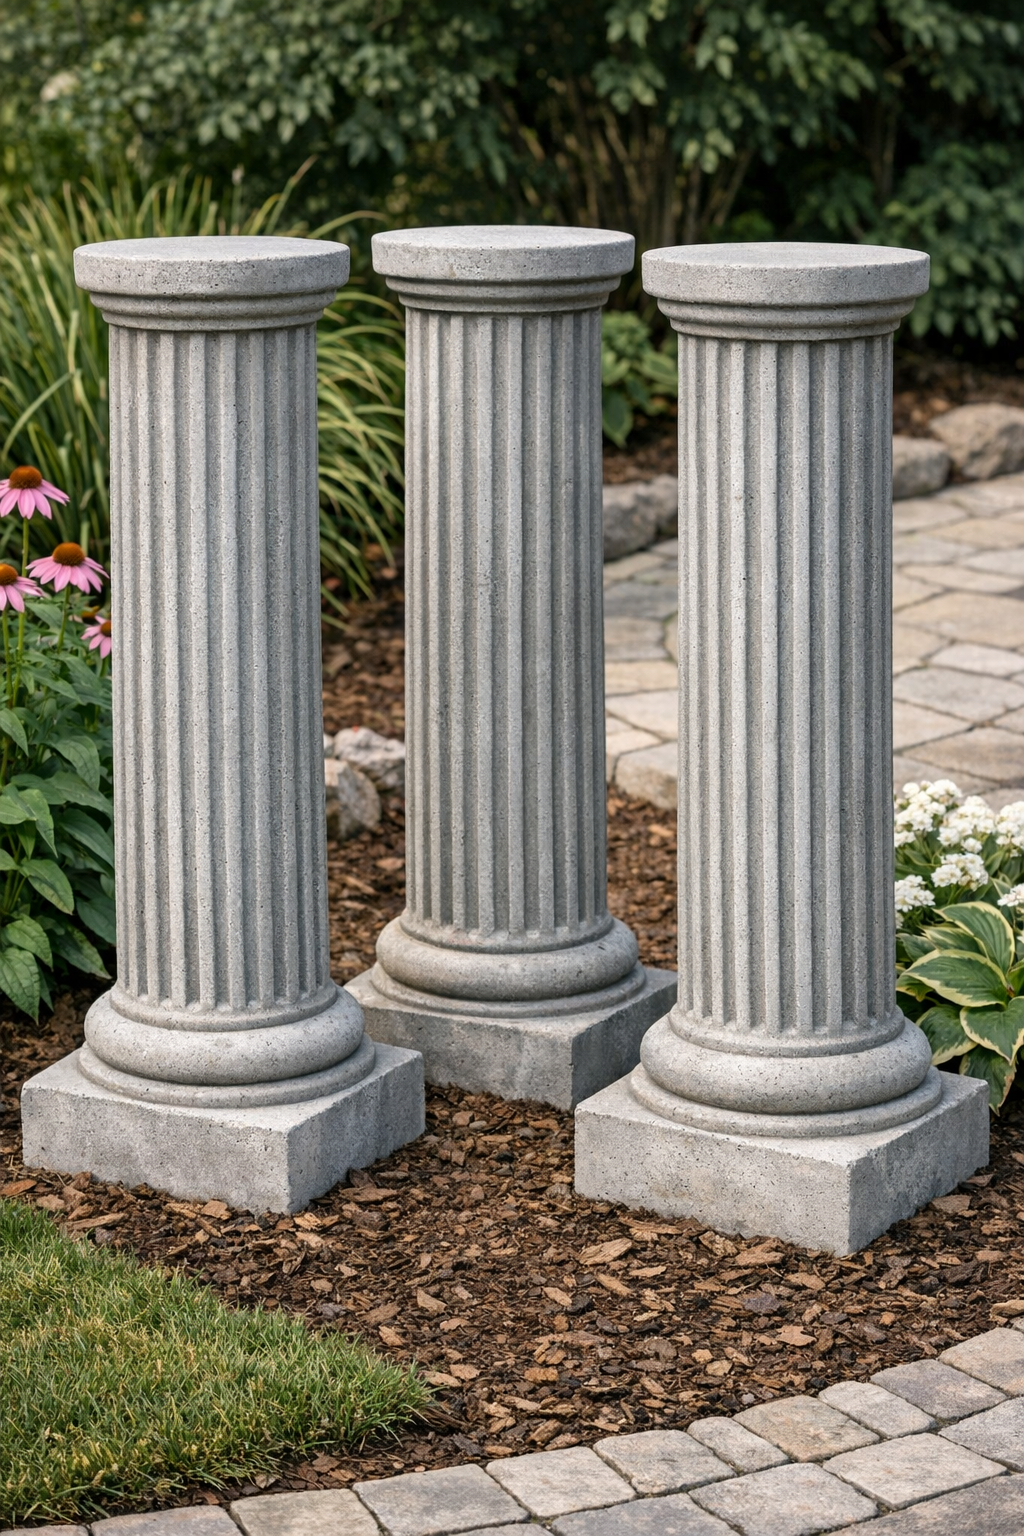
There’s something especially satisfying about turning a few unlikely odds and ends into yard décor that looks like it has been standing there for years. This project uses plastic novelty top hats, wet cement, and two other simple components to make heavy ridged garden columns with a wonderful old-fashioned look. Once they’re cured and set in place, they read like classic pedestal forms, and nobody would guess they started from party-store plastic.
I’ve always had a soft spot for sturdy outdoor pieces that can handle wind, rain, and a bit of Midwestern weather without needing babying. These columns are a good fit for folks who want a bold accent by a walkway, tucked into a flower bed, or flanking a porch step, and they’re simple enough for a patient beginner to make over a weekend.
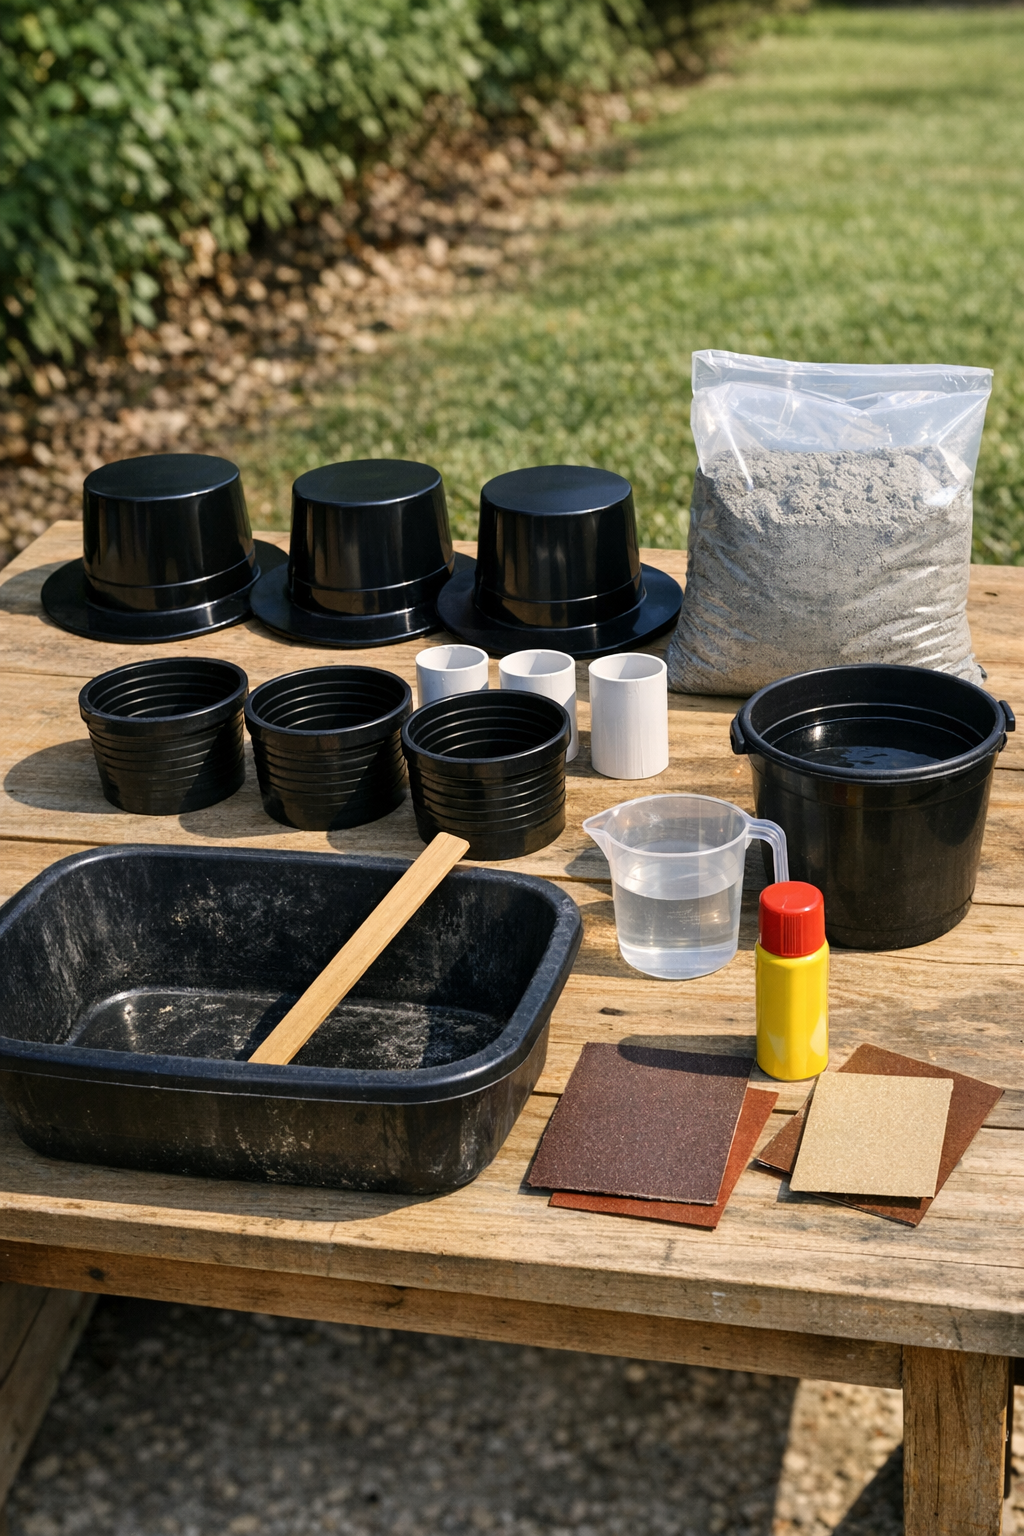
Materials
3 plastic novelty top hats, 10 to 12 inches wide each
Instructions
1. Wash and dry the plastic novelty top hats and the ribbed plastic containers so the cement can cure cleanly against the molds. Lightly sand any very glossy interior surfaces, then wipe away the dust.
2. Spray the insides of the top hats and ribbed containers with a thin coat of cooking spray or mold-release oil. Keep it light so the concrete won’t puddle against the sides.
3. Set each top hat upside down on a level surface covered with plastic or cardboard, because this piece will form the ridged base of each column. Place one ribbed container upright nearby for each column.
4. Mix the concrete in a tub according to the package directions, adding water a little at a time until it reaches a thick pancake-batter consistency. Stir thoroughly so there are no dry pockets hiding in the mix.
5. Fill each upside-down top hat with concrete to about 1 inch below the rim, tapping the sides several times to release trapped air. This creates a broad, heavy base that helps the finished column stay put in the yard.
6. Stand one PVC pipe upright in the center of each filled top hat, pressing it down 2 to 3 inches into the wet concrete. Check it from two sides to make sure it is standing straight.
7. Fill each ribbed container with concrete, leaving 2 inches of space at the top so it’s easier to handle. Tap each container gently on the table to settle the mix and bring bubbles to the surface.
8. Slide one filled ribbed container down over each PVC pipe so the pipe runs up through the center and the bottom of the container meets the concrete-filled hat. Press the two wet concrete sections together firmly enough that they bond into one solid column.
9. Smooth the seam area with a gloved finger or stir stick, adding a little extra concrete if needed to close any gaps. Recheck that each column is upright before walking away.
10. Let the columns cure undisturbed for at least 24 hours, or longer if the weather is cool or damp. Once firm, carefully peel or cut away the plastic molds from the concrete.
11. Sand off any sharp edges or thin flashing left by the molds, especially around the seam and top edge. Wipe the dust away with a dry cloth.
12. If you want an aged garden finish, dry-brush the columns with exterior paint in a soft stone or weathered white tone, letting some raw concrete show through. Allow the finish to dry fully before moving the pieces outdoors.
13. Place the finished columns in the yard on solid, level ground, and lift with care since they’ll be heavy. I like grouping all three together at staggered heights in a flower bed for the kind of stately look my grandmother would have called “plain but handsome.”
Variations & Tips
Different height set: Use ribbed containers in three different heights for a more collected, layered garden arrangement. Keeping the base molds the same size helps the set still look intentional.
Weathered finish: For an older stone look, start with gray paint and lightly dry-brush ivory over the ridges after the first coat dries. That trick settles nicely into the texture and brings out every groove.
Safer lifting: Make the columns close to where they’ll be displayed if you can. Concrete gets heavy in a hurry, and at my age I’ve learned that saving your back is every bit as important as finishing the project.
Mold removal tip: If the plastic clings, wait another 12 to 24 hours before peeling it away. Concrete that is just a little greener than it looks can chip at the edges if you rush it.
Top display option: If the top opening cures slightly recessed, you can set a small planter, lantern, or gazing ball stand on top. It makes the columns feel even more custom without adding much extra work.
Cold-weather note: Cure these in temperatures above 50 degrees Fahrenheit for best strength. In cool rural spring weather, I like to cover them loosely with plastic overnight so they cure slow and even.