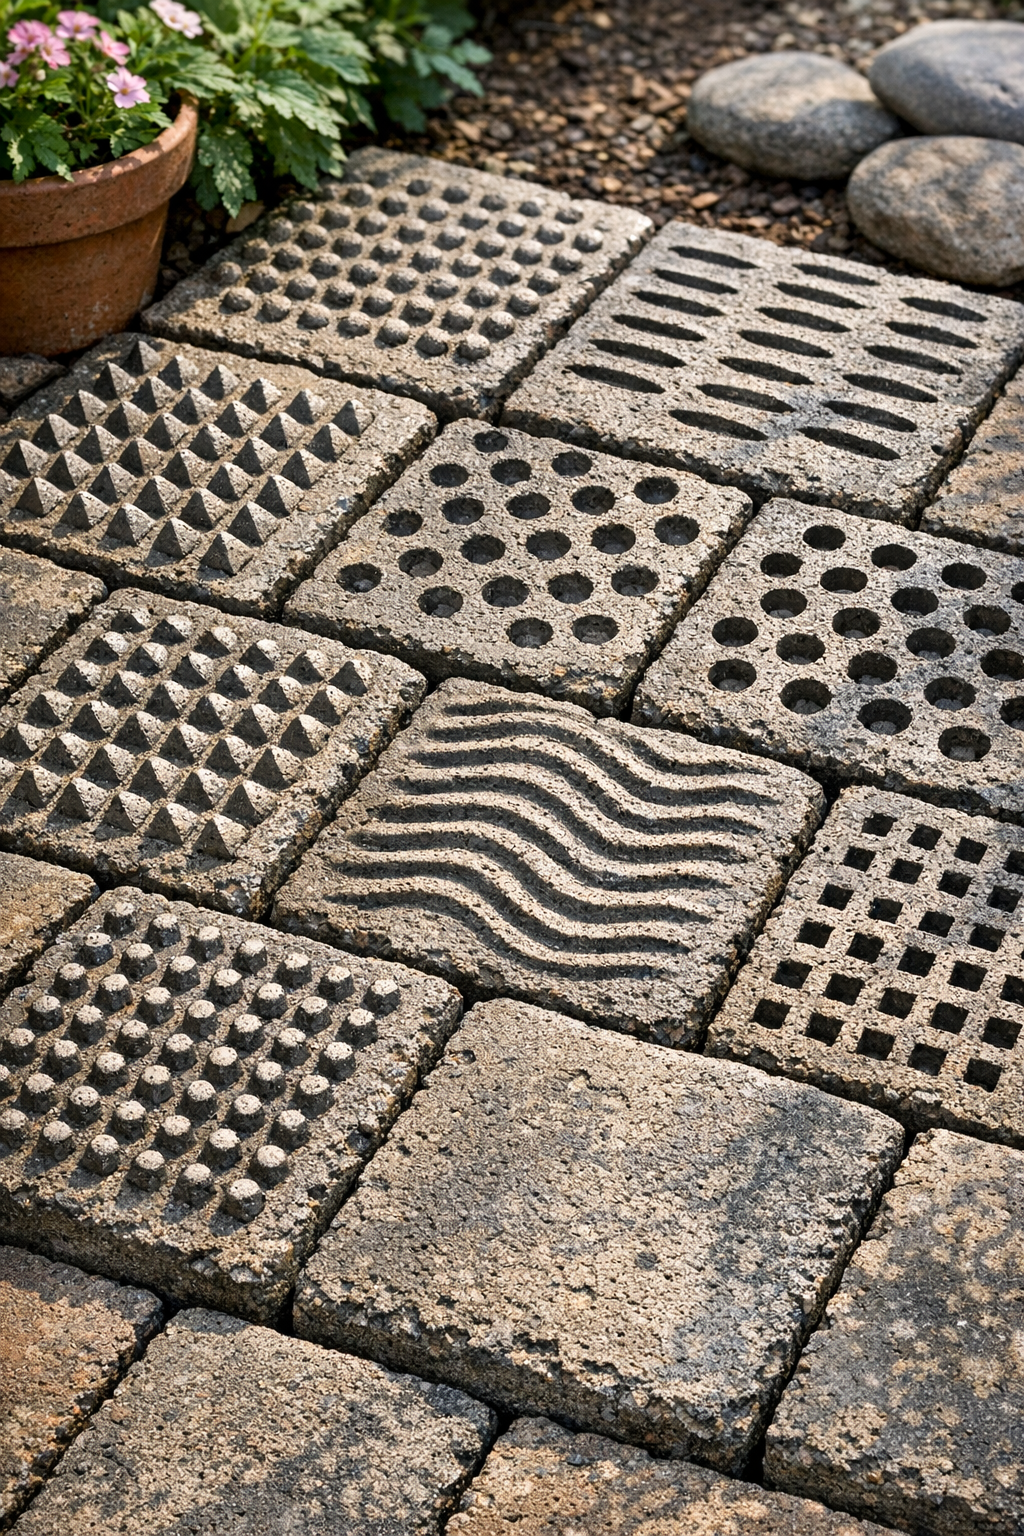
I love a project that turns a cast-off kitchen item into something practical, and these heavy textured patio bricks do exactly that. By pressing old metal cheese graters into wet cement, you can create bold, slip-resistant surface patterns that look surprisingly architectural once they cure. The result feels a little industrial, a little handmade, and very useful for a garden path, a small seating area, or a stepping-stone border.
As someone who spends plenty of time thinking about texture in food, I find it just as satisfying in outdoor projects. The same way a grater changes the surface of cheese or vegetables, it can leave behind a repeating pattern in cement that catches light beautifully. This is a good project for beginners because the material list is short, the technique is straightforward, and the finished bricks are sturdy enough to make a real impact outdoors.
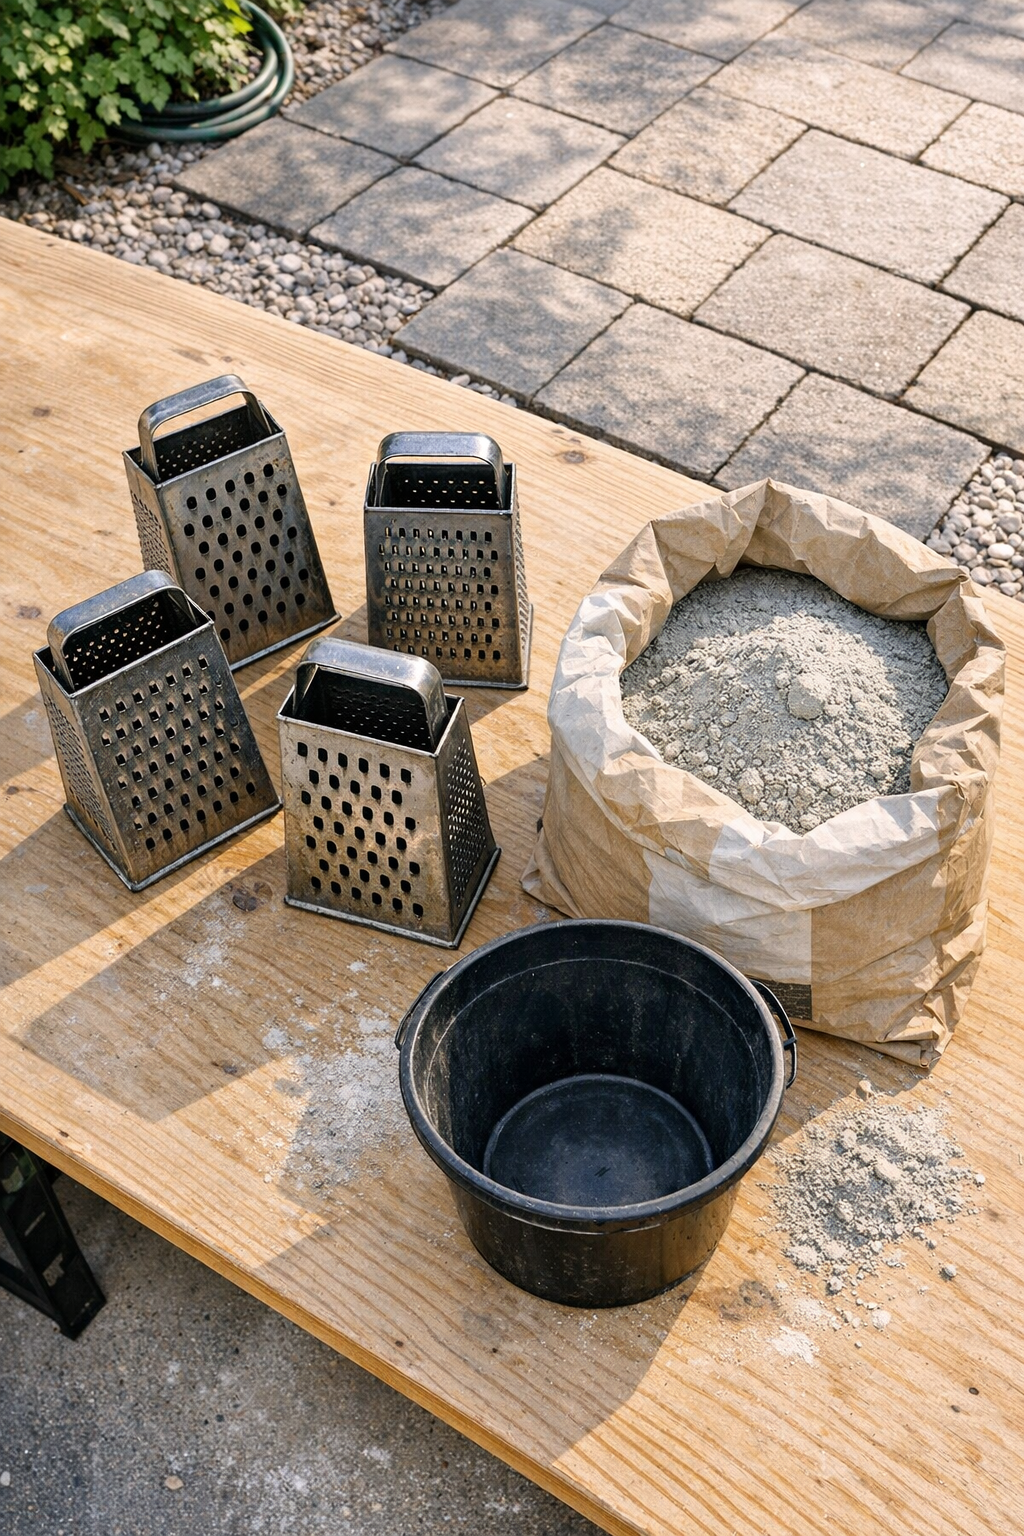
Materials
4 old metal cheese graters, standard box-style, about 9 to 10 inches tall
Instructions
1. Set up your workspace on a flat outdoor surface and spread out the plastic drop cloth to protect the area. Put on gloves before handling the cement and metal graters.
2. Lightly coat the outside faces of each cheese grater with nonstick cooking spray so they release cleanly from the wet cement later. Keep the coating thin so it does not pool in the holes.
3. Pour the cement mix into a bucket or mixing tub and add water a little at a time until it reaches a thick, scoopable consistency, like stiff mashed potatoes. Mix thoroughly so there are no dry pockets.
4. Scoop the wet cement onto the plastic-covered surface and form it into brick-shaped slabs about 8 inches by 8 inches and 2 inches thick. Square the edges with your hands or a small trowel for a cleaner finished shape.
5. Let each slab sit for 3 to 5 minutes so the surface firms up slightly but is still impressionable. This short rest helps the pattern hold without the cement collapsing.
6. Press one side of a cheese grater firmly into the top of each slab to create a heavy texture across the surface. Lift it straight up carefully to avoid smearing the pattern.
7. Repeat the pressing motion over the whole surface, lining up the grater in sections if needed to cover the brick evenly. Vary the grater side if you want larger holes, finer texture, or a mixed patterned look.
8. Smooth the brick edges lightly with gloved fingers or a trowel if any cement bulges outward. Leave the top texture untouched so it stays crisp and pronounced.
9. Allow the bricks to cure undisturbed for 24 to 48 hours, depending on temperature and humidity, until they are hard enough to move. Keep them out of heavy rain while they set.
10. After the initial cure, lift the bricks carefully and place them in their final patio or garden spot. Let them continue curing for another 5 to 7 days before regular foot traffic.
Variations & Tips
Different texture faces: Box graters usually have more than one grating surface, and each one leaves a distinct imprint. I like combining coarse and fine sides on different bricks so the path looks intentional rather than overly uniform.
Brick size adjustment: You can make larger stepping stones or narrower path pavers by changing the slab dimensions, but keep the thickness close to 2 inches for strength. Thin pieces are much more likely to crack as they dry.
Cleaner impressions: If the grater sticks or drags, wait another minute before pressing the next slab. Cement that is just a touch firmer will hold detail much better.
Safer outdoor use: The textured surface is especially useful in damp garden areas because it adds traction. That practical detail is one reason I think this project is worth the effort, not just the novelty.
Placement tip: Set the finished bricks on a compacted sand or gravel base if you are making a path. A stable base helps them stay level and reduces shifting over time.
Tool-saving note: Use only old graters you do not plan to return to the kitchen. Once they touch cement, I consider them dedicated outdoor tools from that point on.