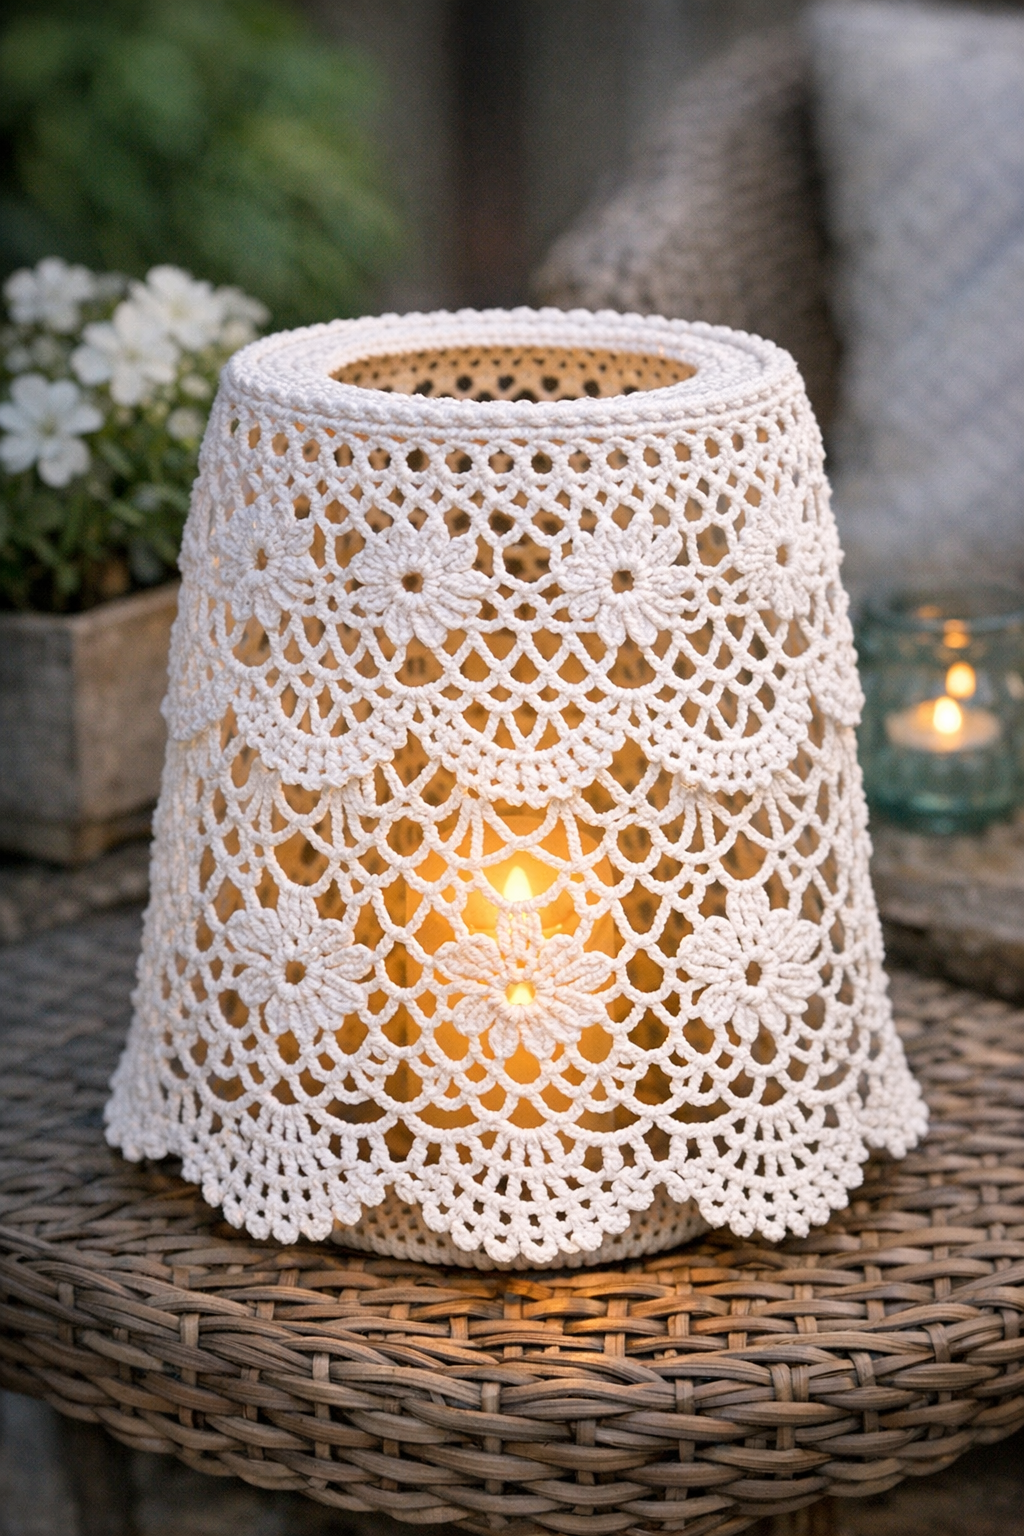
This lantern cover is one of my favorite kinds of DIYs: inexpensive, unexpectedly pretty, and easy to squeeze into a busy weeknight. By turning a wire mesh office trash can upside down and crocheting cotton lace thread through the openings, you get that airy, designer-looking summer lantern vibe without needing fancy supplies or advanced crochet skills.
I love projects like this because they sit right in the sweet spot between craft and home décor. If you already know basic crochet stitches, this comes together surprisingly fast, and even if you are newer to crochet, the mesh acts like a built-in guide so you always know where to place your stitches. It is perfect for patios, porches, sunrooms, or even a cozy corner indoors with a battery candle.
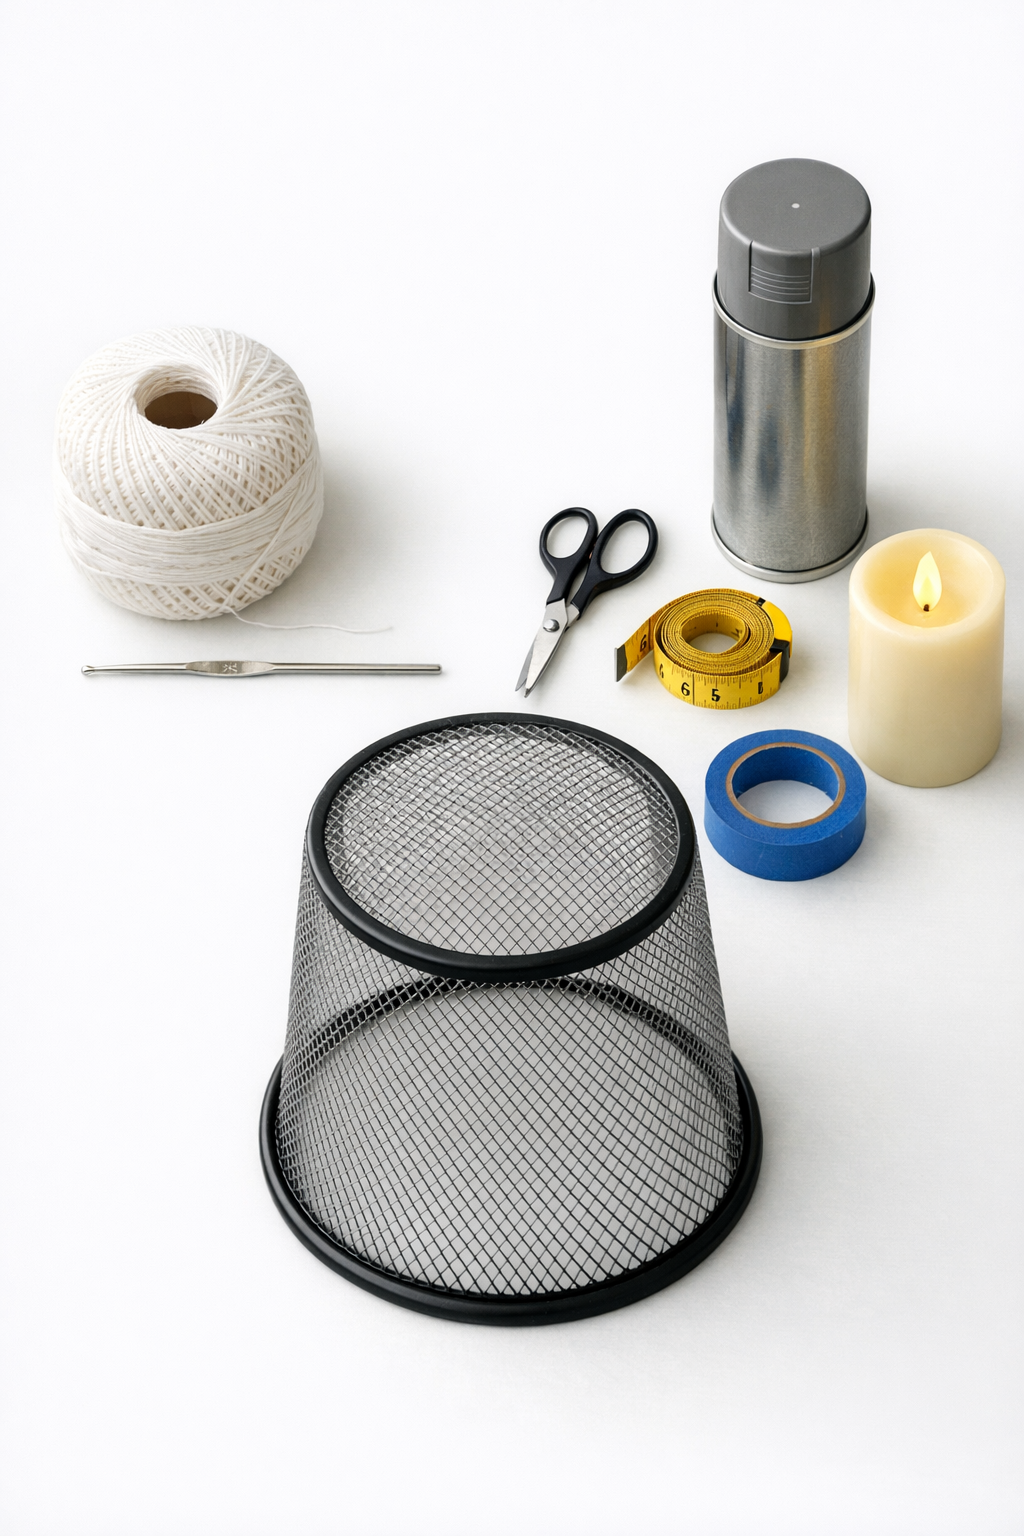
Materials
Instructions
1. Turn the wire mesh trash can upside down and check that it sits evenly, since the former base will become the top opening of your lantern cover.
2. If you want to change the color, lightly sand any glossy finish, wipe away dust, and spray paint the trash can in thin coats; let it dry fully before crocheting.
3. Tie the crochet thread securely to the lower edge of the upside-down can, leaving a 4-inch tail to weave in later.
4. Work one single crochet through every hole around the bottom row of mesh, pulling each stitch snug enough to cover the wire but not so tight that the can warps.
5. Continue upward row by row, placing one stitch through each hole and using the mesh grid as your guide so the coverage stays even.
6. Every few rows, step back and check for skipped holes or uneven tension, then adjust before moving higher because it is much easier to fix early.
7. If you want a lacier look, alternate rows of single crochet with rows where you chain 1 between every mesh opening, but keep the spacing consistent all the way around.
8. When you reach the top section, crochet through each hole around the rim so the edge looks finished and the thread fully frames the opening.
9. Cut the thread with a 6-inch tail, pull it through the last loop, and weave both tails into nearby stitches with a blunt yarn needle.
10. Set the finished cover over a battery-operated candle or LED light, making sure the light sits centered and does not touch the thread.
11. Place the lantern on a porch table, shelf, or indoor sideboard and fluff the crochet slightly with your fingers so the pattern looks open and even.
Variations & Tips
Change the color: Soft white gives this project a breezy summer look, but I also love matte black for a more modern patio style or sage green for something a little garden-inspired.
Use the right light: Stick with a battery-operated candle or LED puck light only. I would never use a real flame here since cotton thread and heat are not a safe mix.
Make it faster: If crocheting every single hole feels like a lot, work every other hole for a more open mesh effect. It still looks intentional and cuts down the stitching time.
Keep your tension relaxed: This is the biggest lesson I learned on my first one. When I pulled too tightly, the shape started looking wonky, so a steady, slightly relaxed tension gives the prettiest finish.
Try a decorative border: Once the can is fully covered, you can add one final round of picots or small scallops around the top rim for an even dressier lace look.
Style it in a group: These look especially pretty when made in two or three sizes and clustered together on an outdoor table. It is one of those dollar store hacks that somehow ends up looking much more expensive than it is.