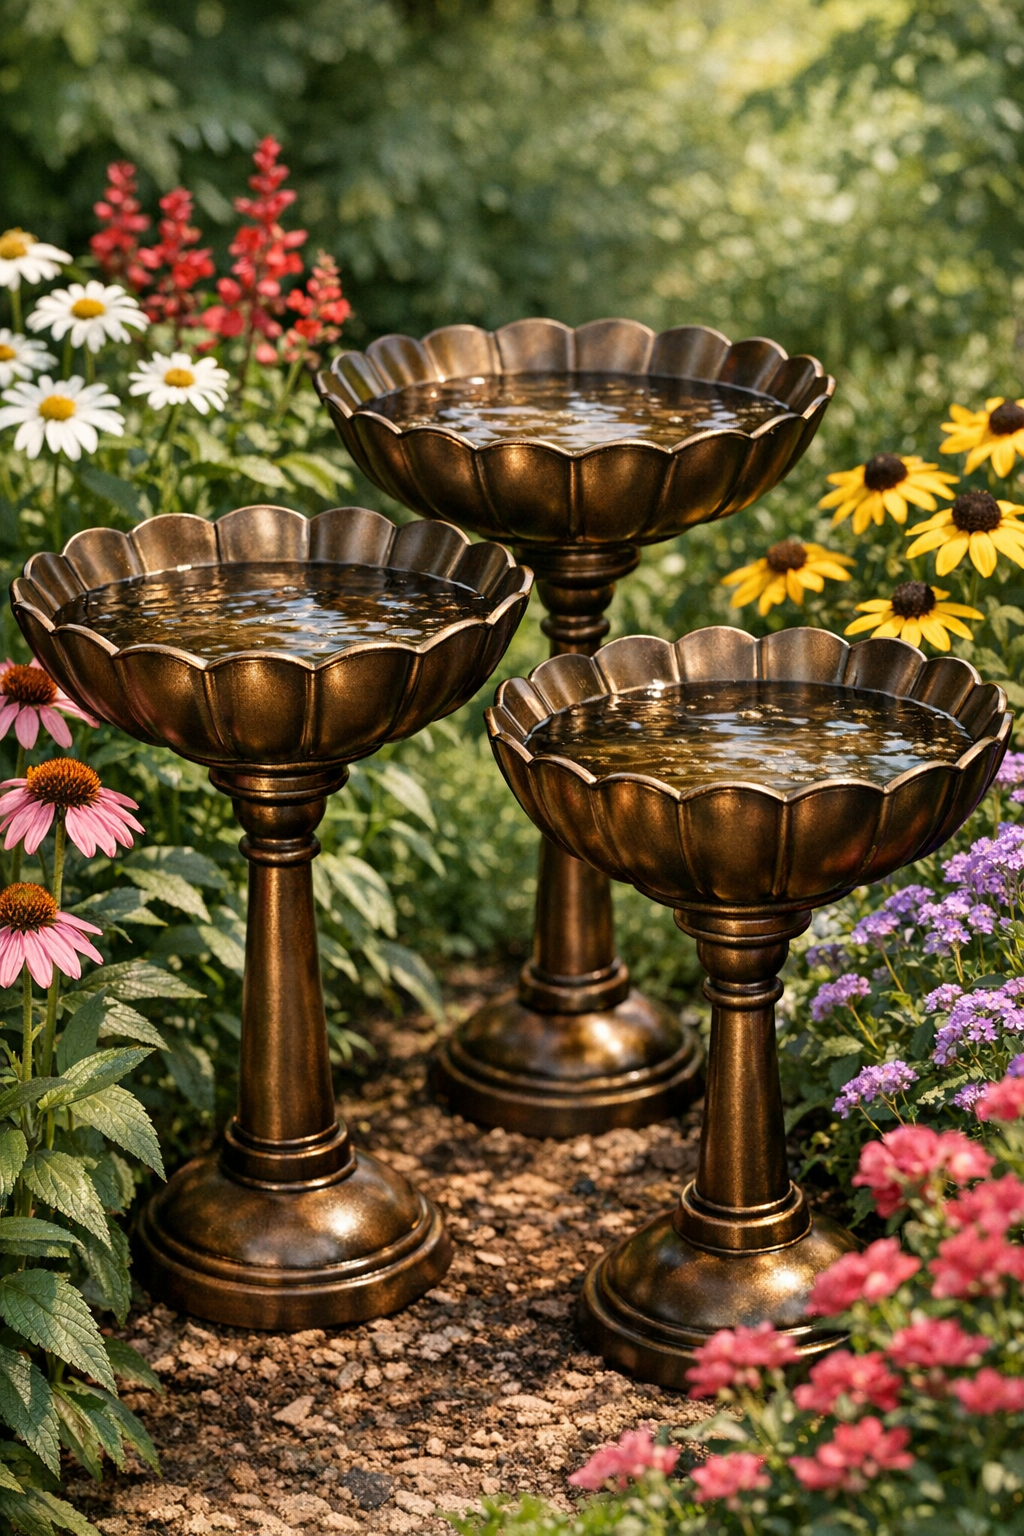
I love a backyard project that looks far more expensive than it actually is, and this birdbath idea checks every box. By pairing a few inexpensive wooden toilet plungers with large scalloped plastic serving bowls and a can of antique bronze spray paint, you can make elegant pedestal birdbaths that genuinely read like garden décor instead of budget hacks.
This is a great project for anyone who wants to dress up a patio, porch, flower bed, or tucked-away garden corner without hauling out a full workshop. I’m always looking for weekend projects I can finish between work emails and dinner prep, and this one is especially satisfying because it comes together quickly but makes a big visual impact outdoors.
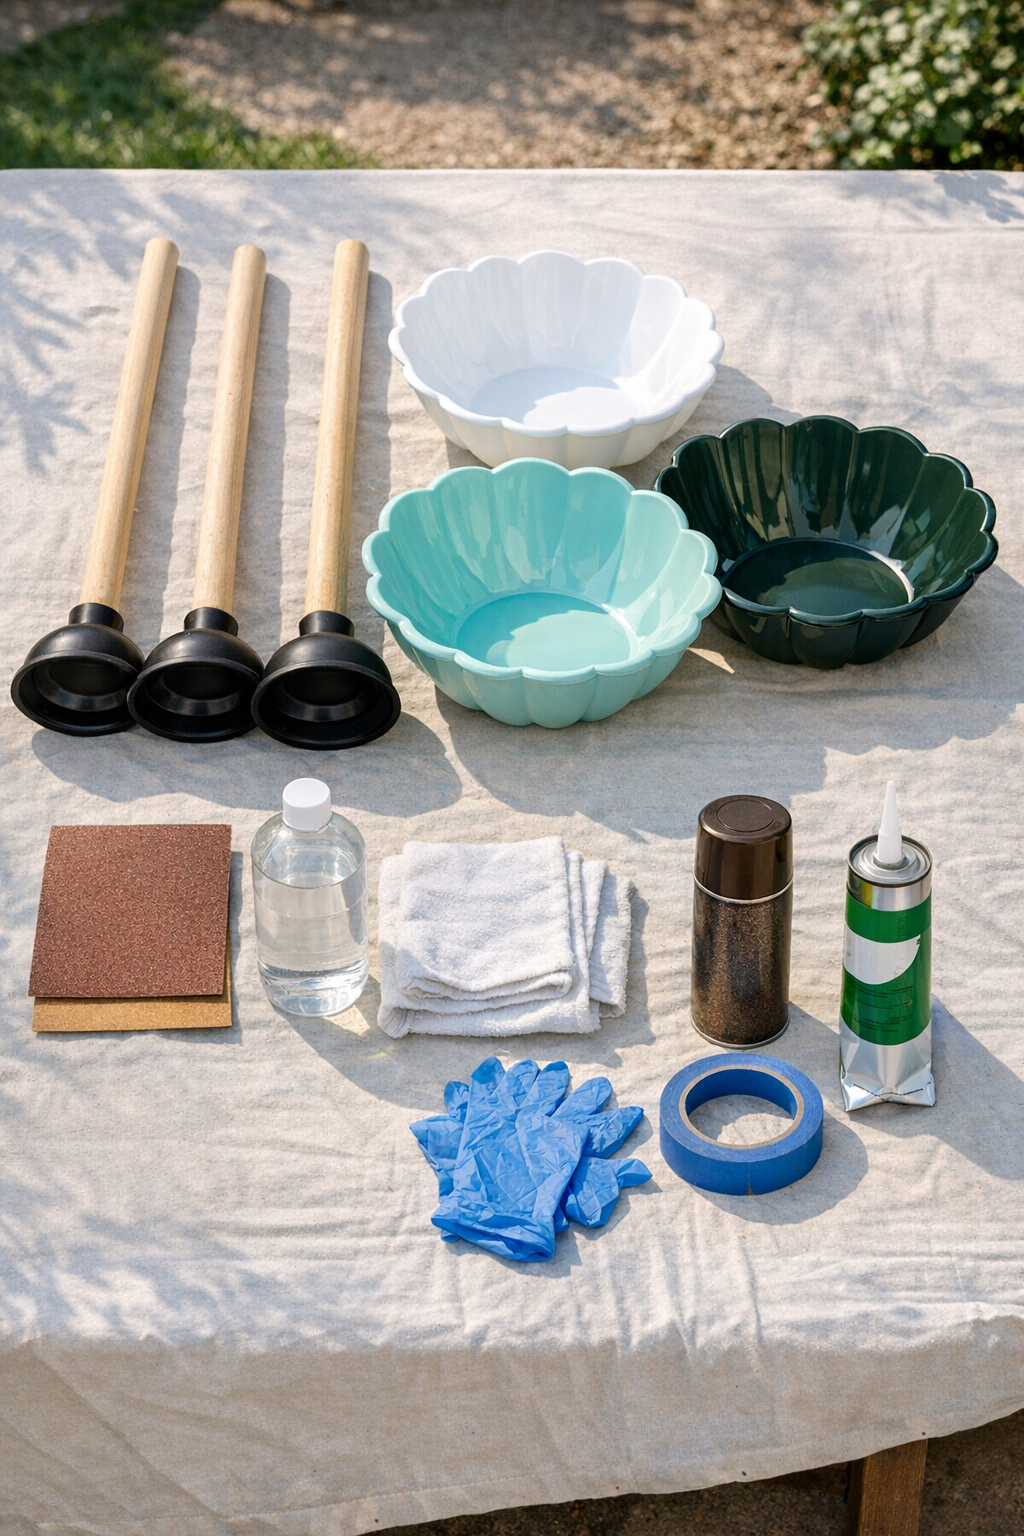
Materials
Instructions
1. Set up your work area outdoors or in a very well-ventilated space, and cover the surface with a drop cloth or cardboard. Put on gloves and make sure all of your pieces are clean and dry before you start.
2. Pull the handles and rubber cups clean of any stickers, dust, or residue, then wipe the plungers and bowls with rubbing alcohol. This quick prep helps the paint and adhesive hold much better, especially on slick plastic.
3. Lightly sand the outside of each plastic bowl, focusing on the bottom center where the plunger will be attached and the outer surfaces that will be painted. Sand the wooden handles and rubber plunger cups lightly too, just enough to dull the finish and give the spray paint some grip.
4. Wipe away all sanding dust with a clean rag, then let every piece dry completely. If you want cleaner edges inside the bowls, use painter’s tape to mask off the interiors and leave the inside surface unpainted for water.
5. Spray paint the outside of each bowl, plus the wooden handle and rubber cup of each plunger, using light even coats of antique bronze paint. Let the first coat dry, then add a second coat for a richer finish and more complete coverage.
6. Allow the painted pieces to cure according to the spray paint directions, giving them extra time if the weather is cool or humid. I’ve learned the hard way that rushing this step usually leads to fingerprints or smudges right when everything starts looking good.
7. Turn one bowl upside down and find the center of the bottom, then apply a generous ring and crosshatch of waterproof outdoor construction adhesive to the top of the rubber plunger cup. Press the plunger cup firmly onto the center of the bowl bottom so the wooden handle becomes the pedestal.
8. Repeat the gluing process for the other two birdbaths, checking each one from the side to make sure the handle stands as straight as possible. Hold each piece in place for the adhesive’s recommended initial grab time.
9. Let the assembled birdbaths cure fully on a flat surface without moving them. Most outdoor adhesives need at least 24 hours, and I really recommend giving them the full cure time before setting them outside.
10. Place the finished birdbaths in level spots around your yard, patio, or garden beds, then fill each bowl with 1 to 2 inches of fresh water. Add a few small stones if you’d like to give birds extra footing, especially in deeper bowls.
Variations & Tips
Stone filler option: If your bowls are a little deep, add a layer of smooth river stones or flat pebbles so smaller birds can perch comfortably while they drink or bathe.
Extra durability: For a longer-lasting finish, use a clear outdoor sealer after the bronze paint has fully cured. This is especially helpful if your birdbaths will sit in direct sun or get regular rain.
Color change: Try matte black, weathered copper, or aged stone spray paint if antique bronze doesn’t match your yard. The same basic build works beautifully with almost any garden-style finish.
Adhesive choice: Use an adhesive labeled for plastic, rubber, and outdoor use so the bond holds up better through temperature changes. If the packaging gives a cure window, follow that instead of guessing.
Placement tip: Put birdbaths near shrubs or small trees so birds feel safe, but not so close that fallen leaves constantly dirty the water. Mine always get the most activity when they’re visible but still a little sheltered.
Easy cleaning: Empty and rinse the bowls every few days to keep the water fresh. A quick scrub with mild soap and a rinse is usually all it takes to keep them looking nice.
Stability check: If your yard is uneven, nestle the plunger handle slightly into mulch or soil for a steadier base, or set each birdbath on a flat paver. That small tweak makes them feel much more secure.