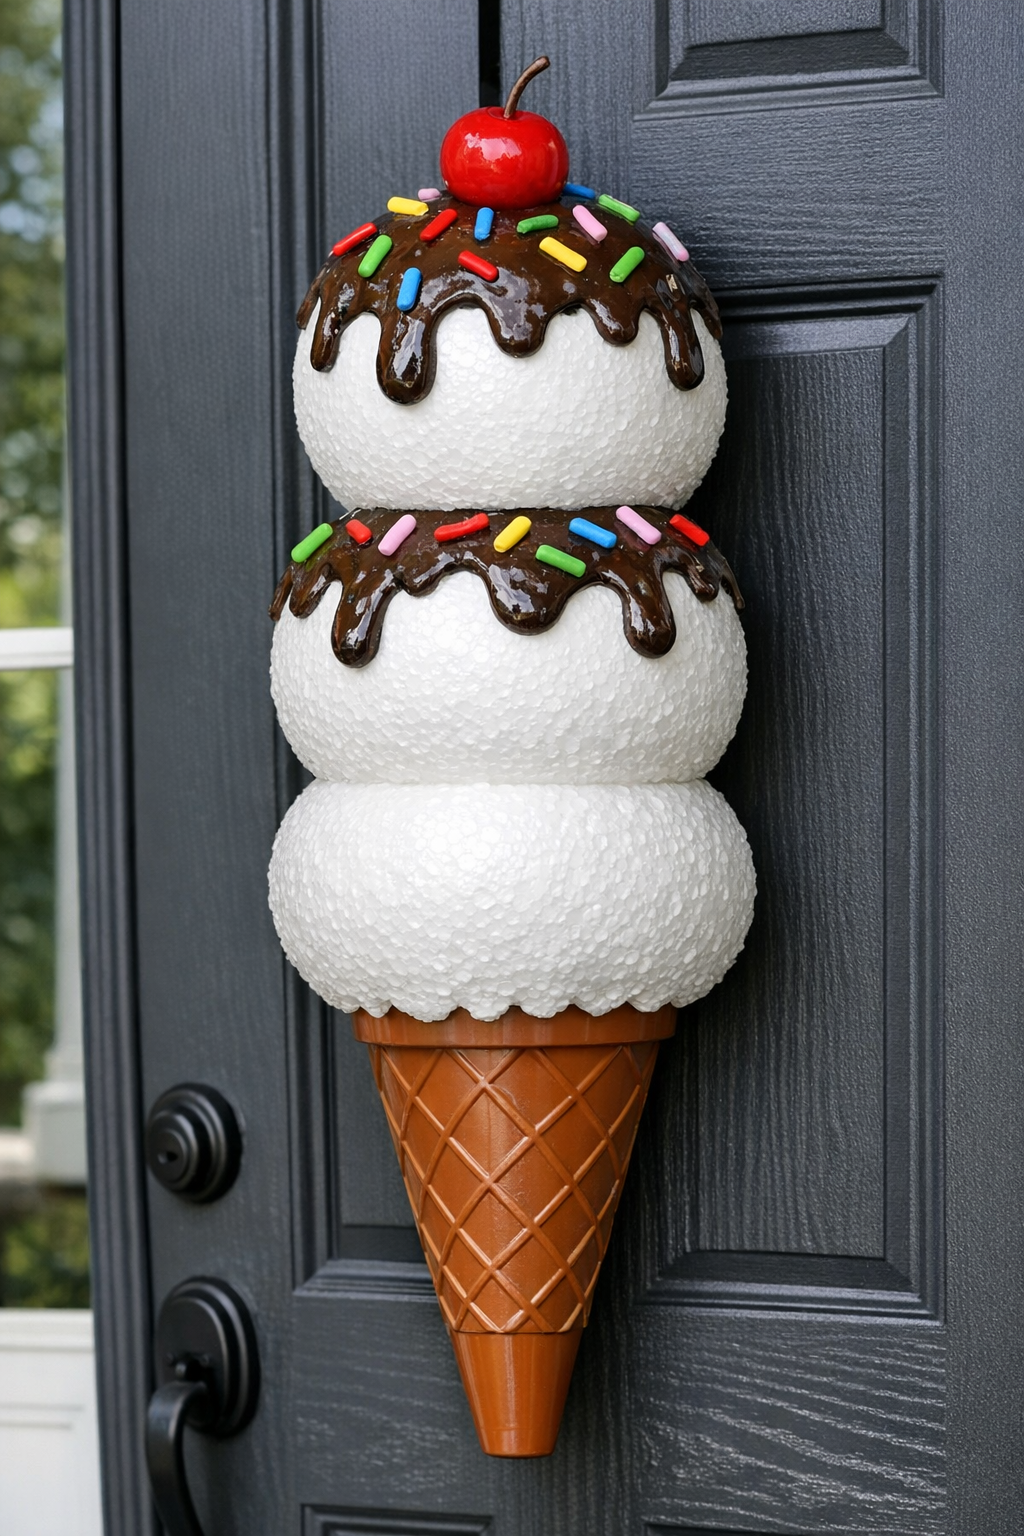
This oversized ice cream cone door hanger is one of those delightfully simple projects that looks far more complicated than it is. By stacking three large Styrofoam balls and attaching them to an inexpensive brown plastic traffic cone, you get a playful front-door decoration with big summer energy and a nice dose of whimsy.
I love projects like this because they borrow humble materials and turn them into something conversation-worthy. If you enjoy seasonal porch décor, party decorations, or cheerful statement pieces that can be made in an afternoon, this is a very approachable build with a high-impact result.
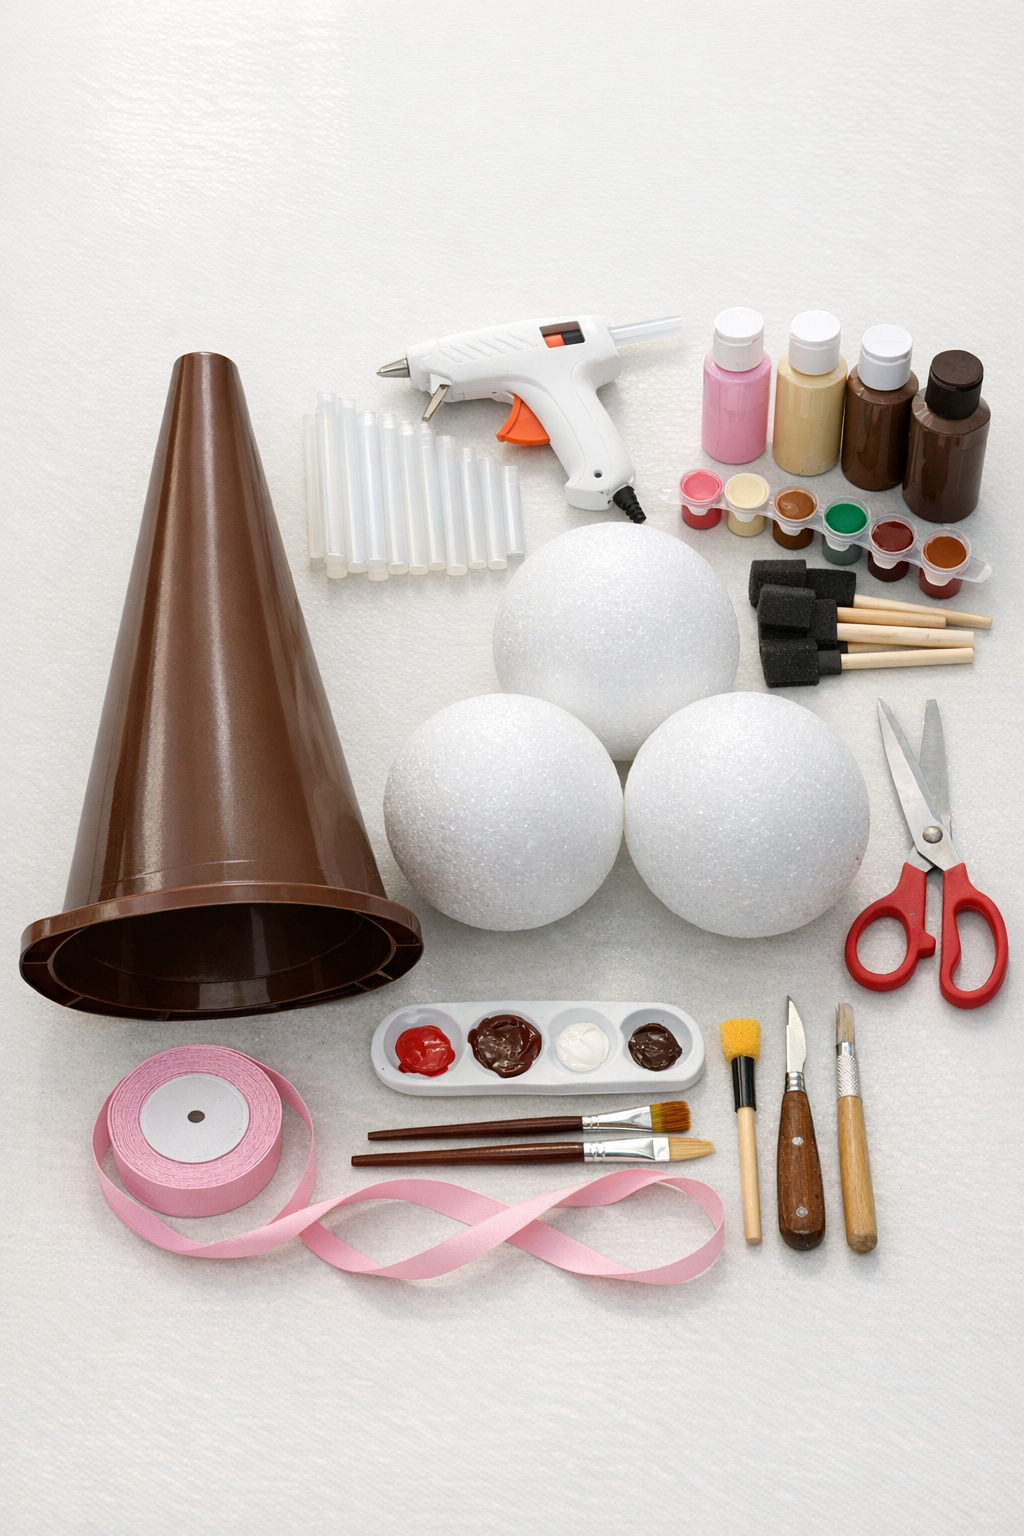
Materials
Instructions
1. Wipe the traffic cone clean with a damp cloth and let it dry fully so the glue will bond better to the plastic surface.
2. Decide which end of the cone will face downward and test the placement of the three Styrofoam balls on top so the stack looks balanced from the front.
3. If you want colored scoops, paint the Styrofoam balls before assembly and allow them to dry completely; I find pastel pink, mint, and vanilla tones especially charming for a front-door display.
4. Flatten a small spot on the bottom of the first Styrofoam ball if needed so it sits securely against the top opening of the cone without rolling.
5. Apply a generous ring of hot glue around the top edge of the traffic cone and press the first ball firmly into place for 20 to 30 seconds.
6. Add hot glue to the top center of the first ball and press the second ball onto it, slightly offset if you want a scooped-ice-cream look.
7. Glue the third ball on top of the second, adjusting the angle so the full stack feels playful but stable.
8. Run extra hot glue into the seams where the balls meet and where the bottom ball meets the cone to reinforce the structure.
9. Attach an 18-inch ribbon or jute loop to the back of the cone near the upper section with hot glue, then cover that attachment point with a square of felt or foam sheet for added support.
10. Add optional details like faux sprinkles, pom-pom trim, or a light dry-brush of brown paint on the cone to make it look more like a waffle cone.
11. Let all glue cool and harden completely, then spray with a clear sealer if the hanger will be displayed on a covered porch.
12. Hang the finished piece on a sturdy wreath hook or door hanger and adjust it so the cone points straight down.
Variations & Tips
Pastel Scoop Version: Paint each ball a different soft color for a classic ice cream parlor look. This is my favorite option when I want the piece to read clearly from the sidewalk.
Waffle Cone Detail: Use a darker brown paint and a fine brush to add diagonal crisscross lines on the traffic cone. That tiny extra step makes the plastic cone look much more intentional.
Lighter Weight Hanging: If your cone is especially heavy, use a metal wreath hanger rather than adhesive door hooks. A secure hanging method matters more than people think with oversized porch décor.
Weather Placement: This project is best on a covered door or porch. Styrofoam and hot glue hold up better when they are protected from direct rain and intense sun.
Stronger Bond Tip: If the plastic cone surface is very slick, lightly scuff it with fine-grit sandpaper before gluing. In my kitchen and craft life alike, surface prep is usually the quiet step that saves the day.
Cherry on Top: For an even more whimsical finish, glue a small red ornament or foam ball at the very top as a cherry. Keep it lightweight so it does not throw off the balance.