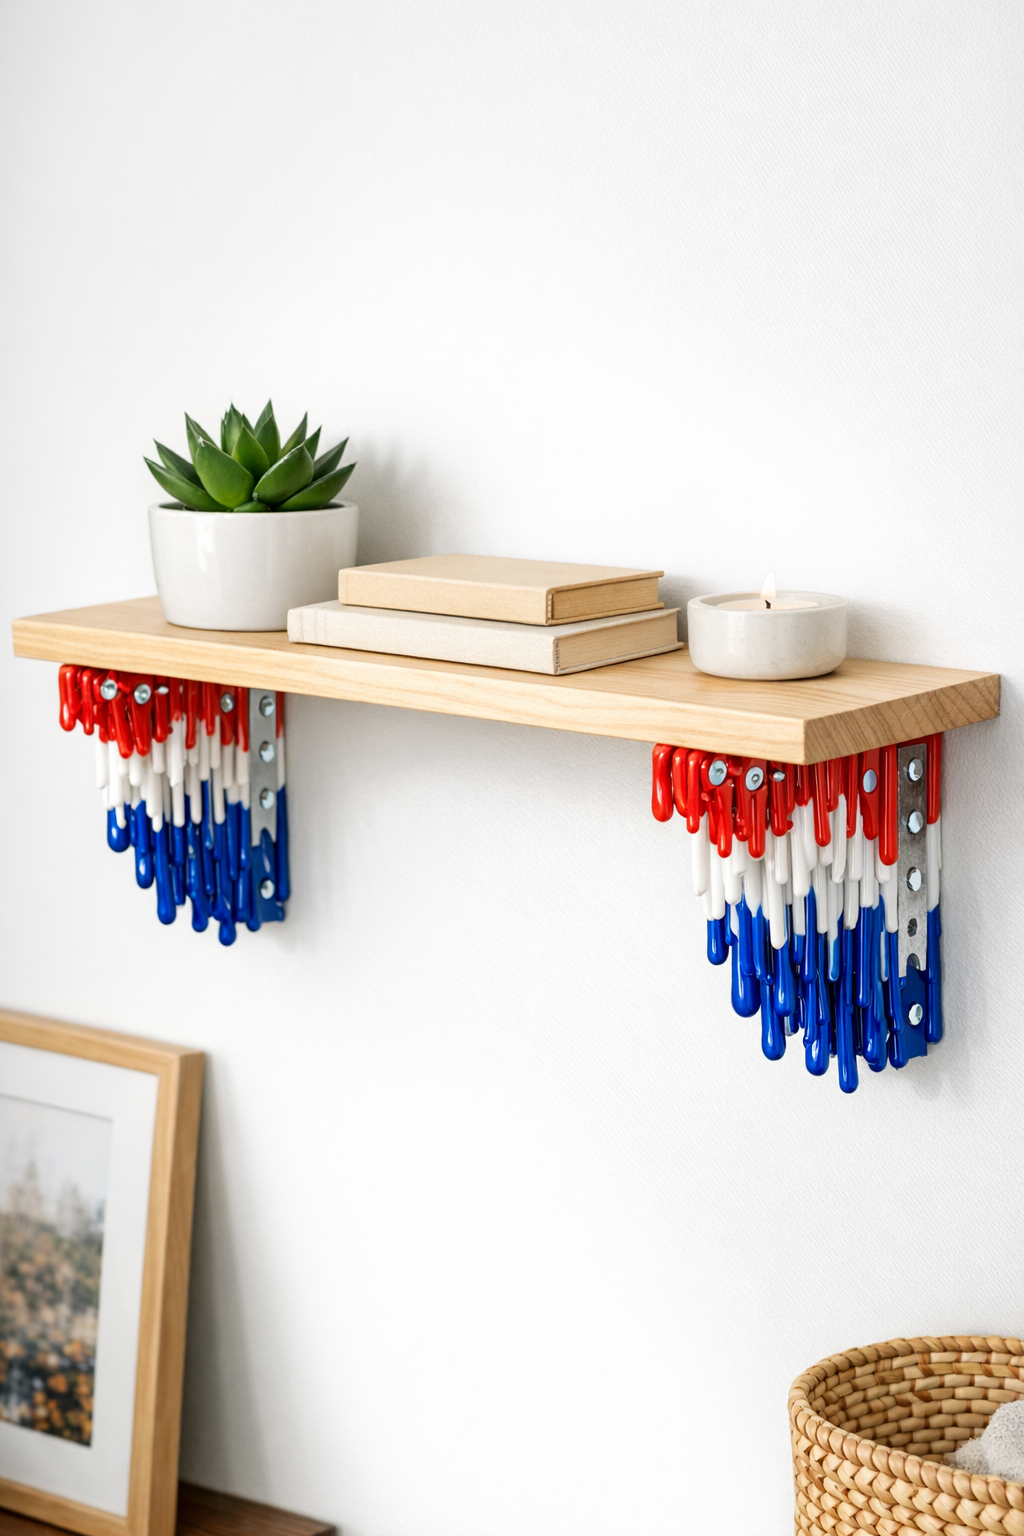
I love a project that turns a handful of unlikely items into something that looks genuinely useful, and these DIY shelf brackets do exactly that. By melting red, white, and blue plastic combs into shaped supports and pairing them with two simple add-ons, you can make bold little brackets that are sturdy enough for a lightweight display shelf and interesting enough to start conversations the minute someone sees them.
This is a good weekend project for anyone who enjoys upcycling and doesn’t mind a little careful shaping work. I especially like projects like this because they take everyday materials that might otherwise get tossed in a drawer and turn them into something fun for the house, dorm room, craft corner, or a kid’s room for lightweight treasures.
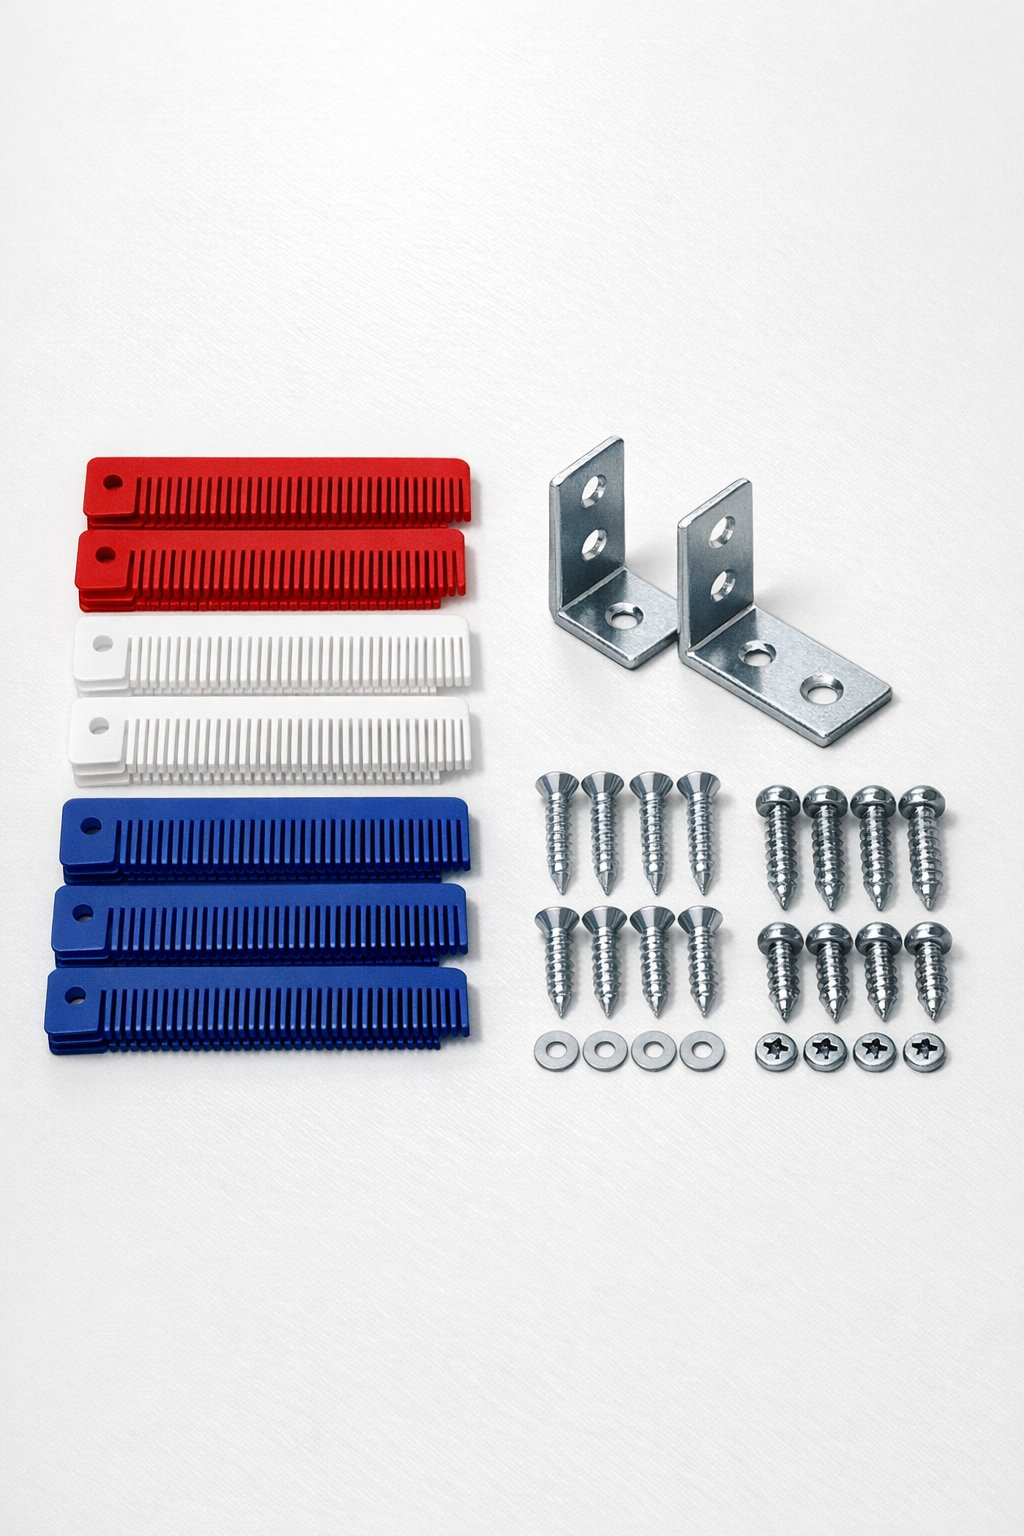
Materials
Instructions
1. Sort the combs by color and wash them well with dish soap and warm water, then dry them completely so no oils or dust interfere with melting.
2. Cut or snap the combs into smaller pieces about 1 to 2 inches long so they melt more evenly and are easier to arrange by color.
3. Arrange one metal angle brace on your protected work surface and plan the bracket covering so one leg of the brace will mount to the wall and the other leg will support the shelf.
4. Heat the comb pieces carefully until they soften, then press red, white, and blue plastic around the outer faces of one angle brace in a layered patchwork, keeping the screw holes open.
5. Build the plastic up to about 1/4 inch thick in the most visible areas so the bracket looks substantial and the colors stand out once cooled.
6. Shape the edges while the plastic is still pliable, smoothing rough spots and wrapping the material snugly around the brace without covering the inside corner completely.
7. Repeat the melting and shaping process for the second bracket, matching the general color balance so the pair looks coordinated even if the patterns are not identical.
8. Let both brackets cool fully until the plastic is hard, then check that all screw holes are clear and trim or re-open them as needed for easy installation.
9. Attach the brackets to the wall or a wooden backing surface with the #8 x 1/2 inch screws, spacing them to fit your shelf board and keeping them level.
10. Fasten your shelf board on top through the upper brace holes, then test the shelf with lightweight décor only, such as framed photos, a small plant, or a little row of cookbooks from the kitchen corner like I’d use at home.
Variations & Tips
For a smoother finish: Press the softened plastic with a piece of parchment paper between the project and your hand or shaping tool to help flatten ridges and blend the colors more evenly.
For picky decorators: If bright patriotic colors are not your family’s style, use the same method with all one color or a softer mix from other plastic combs for a bracket that blends in more quietly.
For better symmetry: Make both brackets at the same time instead of finishing one completely before starting the second, which helps you balance thickness and color placement.
For safe use: These are best for lightweight shelves and décor, not for heavy dishes, big stacks of books, or anything breakable that needs serious structural support.
For cleaner screw access: Coat the inside of each screw hole lightly with a bit of petroleum jelly before shaping the melted plastic around the brace, then wipe it clean after cooling so the holes stay easier to clear.
For a more polished look: Keep the front-facing edge slightly rounded and the underside flatter; that little detail makes the brackets look more intentional and less like scraps that were simply melted together.