These heavy ridged garden stakes are one of those wonderfully simple projects that look far more impressive than the supply list suggests. By using plastic popsicle molds as forms, you get a clean, sturdy shape with pretty vertical ridges, and the “secret item” is a length of wire mesh that gives each cement stake extra strength so it holds up better out in the garden.
I love projects like this because they are affordable, practical, and easy to personalize. If you need simple markers for flower beds, support stakes for lightweight plants, or just a decorative handmade touch tucked between your herbs and tomatoes, this is a satisfying weekend project that doesn’t ask for fancy tools or a big workspace.
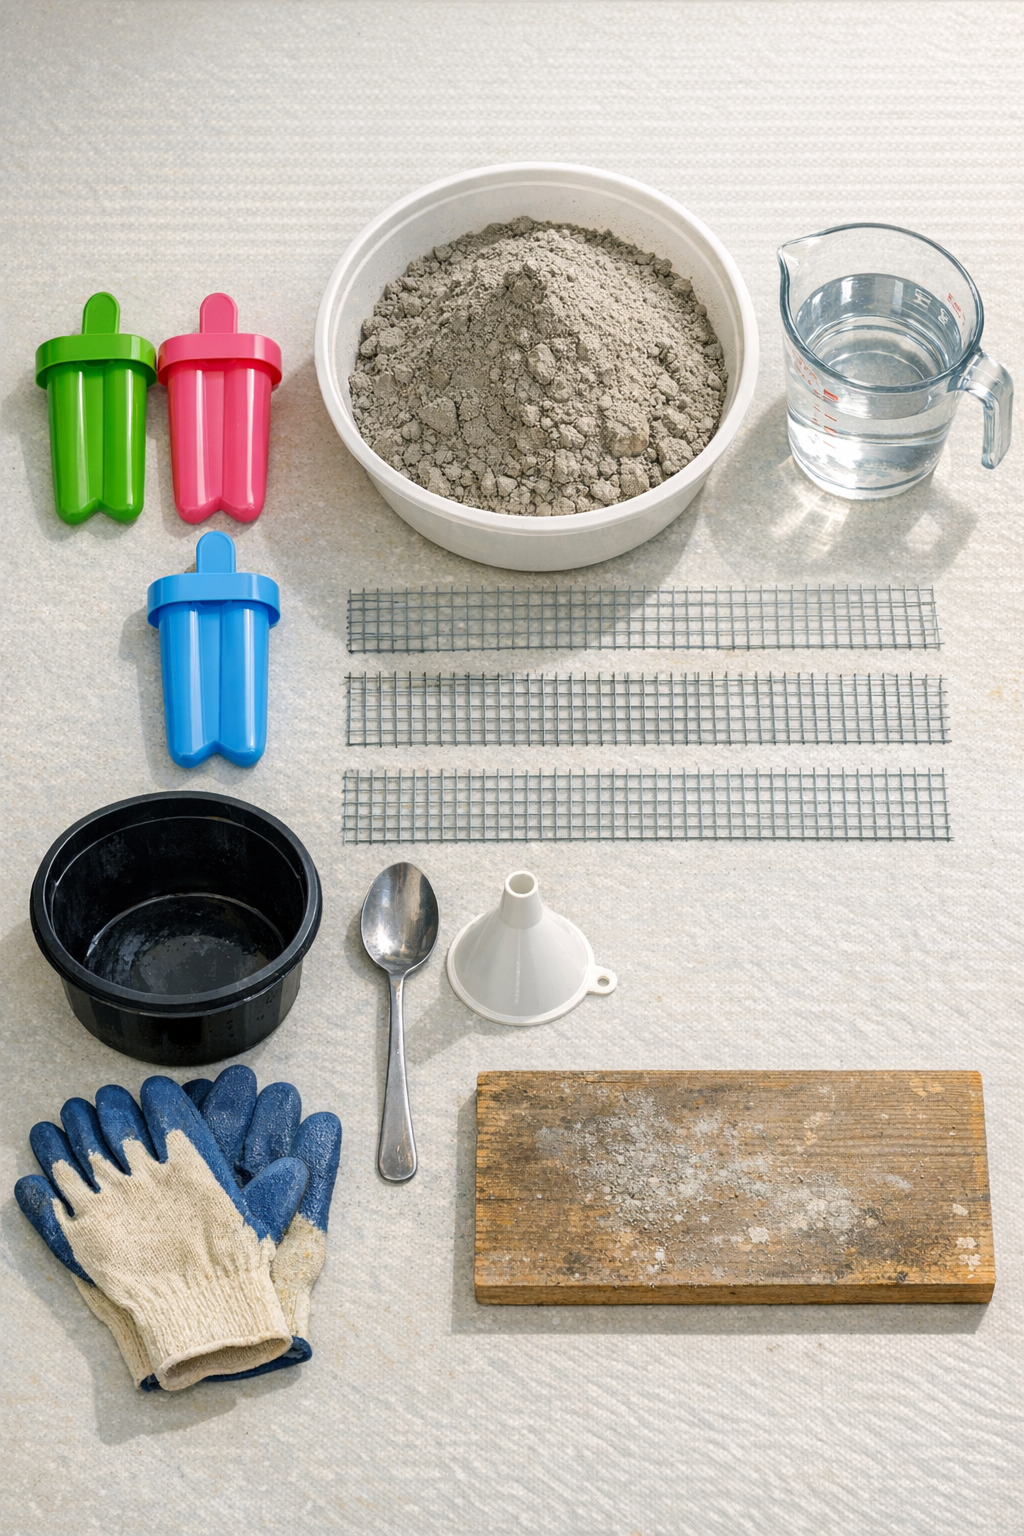
Materials
Instructions
1. Cover your work surface with a drop cloth or cardboard, then lightly coat the inside of each plastic popsicle mold with cooking oil so the cement releases more easily later.
2. Cut three strips of galvanized wire mesh to 3/4 inch by 7 inches, and trim any sharp ends so each strip can slide into a mold without catching.
3. In a small tub, mix the cement and water until it reaches a thick pancake-batter consistency that pours but still holds the mesh upright.
4. Spoon or funnel a little cement into each mold until it is about one-third full, then tap the mold gently on the scrap board to release trapped air.
5. Insert one wire mesh strip into the center of each mold, letting it run lengthwise so it reinforces the full stake from top to bottom.
6. Fill each mold to the top with more cement, then tap again several times to settle the mix and bring bubbles to the surface.
7. Smooth the top with the back of a spoon, and if you want the stakes to have a slightly pointed planting end, shape one exposed end by angling the wet cement gently before it sets.
8. Let the cement cure undisturbed according to the mix instructions, usually 24 hours for handling and longer for full strength.
9. Flex the plastic molds gently to release the stakes, then slide each one out slowly so the ridged sides stay crisp and clean.
10. Sand any rough edges lightly, and let the stakes finish curing for another 24 to 48 hours before pressing them into garden soil.

Variations & Tips
For plant labels: Press small stamped metal tags into the soil near each stake, or write on a separate weatherproof marker instead of writing directly on the cement.
For picky gardeners who like a cleaner look: Keep the stakes plain gray for a simple, neat finish that blends into most flower beds without feeling busy.
Add color: Once fully cured, dry-brush the ridges with outdoor craft paint or masonry paint to highlight the texture.
Make them taller: If your molds are deeper, increase the wire mesh length so the reinforcement runs nearly the full length of the stake.
Prevent cracks: Don’t make the cement too watery, and always tap the molds after filling so hidden air pockets don’t weaken the finished pieces.
Easier release: If a stake resists coming out, wait another few hours and flex the mold more gently rather than pulling hard on the cement.
Best garden use: These are ideal for marking rows, supporting very small plants, or adding decorative structure, but I wouldn’t use them for heavy tomato vines or anything that needs serious load-bearing support.