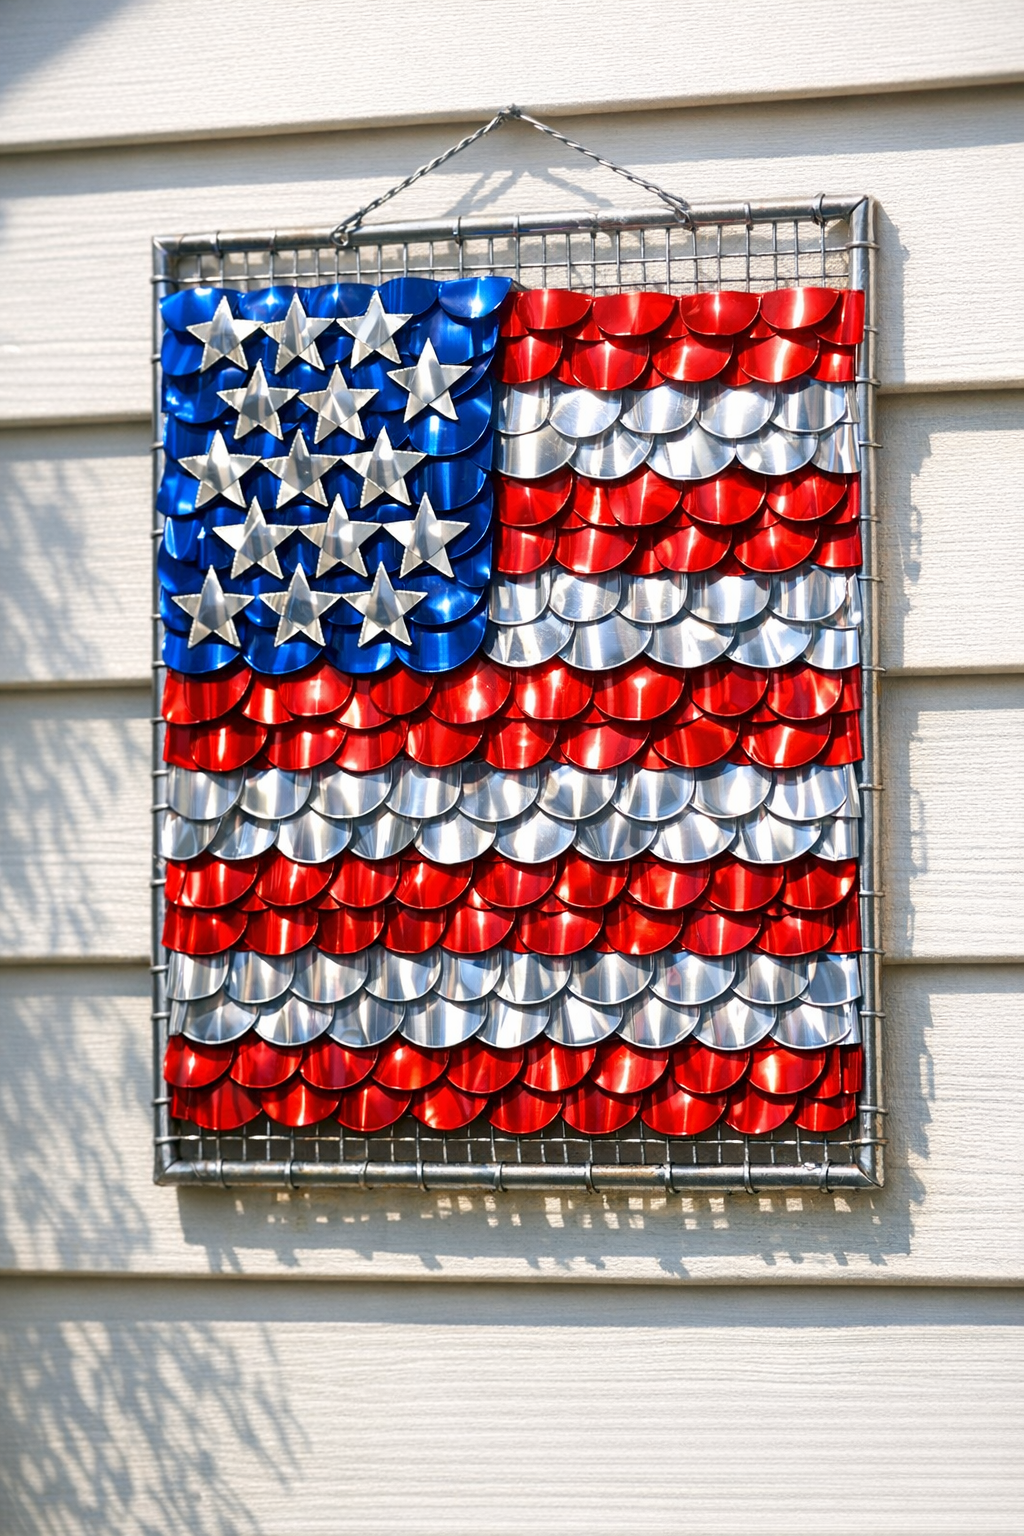
I love a project that turns everyday odds and ends into something cheerful for the yard, and this patriotic outdoor siding piece does exactly that. By stacking cut red, white, and blue aluminum soda cans with just two other inexpensive supplies, you can make a lightweight decoration that catches the light beautifully and adds a fun pop of color to a fence, porch post, shed wall, or garden gate.
This is a great weekend craft if you like budget-friendly outdoor décor and don’t mind a little careful cutting. I especially like projects like this in summer, because they make a cookout or family gathering feel a little more festive without spending much at all. If you can cut, punch, and stack simple shapes, you can make this.
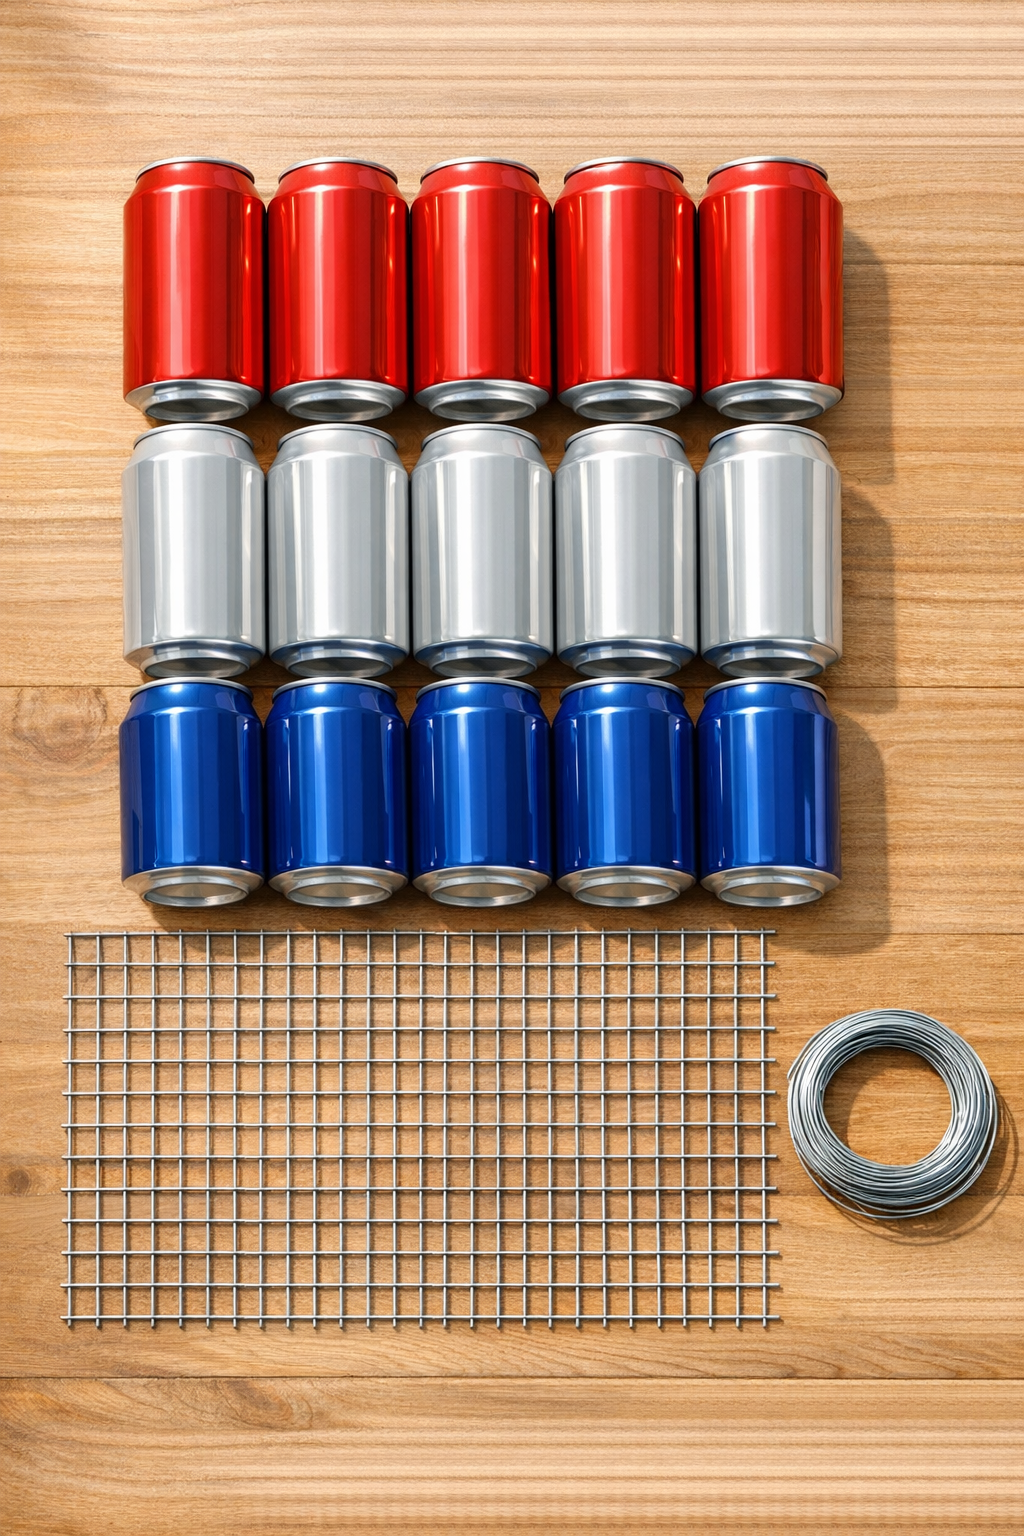
Materials
Instructions
1. Rinse all 12 cans thoroughly, let them dry completely, and press out any major dents so the sides are as smooth as possible.
2. Use scissors or tin snips to cut off the top and bottom of each can, then cut straight down the side to open each can into a flat sheet.
3. Trim each flattened sheet into a rectangle about 2 inches wide by 3 inches tall, keeping the colored sections centered so each piece shows a strong red, white, or blue color.
4. Fold each rectangle gently in half lengthwise and then open it back up slightly to create a shallow center bend, which helps the finished piece catch light and look more dimensional.
5. Poke two small holes near the top edge and two near the bottom edge of every rectangle, placing them about 1/4 inch in from the corners.
6. Cut the wire mesh to a clean 12-inch by 18-inch panel if needed, and turn in or trim any sharp wire ends around the edges.
7. Arrange the metal rectangles on the mesh in horizontal rows, alternating red, white, and blue in a flag-inspired pattern until the panel feels balanced and full.
8. Cut short 3-inch lengths of craft wire and use them to tie each metal rectangle to the mesh through the punched holes, twisting the wire tightly on the back.
9. Slightly overlap the rectangles as you attach them so they look layered like scales or siding, with each row covering the upper edge of the row beneath it.
10. Continue filling the mesh panel from top to bottom, checking that the colors stay evenly distributed and that no sharp corners stick out.
11. Bend each attached piece just a little by hand so the rows have movement and sparkle when the light hits them outdoors.
12. Add two looped pieces of craft wire to the top corners for hanging, then mount the finished panel on outdoor siding, a fence, or a garden wall where it can stay dry between heavy storms.
Variations & Tips
For extra shimmer: Leave some pieces slightly more curved than others so the panel reflects sunlight with more movement. I think this is especially pretty near a porch or garden path.
For picky color preferences: If you want a cleaner look, use mostly solid-color can sections and trim away nutrition panels or barcode areas. It makes the finished project look more polished.
For safer handling: Freshly cut aluminum edges can be sharp, so wear gloves and flatten corners with the back of a spoon or pliers before attaching the pieces.
For a larger display: Make two or three panels and hang them side by side on a fence or shed. That turns a small craft into a real backyard focal point for summer gatherings.
For weather durability: Galvanized mesh and wire hold up well outdoors, but I still like to hang this in a somewhat protected spot so it keeps its color and shape longer.
For easy hanging: If your siding or wall area is windy, add two more wire ties at the bottom corners to keep the panel from shifting or rattling too much.