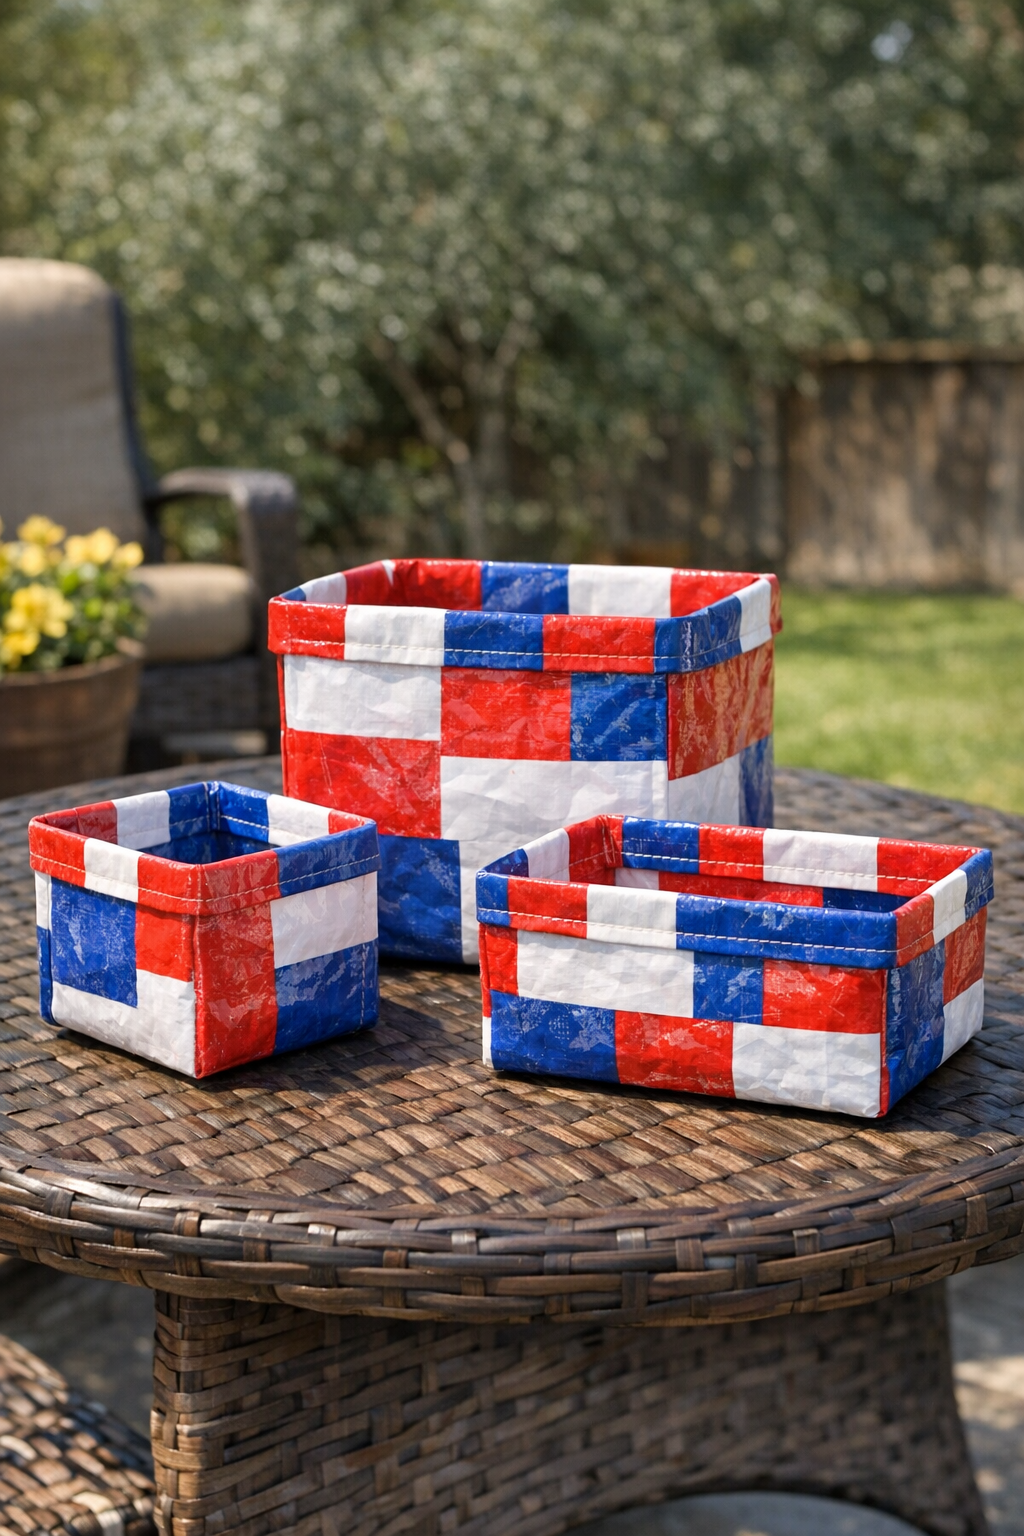
I love a project that turns something headed for the trash into something you’ll actually use, and these outdoor utility boxes do exactly that. By ironing layers of torn red, white, and blue plastic tablecloths together, you can make sturdy little weather-friendly boxes that are perfect for stashing napkins on the patio, seed packets in the potting area, citronella candles, grilling tools, or all those little outdoor odds and ends that seem to wander off.
This is a great beginner-friendly upcycling project, especially if you like practical crafts with a big “wait, that’s made from what?” reaction at the end. I’m always looking for simple ways to make our porch and backyard feel a little more organized before family comes over, and these boxes are one of those satisfying makes that look much fancier than the materials would suggest.
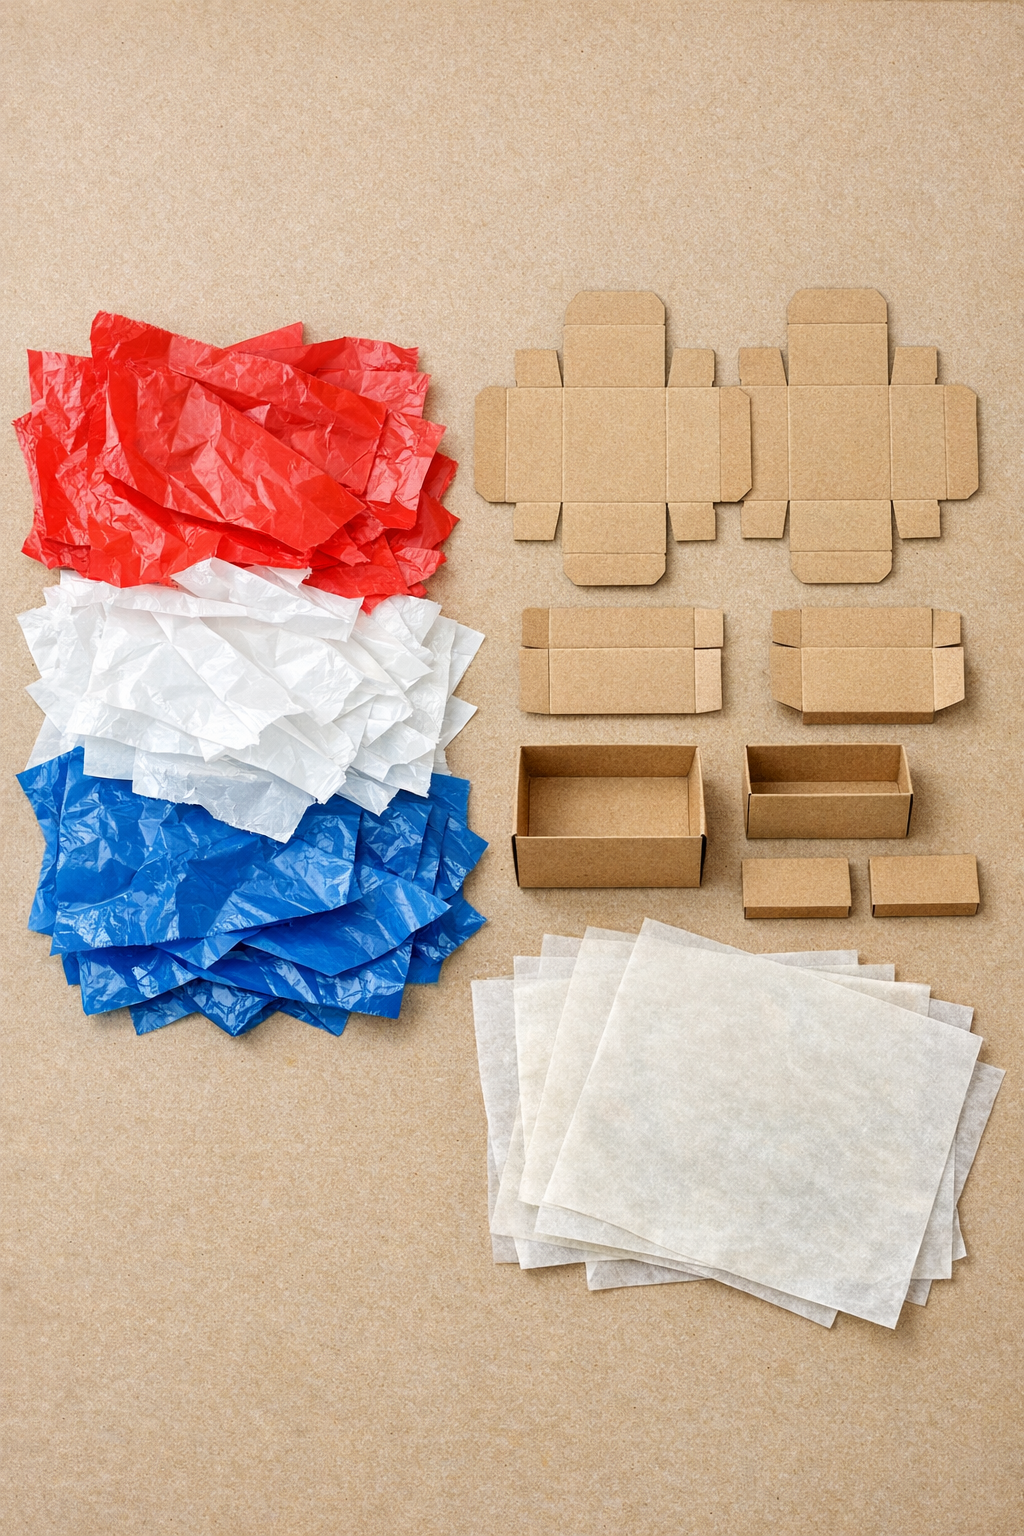
Materials
Torn red, white, and blue plastic tablecloths, about 3 tablecloths total or enough to cut 24 rectangles measuring 10 inches x 12 inches
Instructions
1. Wipe the plastic tablecloths clean and let them dry fully, then cut away any heavily stretched or damaged edges so you’re working with flat usable sections.
2. Tear or cut the plastic into rectangles roughly 10 inches x 12 inches, mixing the red, white, and blue sections so each finished box will have several layered pieces.
3. Stack 8 plastic rectangles for your first box, rotating the colors as you go, then sandwich the stack between two sheets of parchment paper.
4. Using a dry iron on low to medium heat, press over the parchment in slow passes for 10 to 15 seconds at a time until the layers fuse into one thicker sheet; let it cool before checking.
5. Repeat the ironing process to make 3 fused sheets total, adding one or two extra plastic layers to any area that feels too thin or flimsy.
6. Flatten or assemble your cardboard forms so each one measures about 8 inches x 5 inches x 4 inches, because these will be the shaping molds for the utility boxes.
7. Place one fused plastic sheet on the work surface, center a cardboard form on top, and wrap the plastic up around the sides to check fit; trim the corners with short diagonal cuts so the sides can fold neatly.
8. Re-cover the plastic with parchment paper and carefully iron the folded side flaps where they overlap, fusing the corners together one at a time around the cardboard form.
9. Let the plastic cool completely, then slide the cardboard form out and gently press the box back into shape with your hands.
10. Repeat the folding and fusing process for the remaining two boxes, checking that the bottoms are sealed well and reinforcing any weak seams with a small patch of leftover plastic fused over the spot.
11. If you want a cleaner top edge, fold the rim down about 1/2 inch all the way around each box and press it again between parchment sheets to create a sturdier finished lip.
12. Set the boxes outside only after they have cooled fully and held their shape, then fill them with lightweight outdoor supplies like paper goods, garden gloves, twine, seed packets, or small grilling accessories.
Variations & Tips
For a sturdier box: Use 10 to 12 layers of plastic instead of 8, especially if you plan to store heavier items like hand tools or full candle jars.
For picky color preferences: If the bold patriotic mix feels too busy, stack more white layers on the outside and tuck the red and blue inside for a softer marbled look. I do this when I want something that blends in better on the porch table.
For better ironing results: Always start with lower heat and increase only if needed, because plastic can shrink fast. Every iron runs a little differently, so test a small scrap first.
To make matching organizers: Try making one shallow tray, one medium box, and one taller box using the same method so you have a set for napkins, utensils, and condiments during outdoor meals.
For cleaner corners: Trim less than you think you need at first. Small cuts are easier to adjust, and they help avoid gaps at the corners.
Outdoor use tip: These are best for covered outdoor spaces like porches, decks, and potting benches rather than full-time exposure in hot direct sun.
Kid-helpful job: If little hands want to join in, let them sort the color layers or help shape the cooled boxes, while an adult handles the ironing. That makes it feel like a family project, which is always my favorite kind.