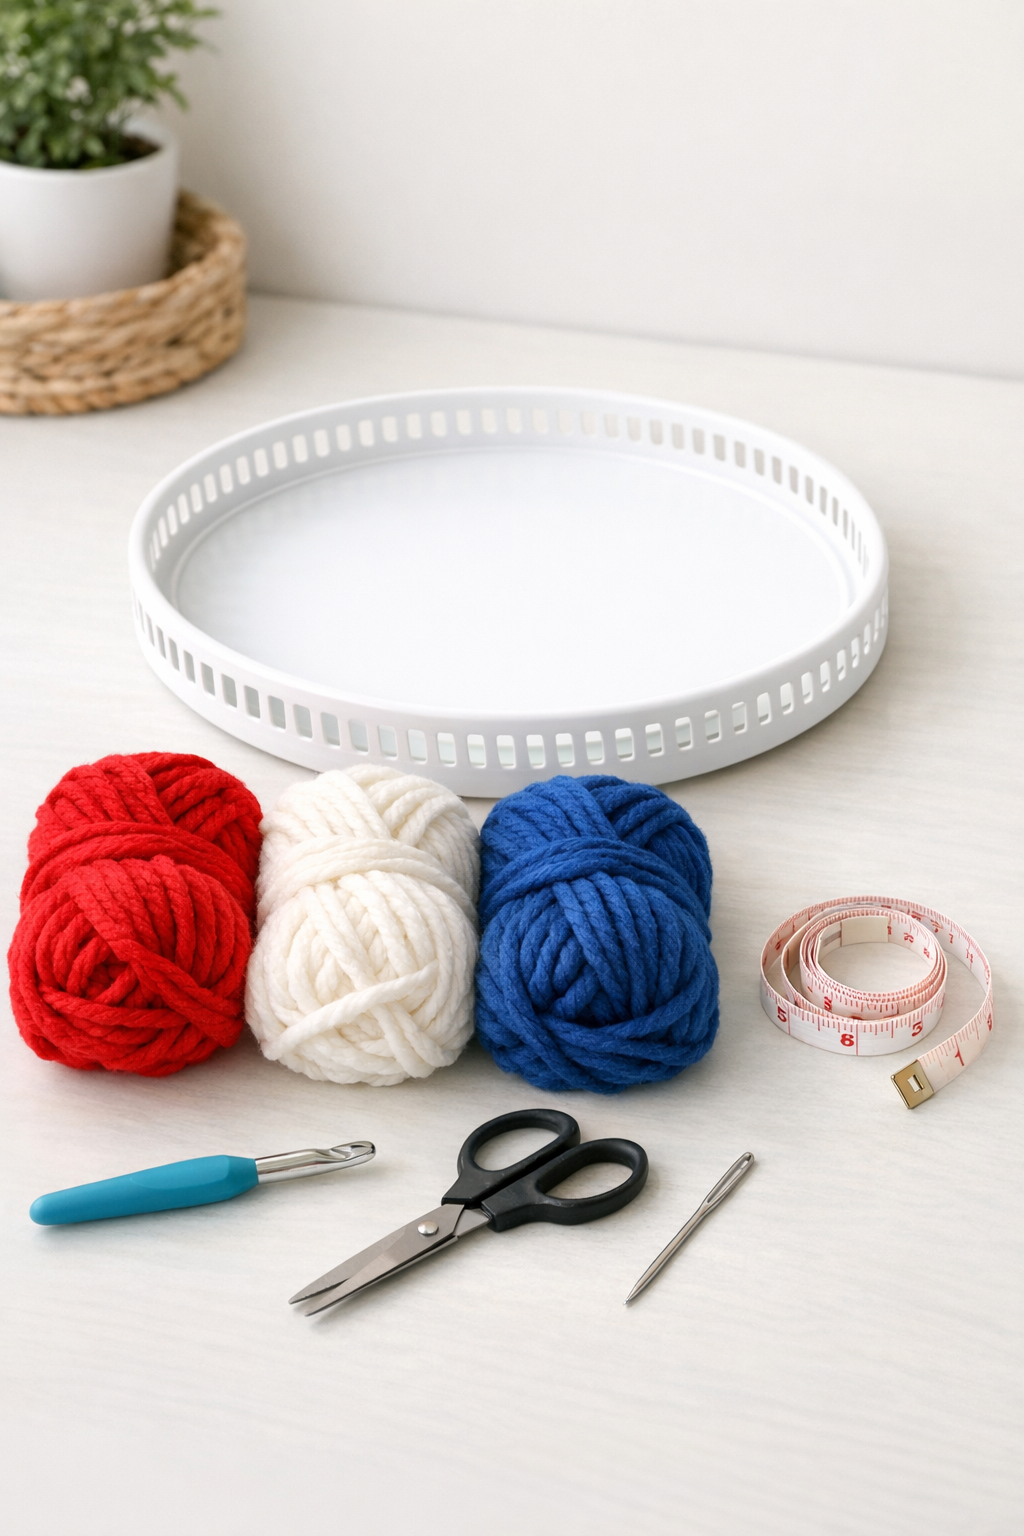
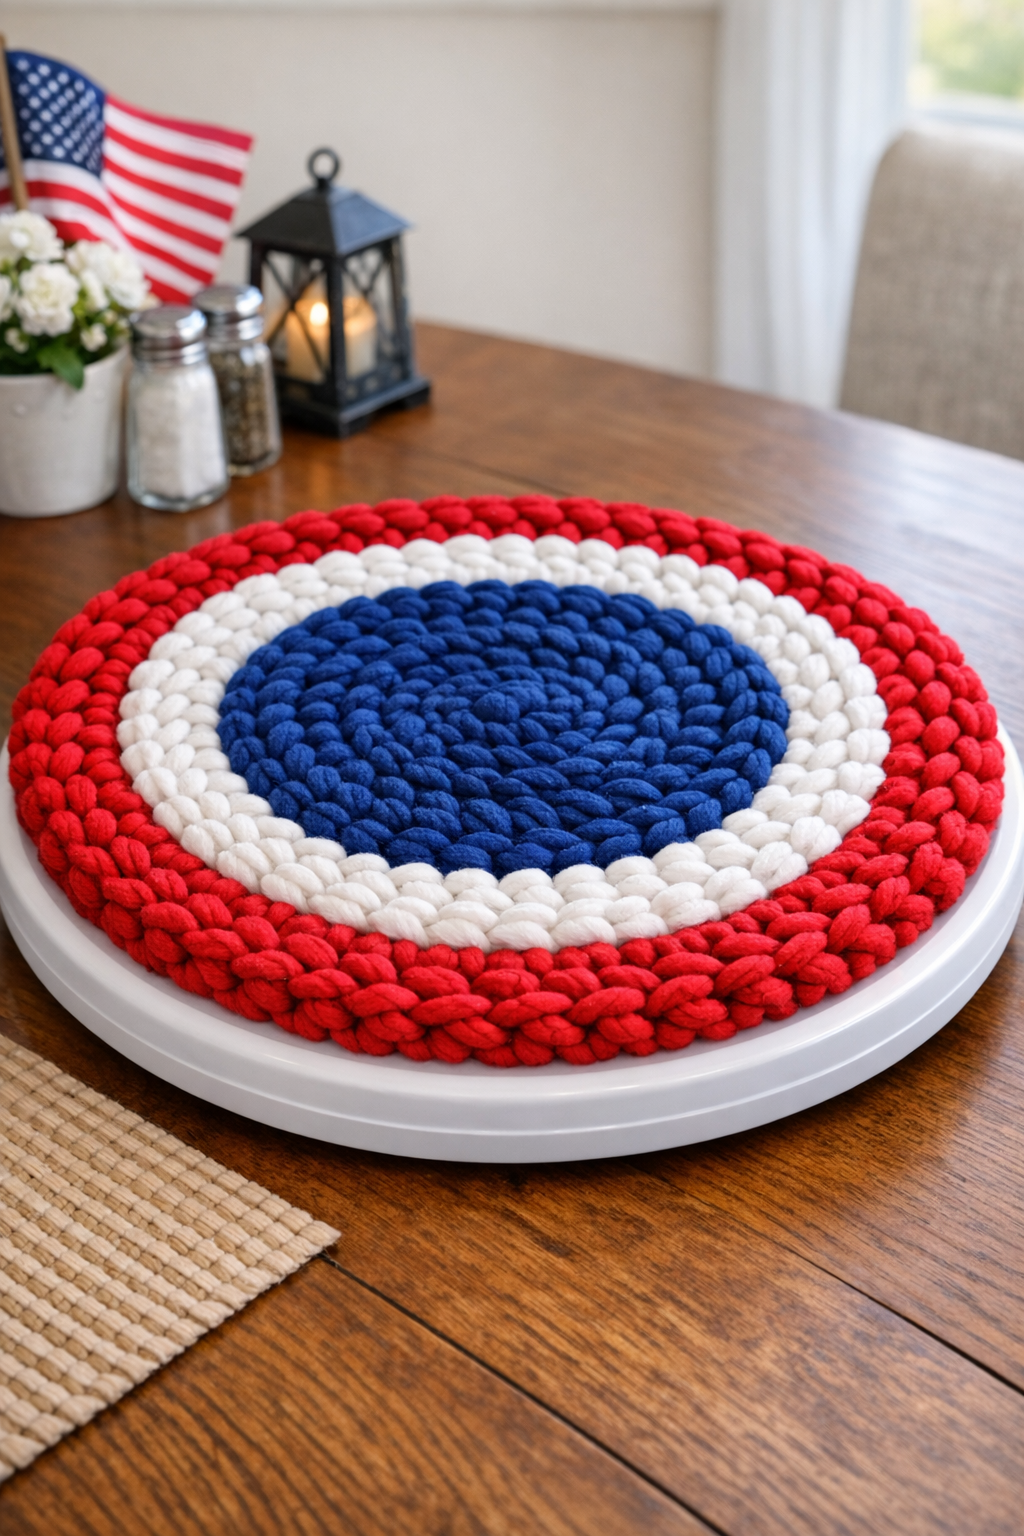
I’m always a little too excited when a dollar-store find turns into something that looks surprisingly polished, and this project absolutely scratches that itch. This patriotic table topper uses a simple plastic lazy Susan turntable as the base, then chunky red, white, and blue yarn crocheted right through the openings to create a bold, textured piece that looks festive without being fussy.
If you like easy crochet projects that don’t require a huge time commitment, this one is a great fit. I especially love projects like this during busy weeks, because I can work on them in short bursts after dinner and still end up with something cute enough to put out for summer parties, Memorial Day, or the Fourth of July.
Materials
1 plastic lazy Susan turntable, 10 to 12 inches in diameter, with open slots or holes around the rim
Instructions
1. Wipe down the lazy Susan and check that the edge openings are smooth and free of sharp plastic bits. If needed, trim any rough spots so the yarn will slide through easily.
2. Decide how you want to place your colors before you start; I like alternating red, white, and blue in broad sections for a clean patriotic look. Measure the diameter so you can estimate how many rounds will fit in the center.
3. Tie the white yarn securely through one outer opening on the lazy Susan, then make a starting loop on your hook. Work one single crochet through each opening around the outer edge, anchoring the yarn directly to the plastic base.
4. Join the round with a slip stitch and chain 1. Work another round of single crochet into the first round, keeping the stitches snug but not so tight that the lazy Susan starts to warp.
5. Switch to red yarn by fastening off the white and pulling the red through the last stitch. Crochet 1 to 2 rounds in red, depending on how wide you want each color band to appear.
6. Change to blue yarn and continue working in the round, using single crochet stitches to build inward. If the center begins to cup, add an extra stitch every 6 to 8 stitches for one round to help it lie flatter.
7. Keep rotating the lazy Susan as you crochet so the work stays comfortable and the tension remains even. Continue changing colors every 1 to 2 rounds until the crocheted section reaches close to the center opening.
8. When the remaining center gap is small, work shorter, tighter stitches as needed so the opening closes neatly. Slip stitch to finish, cut the yarn with a 6-inch tail, and pull it through.
9. Thread all loose yarn tails onto the yarn needle and weave them securely through the back of the stitches. Trim the ends close so the finish looks clean from the top.
10. Set the topper on your table and give the lazy Susan a gentle spin to make sure nothing catches or loosens. If any section looks uneven, tuck and adjust the stitches by hand until the shape looks balanced.
Variations & Tips
Change the color order: You can make the stripes evenly spaced, keep white as the largest section, or place blue in the center for more of a flag-inspired look.
Use a different stitch: Single crochet gives the neatest, tightest finish, but half double crochet can work if your lazy Susan has larger openings and you want a slightly faster project.
Pick the right base: The easiest lazy Susans for this are lightweight plastic ones with visible openings or gaps near the edge. If yours is completely solid, this method will not anchor properly without drilling holes first.
Keep it flat: If your topper starts to ripple, you likely added too many stitches; if it cups upward, add a few increases on the next round. I usually pause every couple of rounds and lay it flat on the table to check.
Make it party ready: I like using this as a base under a bowl of wrapped candies or a simple mason jar centerpiece. It adds color fast, and it’s one of those pieces that looks like you spent way more time on it than you actually did.
Try other seasons: Once you make one, the idea is easy to adapt with other color palettes like orange and cream for fall, red and green for Christmas, or soft pastels for spring.