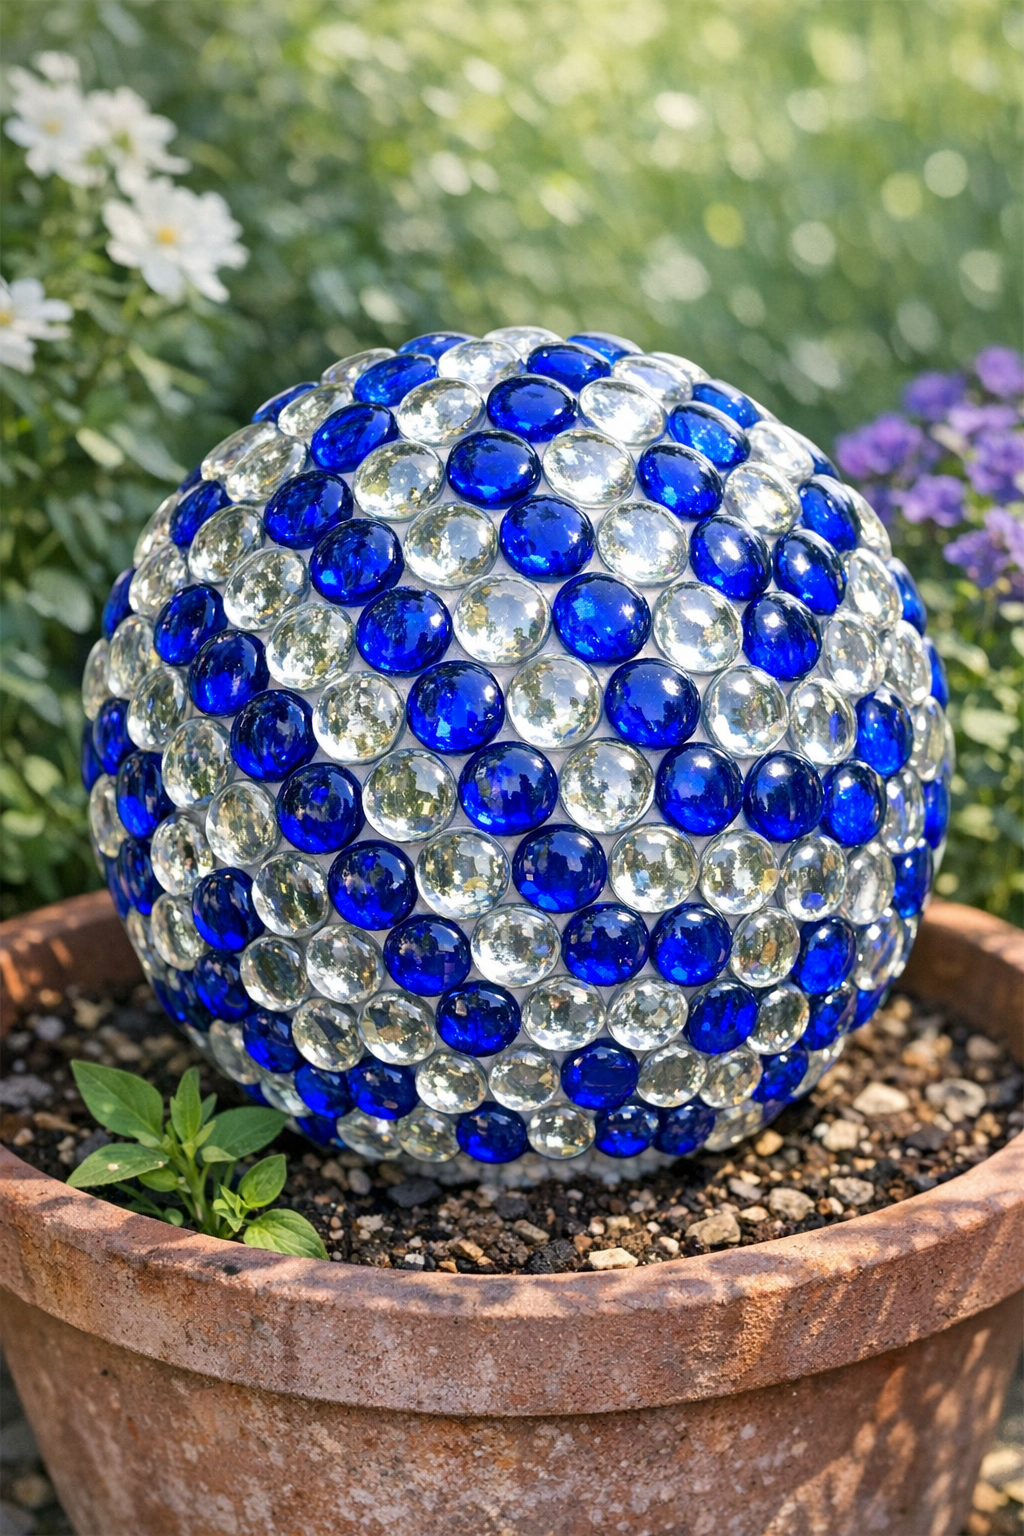
I love a project that looks way fancier than it really is, and this sparkling backyard gazing ball absolutely fits that category. By gluing shiny flat glass marbles onto a large Styrofoam ball, you can make a reflective garden accent that catches the light beautifully on a porch, tucked into a flower bed, or sitting in a planter.
This is the kind of weekend DIY I reach for when I want something creative but not overly complicated after a busy workweek. If you have a little patience and enjoy repetitive, satisfying crafts, this one is especially fun. It’s beginner-friendly, affordable, and a great way to add a bit of personality to your outdoor space.
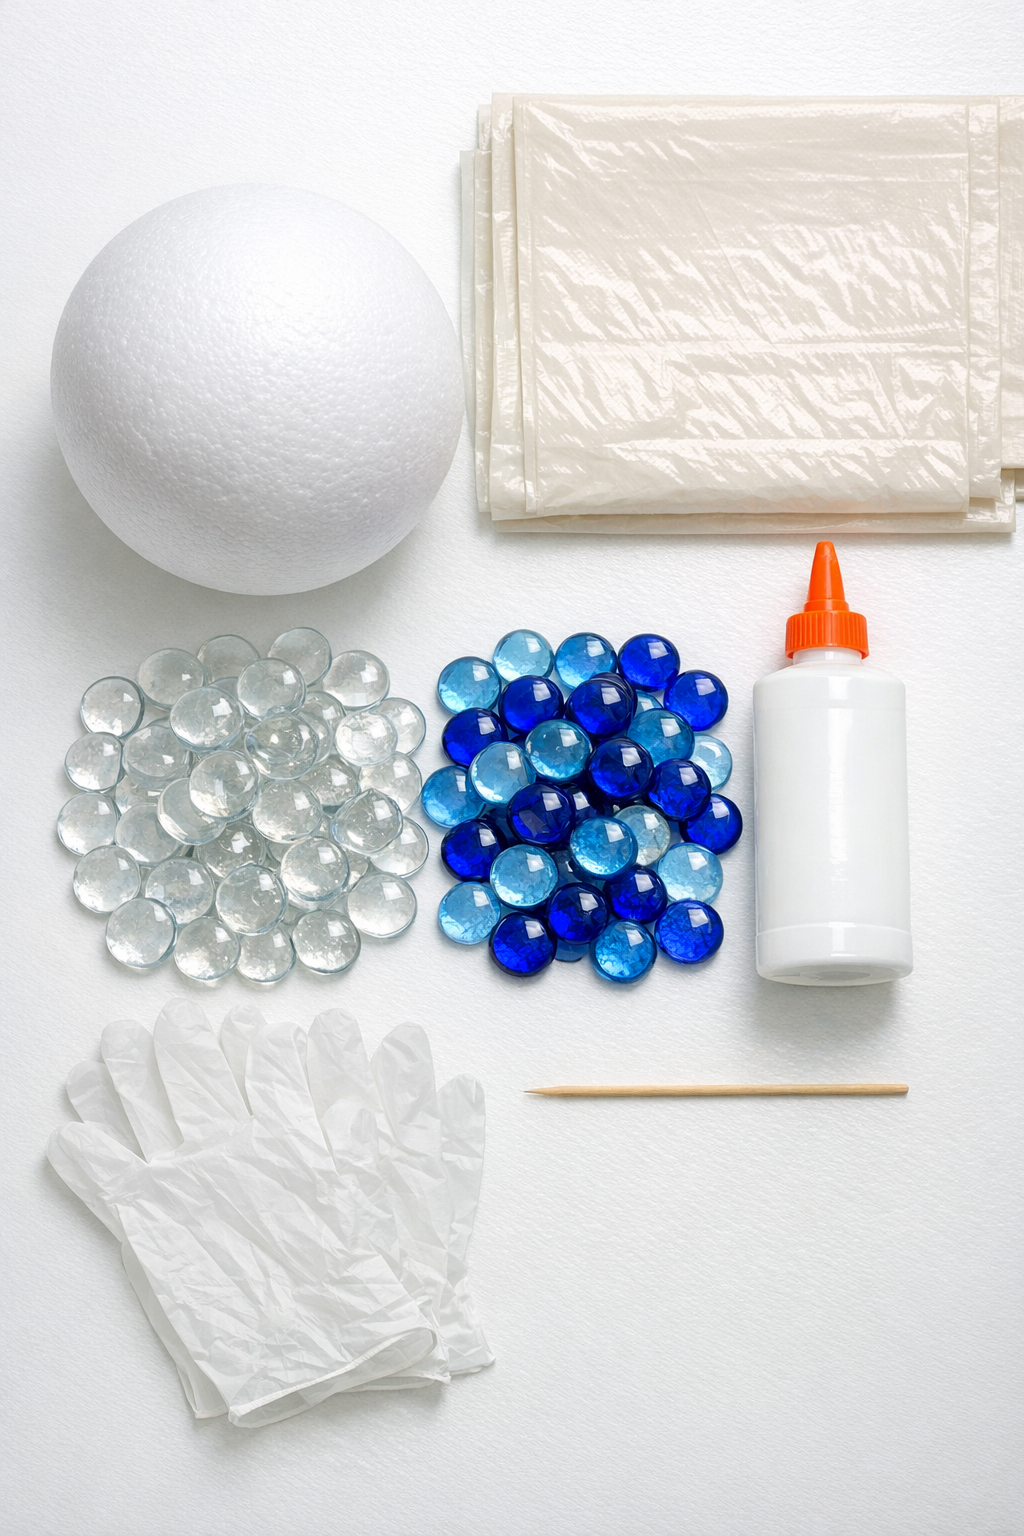
Materials
1 large white Styrofoam ball, 8 inches in diameter
Instructions
1. Cover your work surface with the drop cloth or wax paper, then put on disposable gloves if you want easier cleanup. Insert the wooden skewer into the Styrofoam ball to create a handle so you can rotate it without touching the glued sections.
2. Sort your 150 flat glass marbles by color if you want a pattern, or keep them mixed for a more organic sparkle. I usually do this step first because once the glue starts going down, it helps to move quickly.
3. Apply a small patch of foam-safe glue to the Styrofoam ball, working in an area about 3 to 4 inches wide. Don’t coat the whole ball at once, because the glue can start to set before you place the marbles.
4. Press the flat side of each glass marble onto the glued area, placing them as close together as possible. Continue around the section, gently adjusting the spacing so the ball looks even from all angles.
5. Rotate the ball by the skewer and keep adding glue in small sections, then press on more marbles until most of the surface is covered. Leave a small bare spot at the bottom if you want the ball to sit more steadily in a planter or on a stand.
6. Check the ball for open spaces and fill any larger gaps with the remaining marbles. If a marble slides, hold it in place for a few seconds until it grabs.
7. Stand the skewer upright in a jar or other stable container and let the glue dry completely according to the bottle directions, usually at least 12 to 24 hours. Keep it indoors or in a covered area while it cures so dust and moisture don’t settle on the glue.
8. Once dry, remove the skewer if desired and set the finished gazing ball in your garden, a decorative bowl, or a planter on top of pebbles. Place it where it can catch natural light, because that’s when the sparkle really shows off.
Variations & Tips
Color Mix: Use all one color for a cleaner look, or blend two to three shades for a more mosaic-style finish. Blue and clear give it a classic garden look, but green is beautiful near plants.
Glue Choice: Make sure your glue is labeled foam-safe, since some adhesives can melt Styrofoam. I always test a tiny spot first if I’m using a brand I haven’t tried before.
Outdoor Placement: This project works best in a somewhat sheltered outdoor spot, since the base is Styrofoam. If your yard gets a lot of harsh weather, display it on a covered porch or bring it inside during storms.
Display Option: Nestle the finished ball into a flower pot, metal bowl, or plant stand so it stays put. A stable base makes it look more polished and keeps it from rolling around the garden.
Gap Management: Small spaces between the marbles are normal on a round surface, so don’t stress about making it mathematically perfect. I focus on even spacing overall, and once it’s outside catching the light, nobody notices tiny imperfections.
Make-Ahead Tip: If you’re crafting in short bursts like I usually do after work, glue one half first and let it set before finishing the other half. It makes the ball easier to handle and a lot less messy.