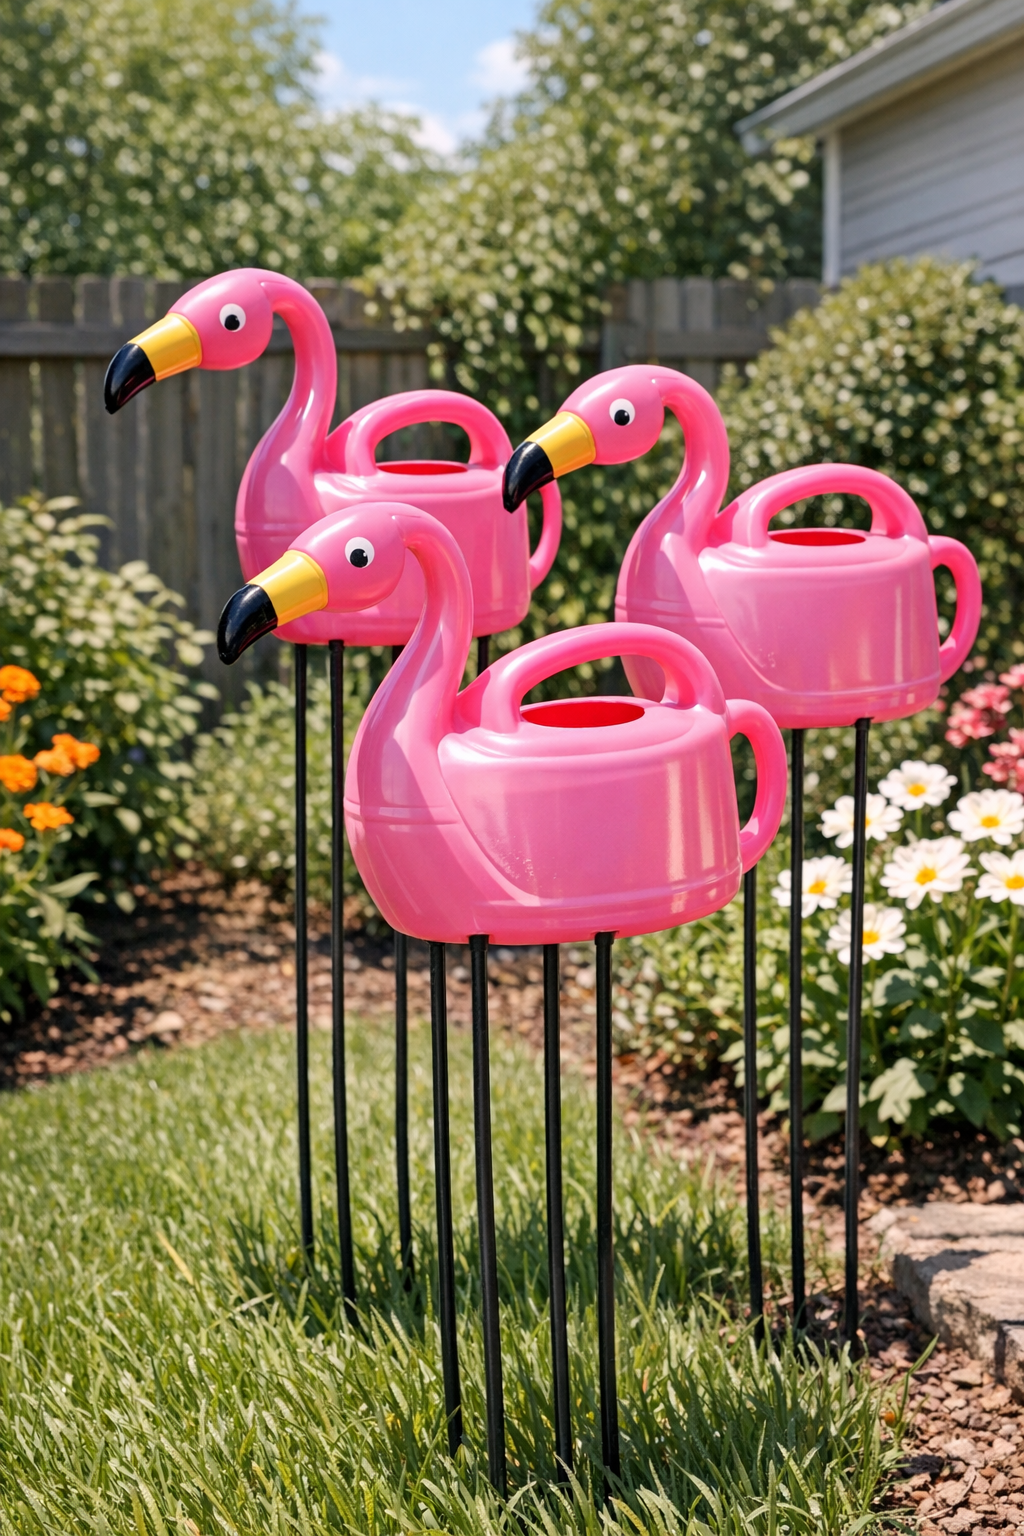
I love a backyard project that makes people stop, smile, and immediately ask, “Wait, how did you make those?” These giant flamingos are exactly that kind of project. By turning a few cheap pink plastic watering cans into playful lawn art and mounting them on tall metal garden stakes, you get a bold, quirky decoration that looks surprisingly clever for how simple it is to build.
This is a great weekend DIY if you want something fun, inexpensive, and low-pressure. I’m always drawn to projects that don’t require a full workshop or a huge time commitment, especially after a long workweek, and this one checks both boxes. If you’re decorating a garden bed, dressing up a patio, or just leaning into a little backyard whimsy, these oversized flamingos are easy to customize and genuinely fun to make.
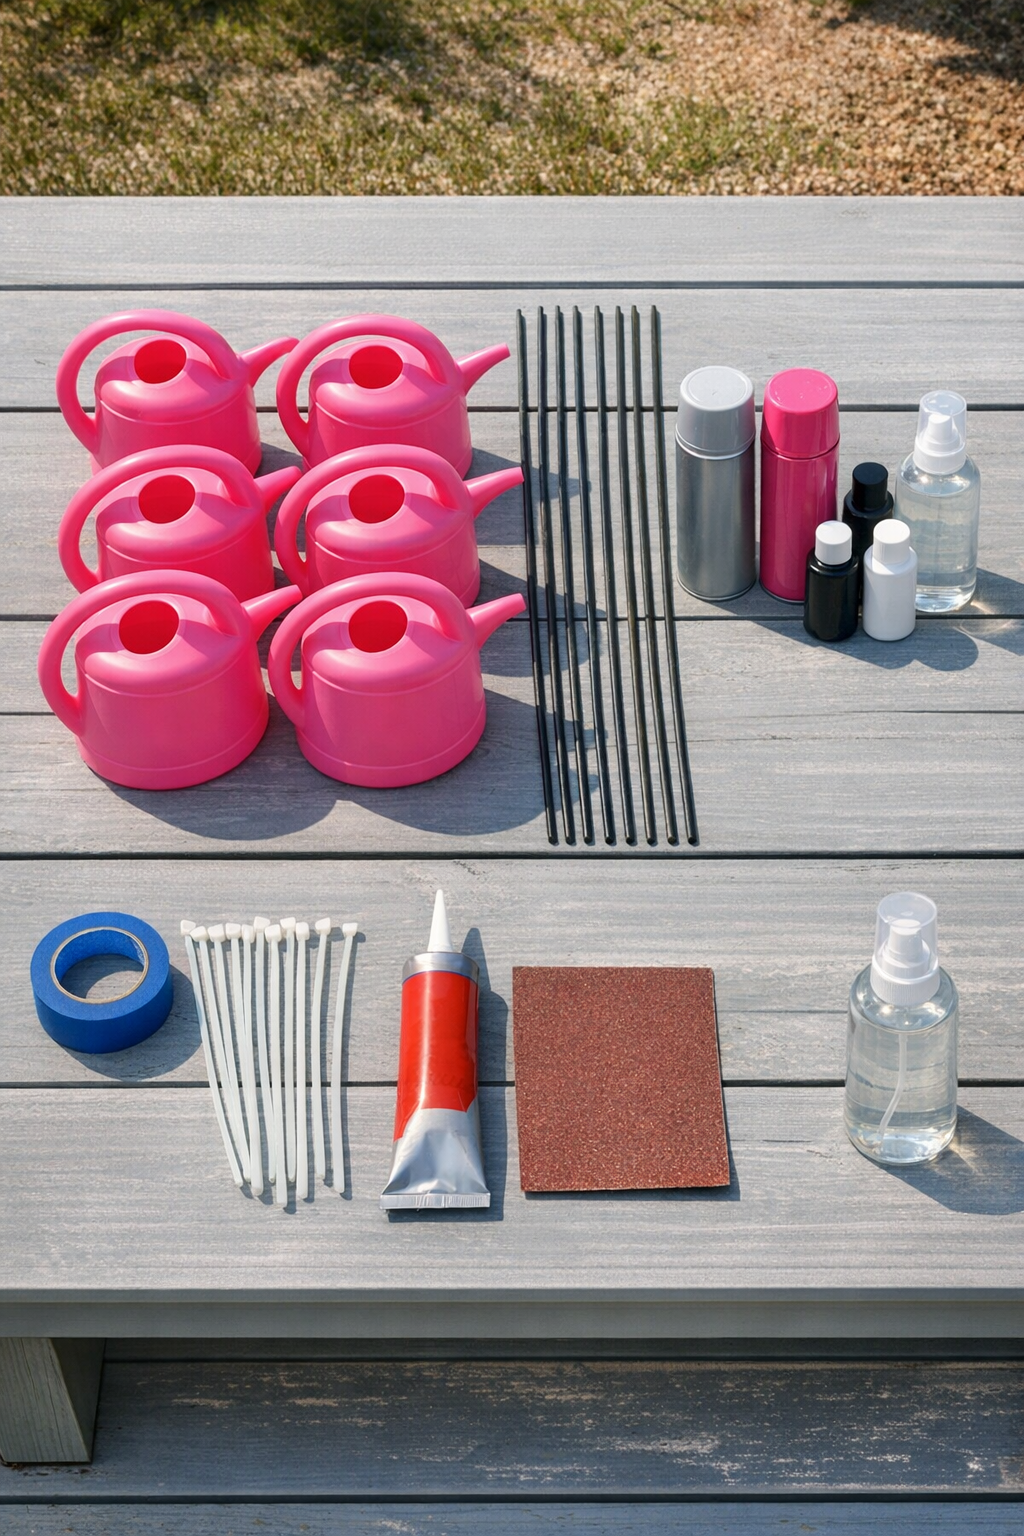
Materials
4 cheap pink plastic watering cans, 1 to 2 gallon size each
Instructions
1. Wash all 4 watering cans with warm soapy water, rinse well, and let them dry completely so paint will stick properly. Lightly scuff the outside with medium-grit sandpaper, focusing on the body, handle, and spout.
2. Set the cans on a protected surface outdoors or in a well-ventilated area, then apply a light, even coat of plastic-bonding primer. Let the primer dry according to the can directions before moving on.
3. Spray each can with 2 to 3 light coats of glossy pink paint, letting each coat dry before adding the next. Cover the handle and body evenly so the cans look like a single solid flamingo shape.
4. Use black acrylic paint to cover the end of each spout, creating the flamingo’s beak tip, and add a small white circle with a black dot above it for the eye. Keep the details simple; from the yard, bold shapes read better than tiny painted lines.
5. Seal the painted cans with a clear outdoor sealer and let them cure fully. This extra coat helps the finish hold up better through sun, sprinklers, and the occasional Midwest surprise rainstorm.
6. Push 2 metal garden stakes into the ground for each flamingo, spacing the pair about 3 to 4 inches apart so they act like long legs. Make sure each pair is planted deep enough to feel stable and stand at matching heights.
7. Slide or position one watering can over each pair of stakes so the spout points forward like a neck and beak and the handle arches upward like the flamingo’s back. Adjust the angle until the body looks balanced and slightly tilted forward, which gives it that classic flamingo posture.
8. Secure each watering can to the stakes with 2 zip ties threaded around the handle and body, then add a small bead of exterior construction adhesive where the stakes touch the plastic for extra hold. Let the adhesive set fully before moving or repositioning the flamingos.
9. Step back and fine-tune the height, spacing, and angle of all 4 flamingos so they look like a little flock. Grouping them at slightly different heights and directions makes the display feel much more natural and a lot more charming.
Variations & Tips
Add wings: Cut wing shapes from thin craft foam or corrugated plastic, paint them pink, and glue them to the sides of the cans for a more decorative look.
Make them sturdier: If your yard gets windy, use thicker metal rods or drive the stakes deeper into the ground before attaching the watering cans.
Try a tropical cluster: I like grouping these near ornamental grasses, a planter, or a small patio corner so they feel intentional instead of randomly stuck in the lawn.
Use different poses: Tilt some flamingos slightly downward and others upright to mimic pecking, standing, and looking around.
Refresh the finish seasonally: A quick wipe-down and one fresh coat of clear sealer at the start of summer helps the color stay bright longer.
Keep assembly simple: If you’re making these after work or in short bursts like I usually do, paint the cans one evening, seal them the next day, and install the stakes over the weekend.