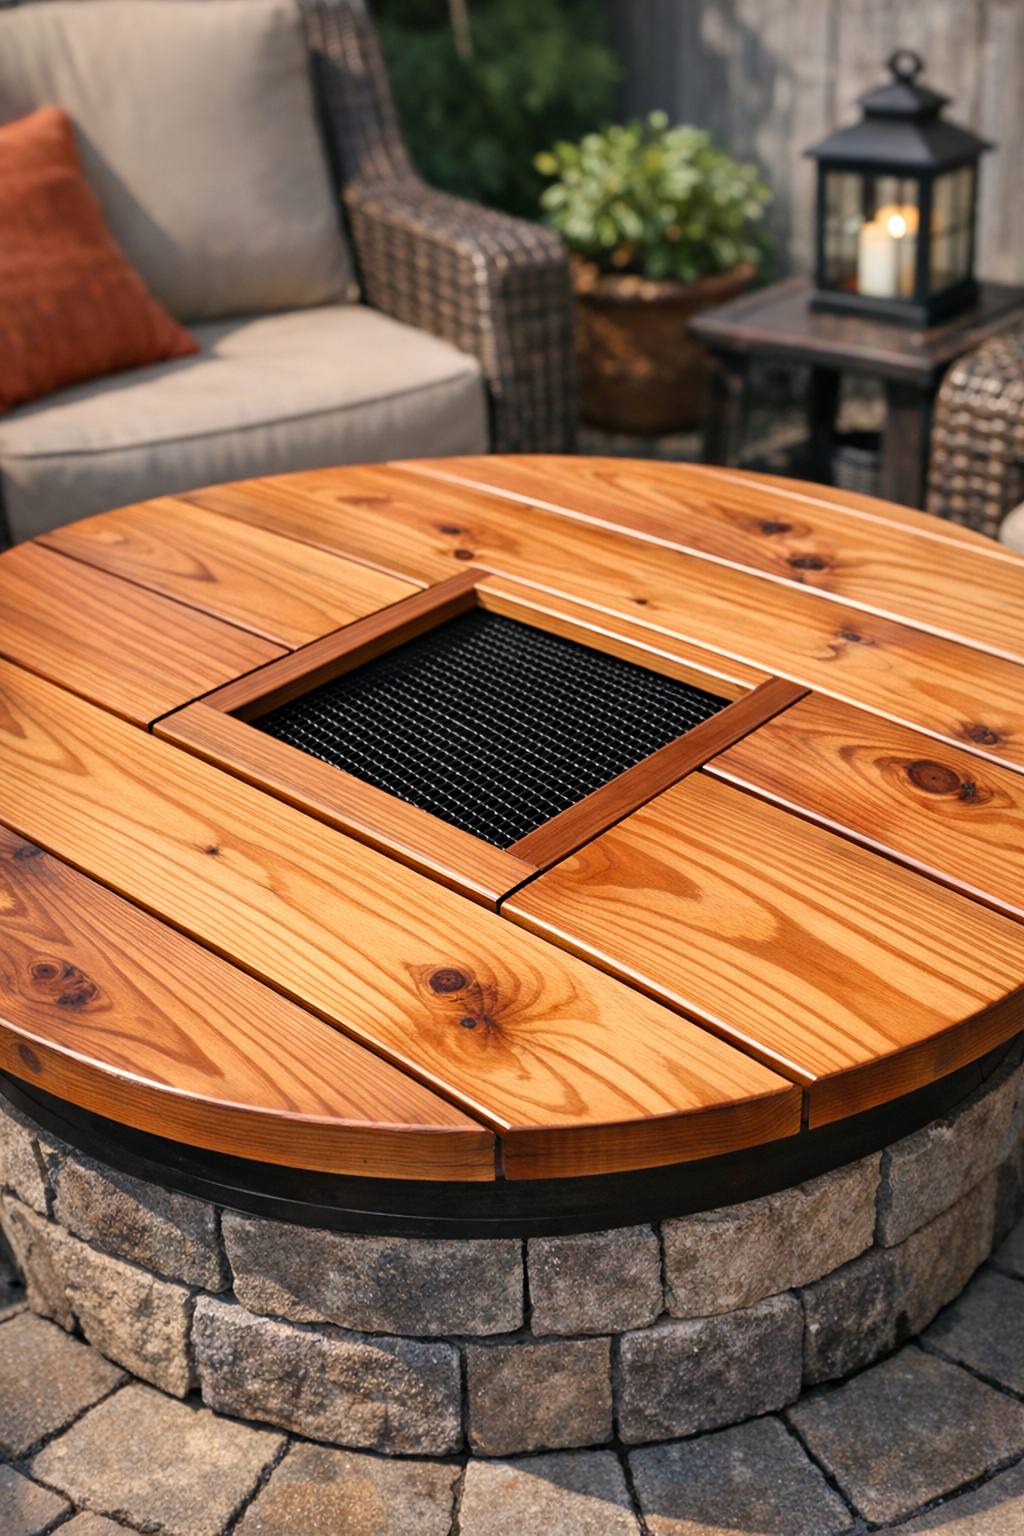
If you’ve got a backyard fire pit that sits unused part of the week, turning it into extra table space is one of those simple upgrades that makes outdoor living feel a whole lot more practical. This DIY fire pit cover is made like a sturdy cedar plank tabletop with a center cutout, and the clever part is the stretched metal mesh that adds airflow and a custom, built-in look while still keeping the piece light enough to move.
I love projects like this because they make a patio work harder for family dinners, snacks with friends, and those in-between evenings when you want the fire pit nearby but not necessarily in use. If you’re comfortable measuring, cutting boards, and fastening hardware cloth or metal mesh neatly in place, this is a very doable weekend build.
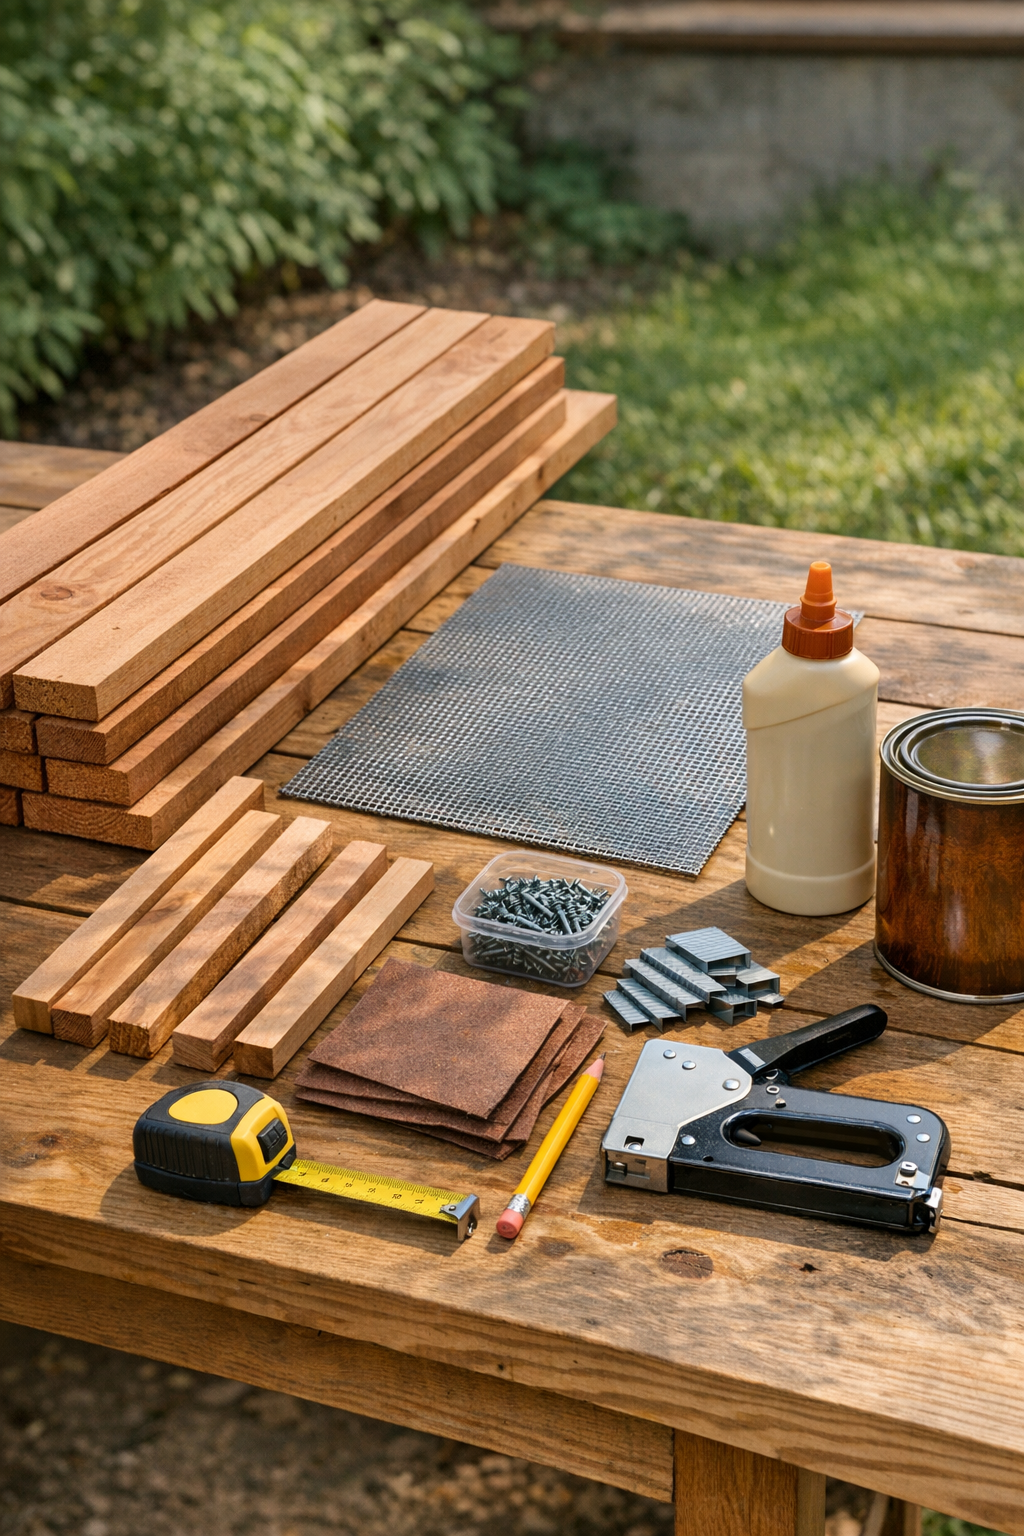
Materials
5 cedar deck boards, 1 in. x 6 in. x 36 in.
Instructions
1. Measure the opening of your fire pit and decide on the final cover size, allowing at least 1 inch of overhang on all sides so the cover sits securely without slipping.
2. Lay the five cedar boards side by side and arrange the best faces upward, alternating the grain slightly if needed to help keep the top looking balanced.
3. Mark the center of the panel and trace your center cutout using a cardboard template; for a round opening, a 14- to 16-inch diameter usually looks proportional on a 30- to 36-inch cover.
4. Clamp the boards together temporarily and cut the center opening with a jigsaw, cutting slowly so the circle or shape stays smooth across all the planks.
5. Separate the boards, then sand the cut edges and all top-facing surfaces with 120-grit followed by 220-grit sandpaper until everything feels splinter-free.
6. Reassemble the boards edge to edge on a flat surface and check that the cutout lines back up cleanly before attaching the supports underneath.
7. Run a thin bead of exterior wood glue between the board edges, then place the two 30-inch support cleats across the underside, one about 5 inches from each end.
8. Center the two 16-inch end braces on the underside near the middle, positioning them so they strengthen the area around the cutout without blocking it.
9. Pre-drill and drive the 1 1/4-inch exterior screws through the cleats and braces into the cedar boards, keeping the top surface free of fasteners for a cleaner tabletop.
10. Flip the piece over and trim the metal mesh so it overlaps the center cutout by at least 1 inch on every side underneath the opening.
11. Pull the metal mesh tight across the underside of the cutout and staple it down evenly, starting on one side and working opposite sides in turn to keep the mesh stretched flat.
12. Check the top side to make sure the mesh sits centered and taut beneath the opening, then add a few extra staples anywhere the mesh needs more support.
13. Sand any rough corners one last time and brush or wipe on two coats of exterior sealant, letting the first coat dry fully before applying the second.
14. Once the finish is cured, set the cover over your fire pit and make sure it sits level and stable before using it as a tabletop.
Variations & Tips
For a square fire pit: Make the center cutout square instead of round so it echoes the shape of the pit and makes layout a little easier.
For picky weather: Cedar holds up beautifully outdoors, but I still recommend resealing the cover every season or two, especially if your backyard gets strong sun or lots of rain.
For easier lifting: If this cover feels large for one person, reduce the board length slightly or add low-profile handles underneath on the two ends.
For a cleaner mesh edge: After trimming the metal mesh, bend or file any sharp wires before stapling so the underside is safer to handle.
For family use: We always wait until the fire pit is completely cool before placing any cover on top, and that’s a house rule worth keeping if kids are helping outdoors.
For a different look: You can stain the cedar a deeper brown, leave it natural to weather to soft gray, or swap in black metal mesh for a slightly more modern finish.