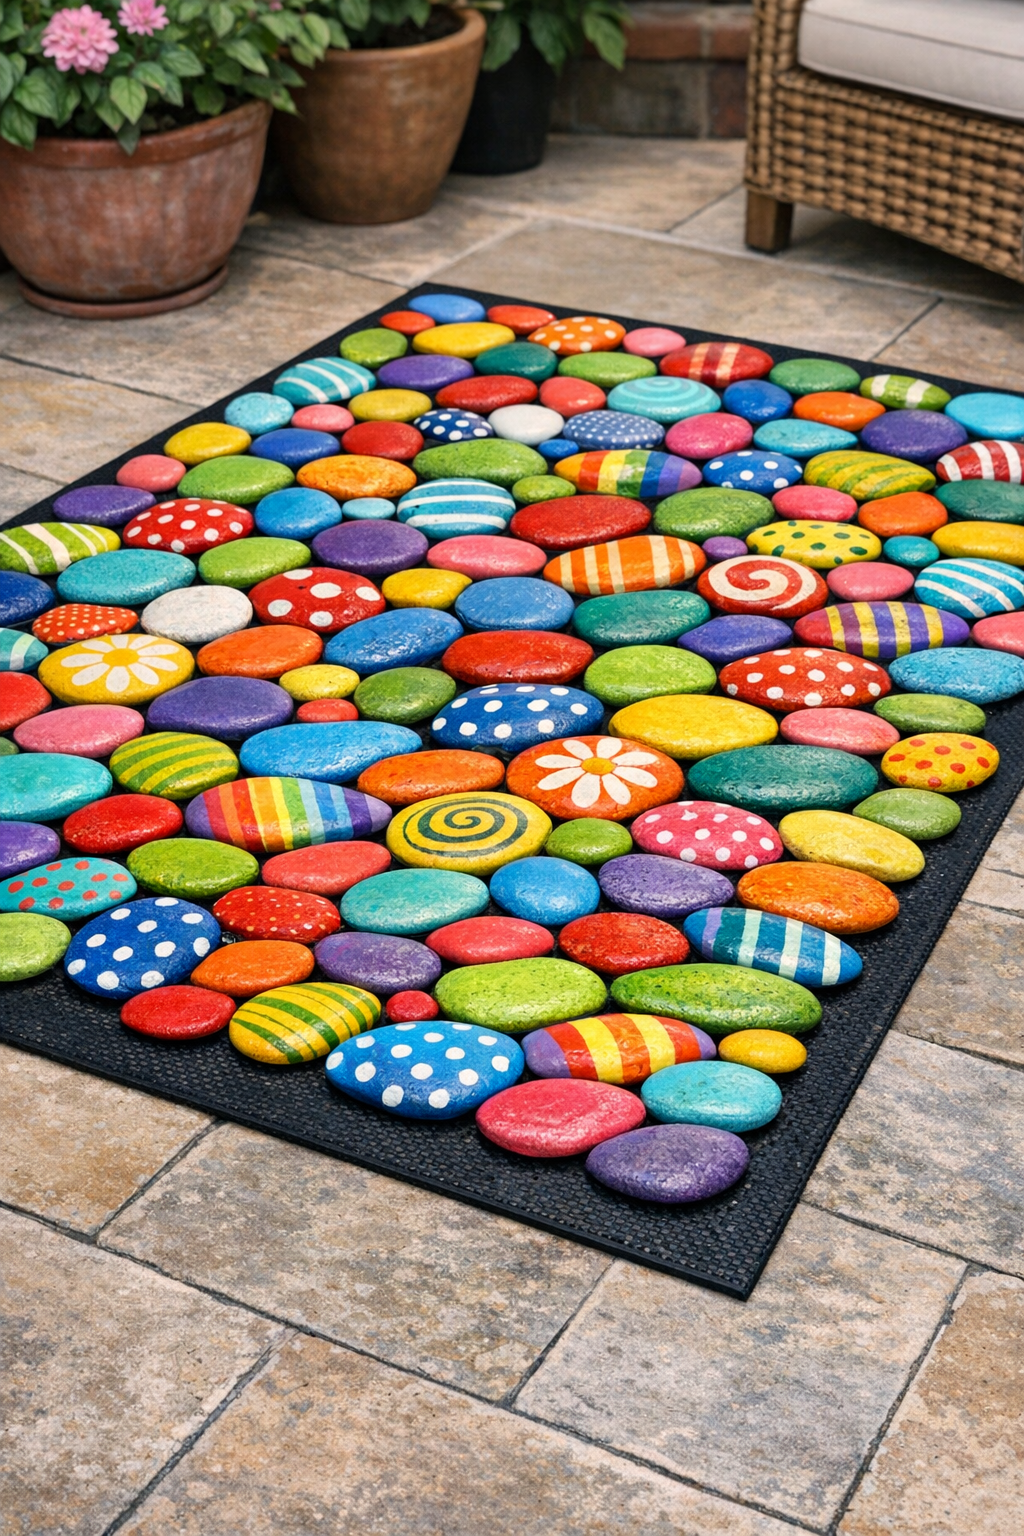
This painted river rock patio rug is one of those projects that looks unexpectedly polished once it’s finished. You start with a plain heavy rubber mat, add a mosaic of hand-painted flat stones, and end up with a colorful outdoor accent that can handle life on a patio much better than a fabric rug. I love projects like this because they borrow a little from cooking: prep everything first, work in batches, and let patience do half the job.
If you want a backyard upgrade that feels cheerful and handmade, this is a very approachable weekend project. It’s especially good for anyone who enjoys painting, arranging color, or giving an outdoor space more personality without building anything complicated.
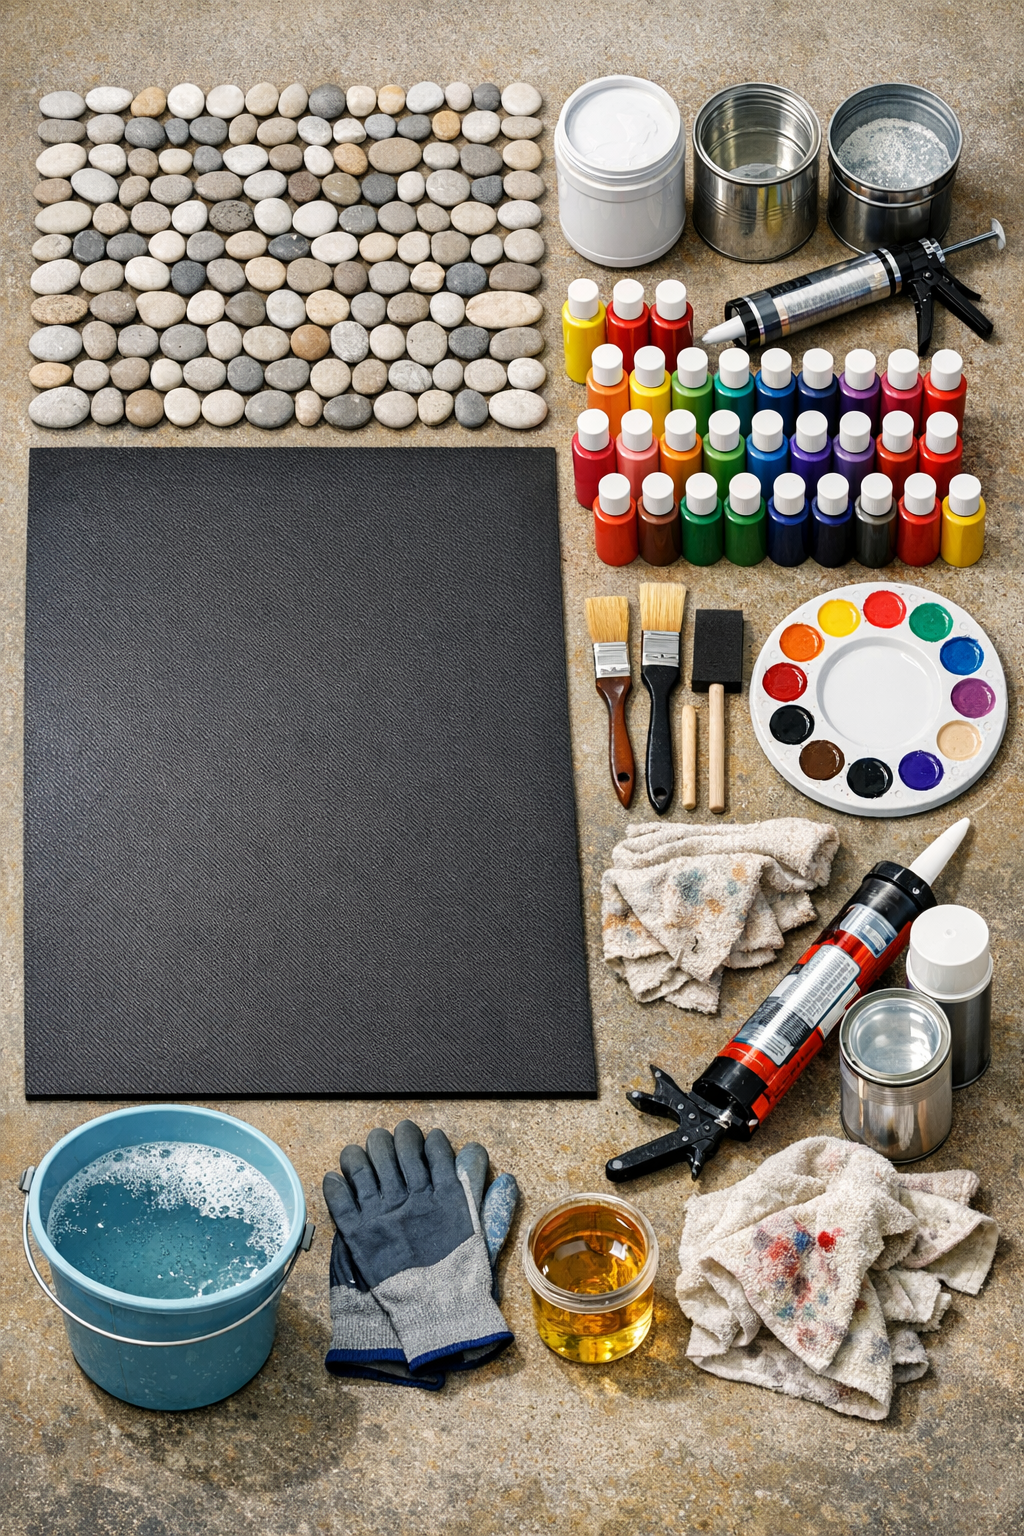
Materials
Instructions
1. Wash the river rocks in warm water with dish soap, scrub off any dirt, and let them dry completely on towels for several hours or overnight.
2. Lay the rubber mat on a flat work surface and sort the rocks by size, shape, and thickness so the final surface sits as evenly as possible.
3. If any rocks feel especially slick, lightly scuff the top surface with 220-grit sandpaper and wipe away dust with a dry cloth.
4. Apply a thin coat of exterior bonding primer to the top side of each rock, then let the primer dry according to the product directions.
5. Paint the rocks in batches using outdoor acrylics, covering each rock fully or creating simple patterns like stripes, dots, color blocks, or soft ombré blends.
6. Let the first coat dry, then add a second coat anywhere the color looks thin so the stones read clearly against the black mat.
7. Seal the painted tops with a thin, even layer of clear outdoor sealer and allow them to cure fully before assembly.
8. Dry-fit all 300 rocks on the rubber mat before gluing, starting at one corner and leaving about 1/8 inch between stones or placing them edge-to-edge where they fit naturally.
9. Adjust the layout until the colors feel balanced across the mat, mixing large and small stones so there are no obvious gaps or wobbly high spots.
10. Working in small sections, lift 6 to 10 rocks at a time, apply exterior construction adhesive to the back of each stone, and press each one firmly back into its marked position.
11. Continue gluing section by section until the mat is fully covered, checking every few rows to keep edges straight and spacing consistent.
12. Let the finished mat cure flat for at least 24 to 48 hours, or as directed by the adhesive manufacturer, before moving it onto the patio.
Variations & Tips
Color story: Pick 4 to 6 main colors instead of using every shade you own. I find a limited palette makes the finished piece look more intentional, much the way a restrained spice blend lets each flavor stand out.
Pattern option: Try arranging the stones in bands, a rainbow fade, or repeating clusters of warm and cool colors. Even a loose pattern gives the rug a more designed look.
Adhesive tip: Use an exterior-grade adhesive rated for rubber and stone, and test one rock first if your mat material is unusual. Outdoor surfaces expand and contract, so this is not the place for basic craft glue.
Weather placement: This rug works best on a covered or partially covered patio. Constant standing water can shorten the life of both the paint and the bond.
Comfort note: Keep the flattest stones for the center walking area and save slightly uneven pieces for the edges. That small bit of sorting makes the rug feel steadier underfoot.
Maintenance: Clean the rug with a soft brush or damp cloth instead of a pressure washer. A gentle cleaning keeps the sealer intact much longer.
Edge finish: If a little black mat shows around the outside, leave it for a clean border or touch it up with black outdoor paint so it looks crisp and deliberate.
Make-ahead strategy: Paint the rocks over a couple of evenings, then do the layout and gluing the next day. Breaking it into stages makes a 300-rock project feel much more manageable.