These heavy textured yard slabs are one of those simple outdoor projects that look far fancier than the materials would suggest. I’m using stretched plastic mesh produce bags and cement to create deeply patterned stepping-style slabs, and the little “secret” that makes the texture stand out is a light dusting of dry cement over the mesh before the final press. It helps capture the pattern beautifully and gives the finished surface that crisp, stone-like texture people always want to touch.
I love projects like this because they use humble, easy-to-find supplies and turn them into something sturdy and decorative for the yard. If you want a weekend project that doesn’t require woodworking tools or a lot of experience, this is a very approachable one, and it’s especially satisfying if you enjoy adding handmade details around a garden path, patio edge, or flower bed.
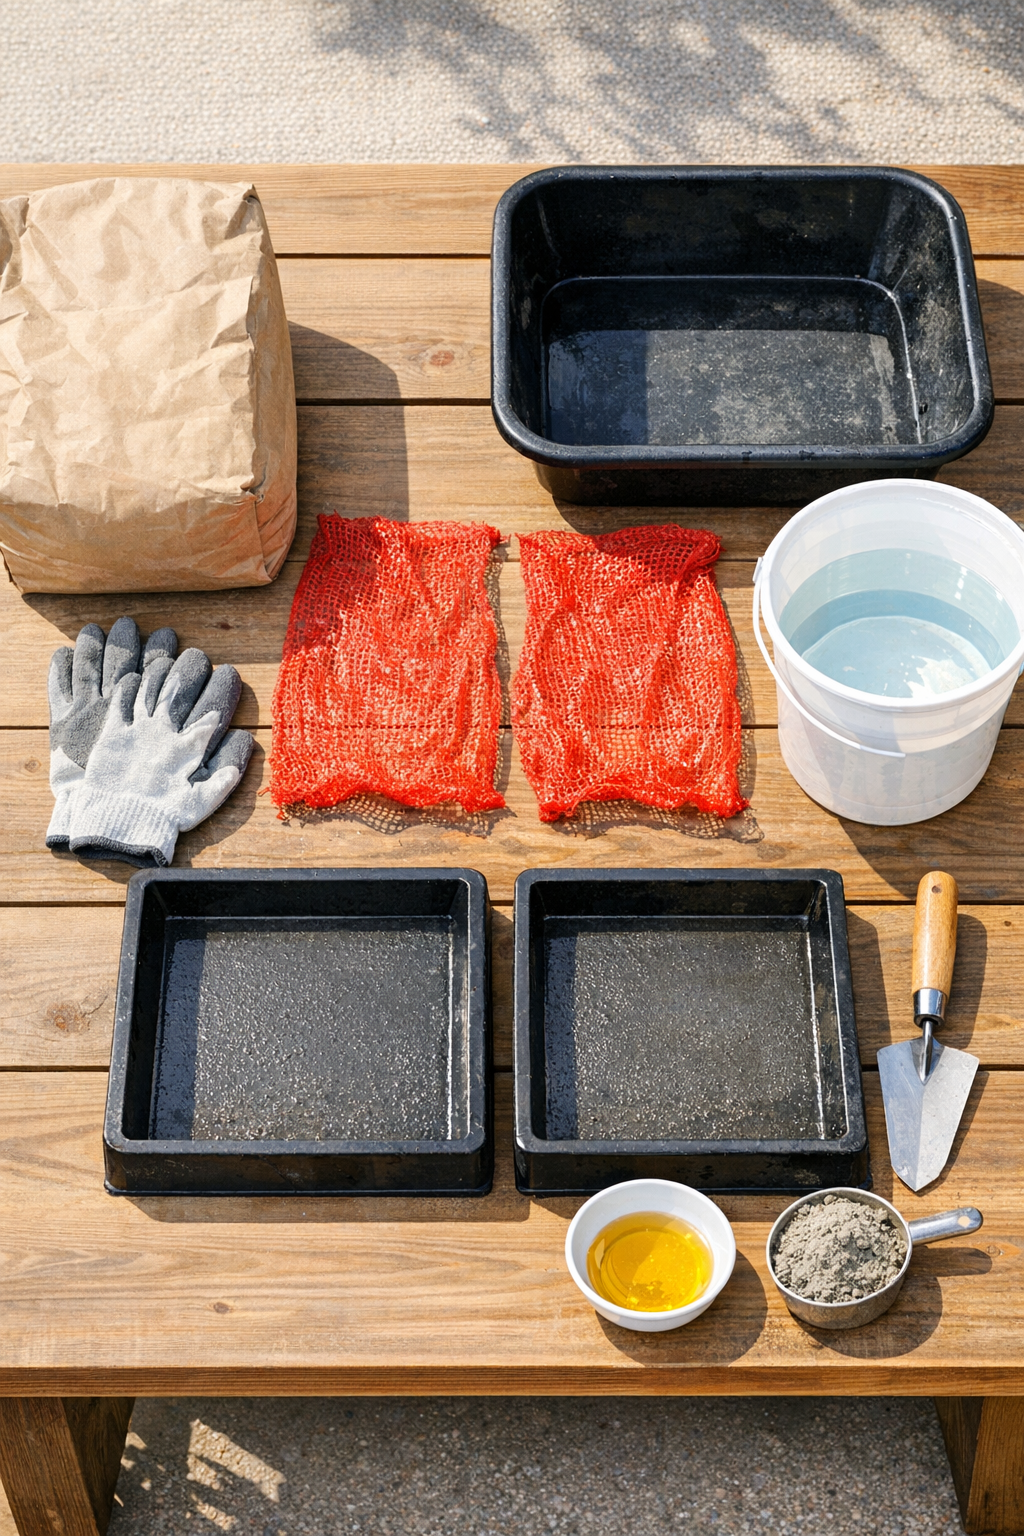
Materials
Instructions
1. Set your molds on a flat outdoor work surface, and if the ground is uneven, level them with a thin bed of sand underneath. Brush or wipe a light coat of oil inside each mold so the slabs release more easily later.
2. Cut the produce bags open so each one becomes a flat sheet of plastic mesh, then stretch each sheet gently to open the pattern as much as possible without tearing. The wider the mesh openings, the bolder the texture will be.
3. Mix the cement in a tub with water a little at a time until it reaches a thick brownie-batter consistency. It should hold its shape when scooped but still spread easily with a trowel.
4. Fill each mold halfway with cement, tapping the sides a few times to settle the mix and release trapped air. Smooth it lightly so the surface is fairly even.
5. Add more cement until each mold is nearly full, leaving about 1/4 inch at the top. Level the surface with your trowel, but don’t worry about making it perfectly slick.
6. Lay one stretched mesh sheet over each mold, pulling it snug so it sits flat across the wet cement. Press it down evenly with your gloved hands until the mesh pattern begins to sink into the surface.
7. Sprinkle a very light, even dusting of dry cement powder over the mesh. This is the secret that helps sharpen the pattern and keeps the mesh from dragging as you make the final press.
8. Press the mesh firmly into the cement with a flat board, trowel face, or your hands, working from the center outward so the texture transfers evenly. Lift one corner carefully to check the pattern, then press again anywhere that looks shallow.
9. Leave the mesh in place for 20 to 30 minutes, until the surface starts to firm up, then peel it away slowly. If a spot sticks, lift gently and ease it back instead of yanking so you don’t tear the texture.
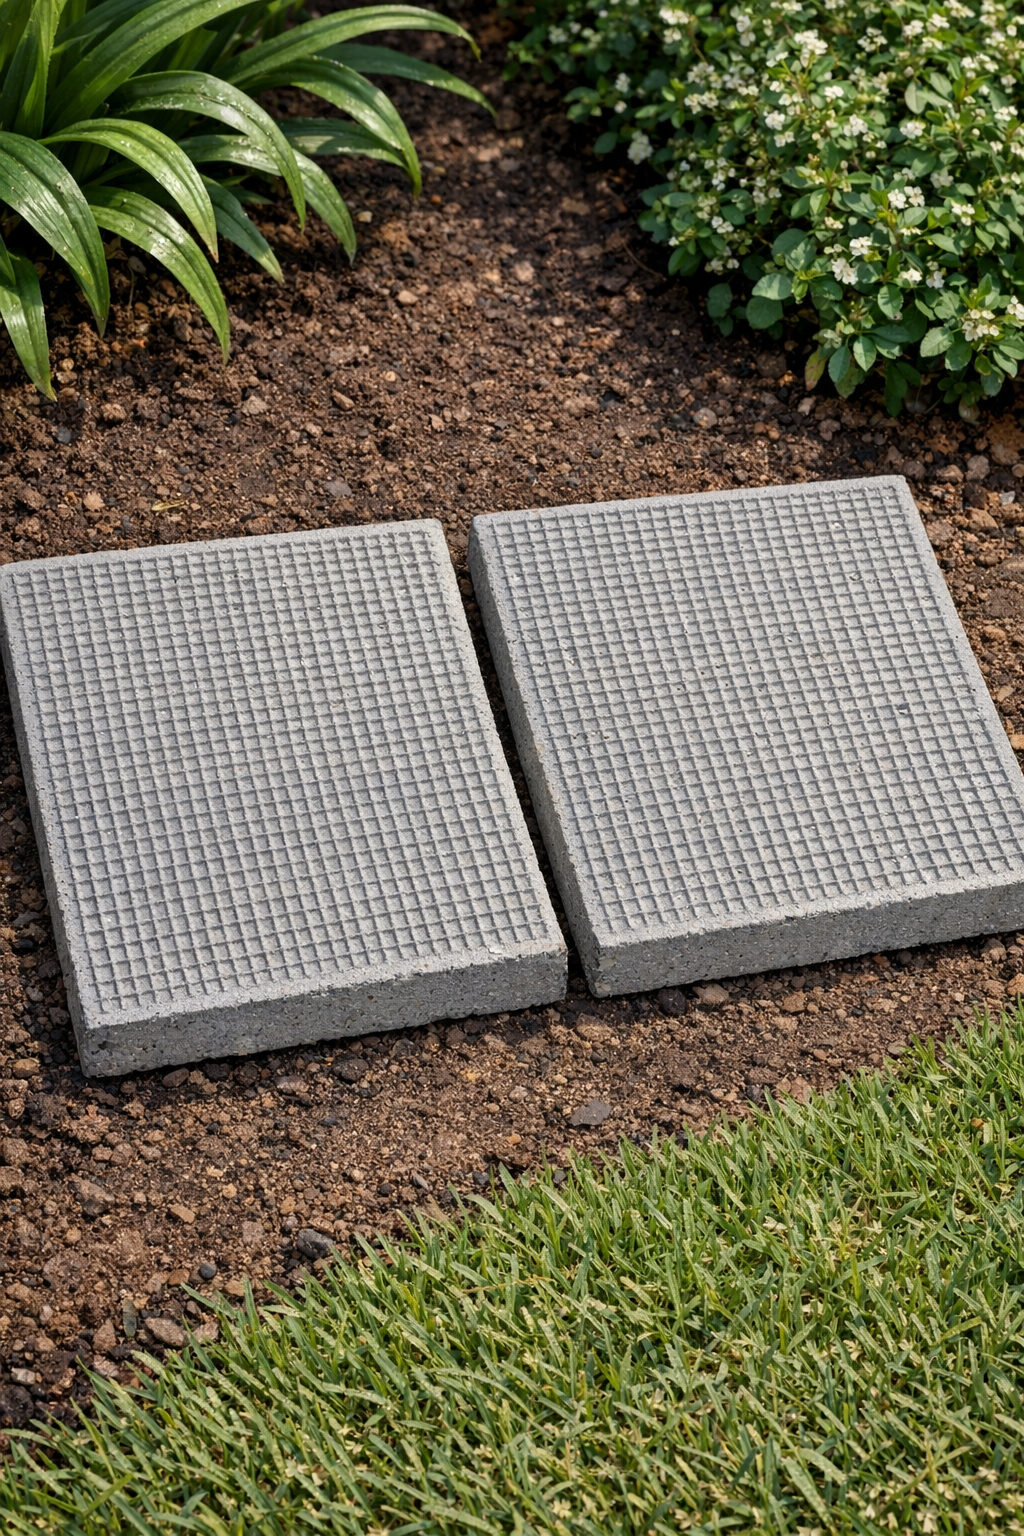
10. Cover the molds loosely with plastic and let the slabs cure for 24 to 48 hours before unmolding. After removing them from the molds, let them continue curing in a shaded spot for about 5 to 7 days before placing them in the yard.
Variations & Tips
For a deeper pattern: Use produce bags with a wider mesh and stretch them a bit more before pressing. I’ve found that a bold lattice shows up especially well once the cement fully cures.
For easier release: If your mesh feels flimsy or snaggy, rub just a tiny bit of oil on it before laying it over the cement. Don’t overdo it, or the surface can get too slippery to hold a crisp imprint.
For picky gardeners: If your family likes a tidier yard look, make these in matching square molds for a clean path. If you like a more relaxed cottage-garden style like I do, vary the spacing when you set them into the ground.
For adding color: Once fully cured, you can brush off the dust and dry-brush the high points with outdoor concrete stain or masonry paint. A soft gray wash or earthy tan can make the texture stand out even more.
For durability: Keep the slabs damp-curing under plastic for the first day or two if the weather is hot or windy. Cement that dries too fast can be more prone to surface cracking, and a slower cure usually gives a stronger result.
For placement: These are best for decorative stepping areas, garden borders, or around raised beds. Set them onto compacted soil or sand so they stay supported evenly and don’t rock underfoot.