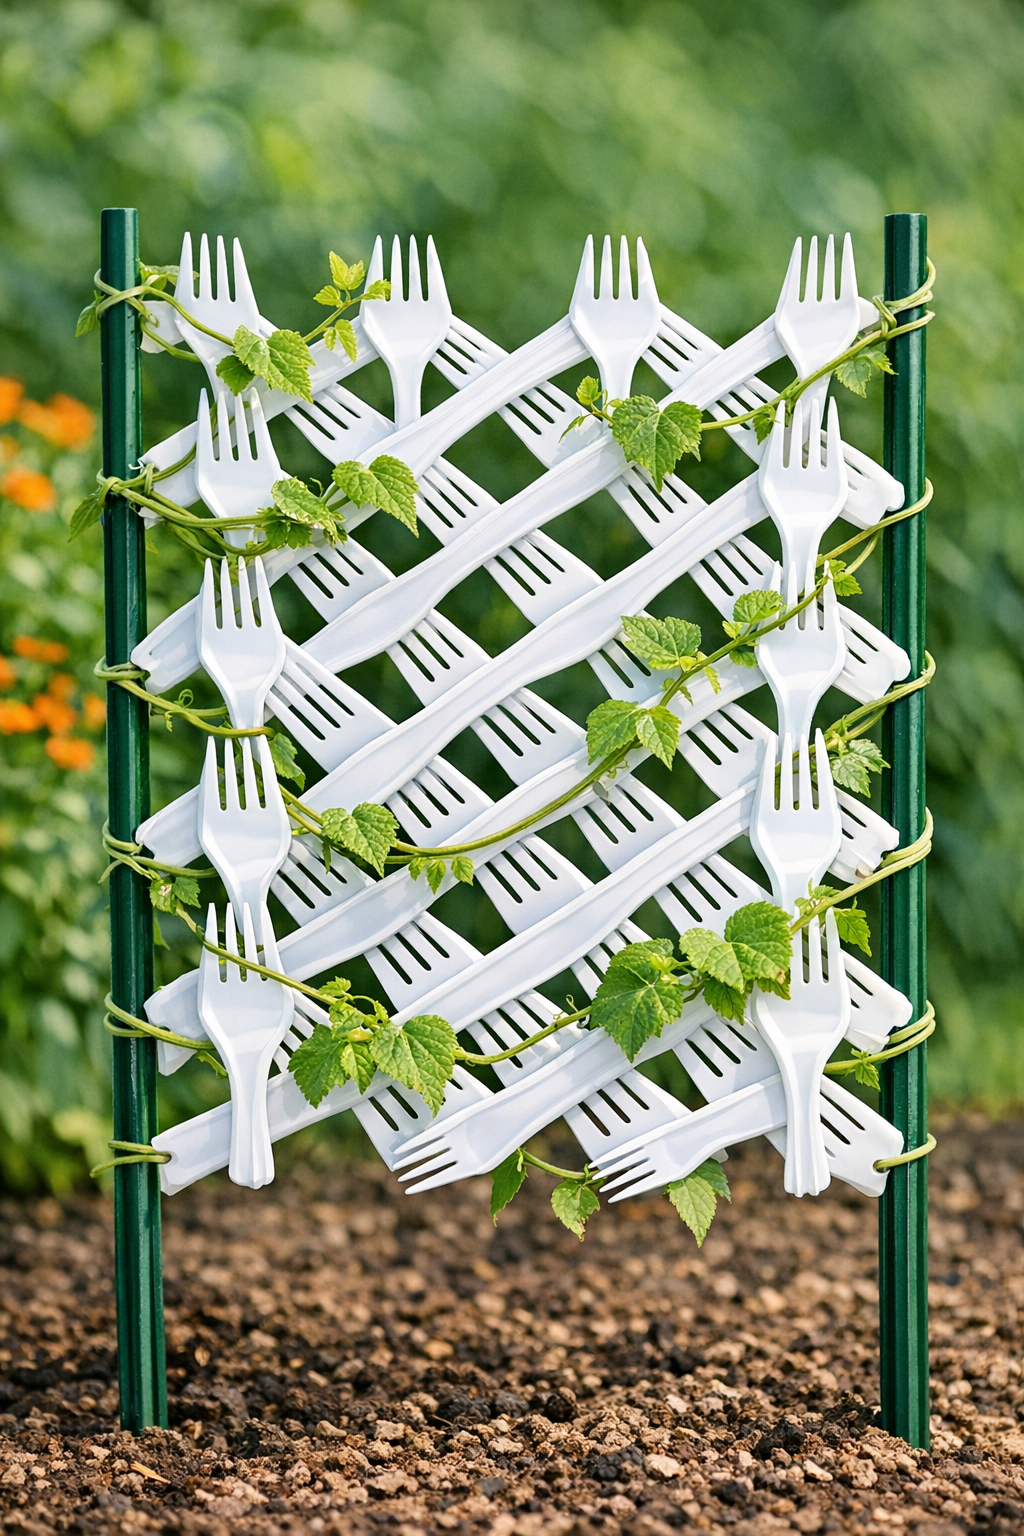
When I’m trying to stretch a garden budget, I love finding a way to turn plain household odds and ends into something that’s actually useful outside. This trellis is one of those projects that looks a little surprising at first, but once it’s assembled, it creates a sturdy support for peas, lightweight beans, cucumbers, and climbing flowers. The overlapping plastic forks form a textured panel that vines can grab onto so much more easily than a flat surface.
This is a good weekend project for anyone who enjoys upcycling and doesn’t mind a little careful assembly work. I’d keep this one for outdoor decorative use and light garden support rather than edible-contact kitchen use afterward, and I always recommend working in a well-ventilated area when heating plastic. If you like making your yard feel special without spending much, this is a fun conversation piece.
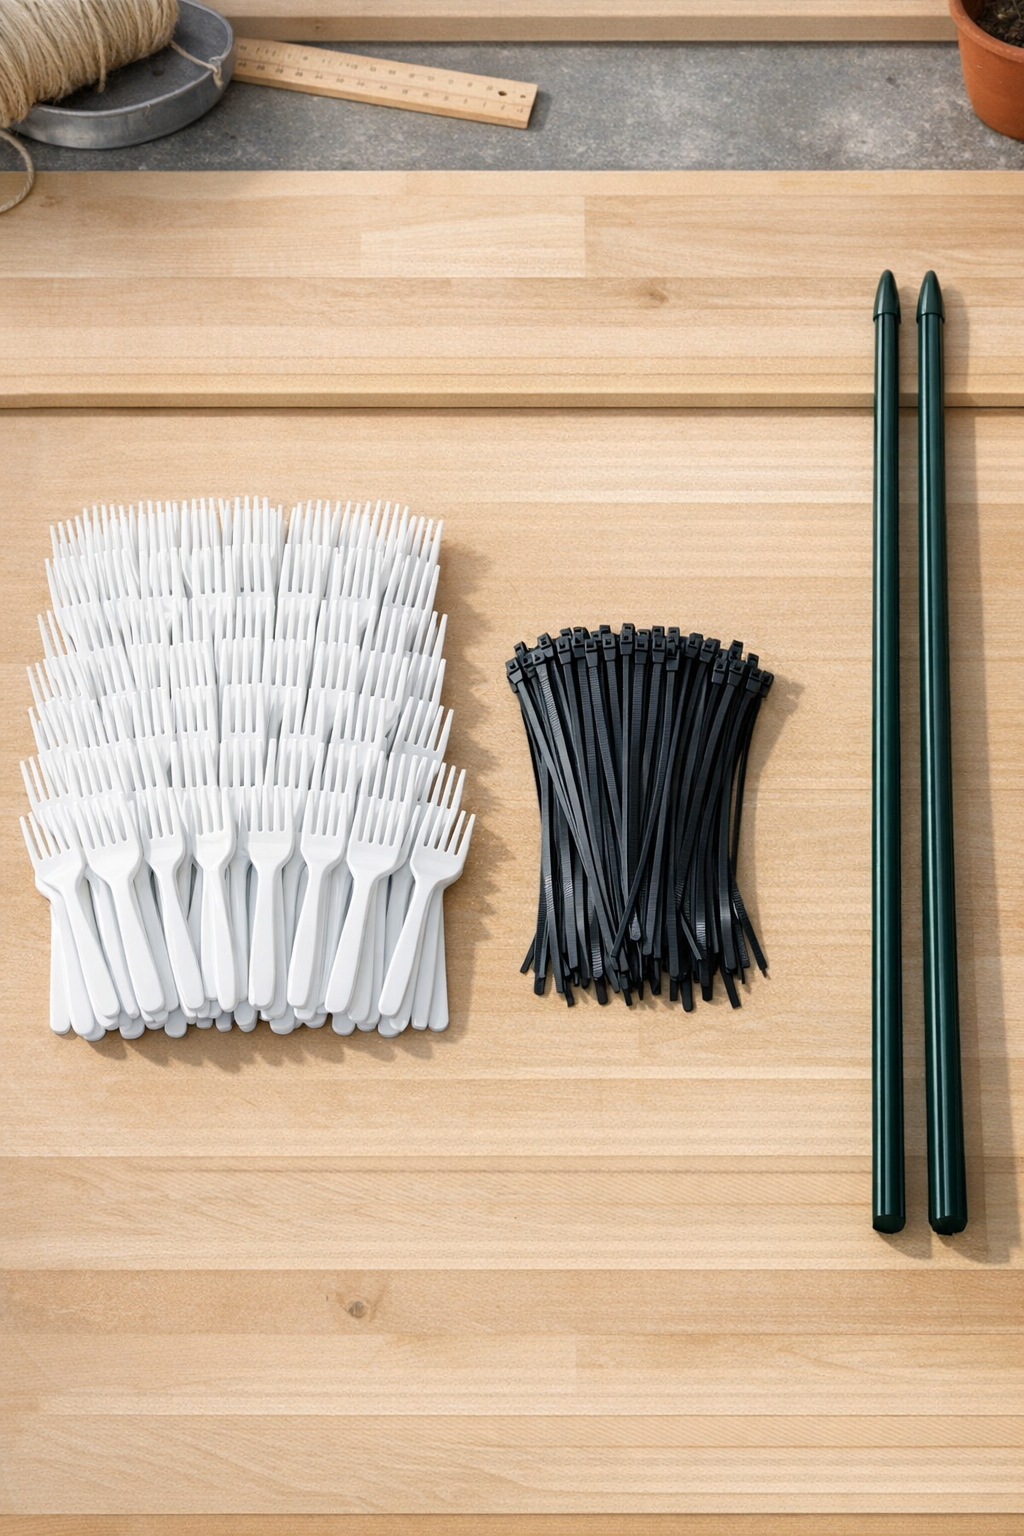
Materials
80 heavy-duty plastic forks, standard size 6 to 7 inches long
Instructions
1. Preheat your oven to 250°F and line a large baking sheet with parchment paper. Open a window or turn on ventilation so you have plenty of airflow while the forks soften.
2. Arrange 10 plastic forks on the baking sheet in a slightly overlapping row, with the tines overlapping the handles by about 1 inch. Keep all the forks facing the same direction so the row will fuse into a flexible strip.
3. Bake the row for 3 to 5 minutes, just until the plastic softens and the overlaps begin to bond. Remove the sheet carefully and press the overlaps gently with the back of a spoon for a flatter connection, then let the strip cool completely.
4. Repeat the same process to make 8 strips total, using 10 forks per strip. Try to keep the strips close in length so the finished trellis looks tidy and sits evenly between the stakes.
5. Lay 4 strips vertically on your work surface, spacing them about 4 inches apart. Set the other 4 strips horizontally across them to create a simple grid, keeping the fork tines angled outward for extra texture.
6. Fasten each crossing point with a zip tie pulled tight, trimming the tails neatly after each one. Use enough ties to secure every intersection so the panel won’t shift once it’s in the garden.
7. Place one metal garden stake along each side of the fork panel and attach the panel to the stakes with additional zip ties at the top, middle, and bottom. Pull each tie snug so the panel stays flat and supported.
8. Push the stakes 8 to 10 inches into the soil behind your plant, then angle and press the trellis until it feels steady. Guide the first few vines onto the fork grid so the plant starts climbing in the right direction.
9. Check the trellis after the first windy day and tighten or replace any loose zip ties. Once the plant fills in, the unusual fork texture becomes a charming hidden support under all that green growth.
Variations & Tips
For lighter plants: This trellis is best for sweet peas, black-eyed Susan vine, small cucumbers, and other lighter climbers. I would skip very heavy squash or anything that can pull hard on the grid after rain.
Fork color choice: White forks give the cleanest cottage-garden look, but green or tan plastic blends in better once the plants grow. If you’re making this for a flower bed near the porch, matching the fork color to your planters makes it look more intentional.
Safer heating tip: Soften only a few forks at a time and watch them closely so they don’t scorch or curl too much. In my house, I’ve learned that gentle heat and patience make a much nicer result than trying to rush a batch.
Extra strength: If you want a firmer panel, make the grid denser by reducing the spacing between strips to 3 inches. More intersections mean more zip ties, but it also creates a sturdier climbing surface.
Kid- and pet-aware placement: Because the tines can stay a little textured even after softening, place the trellis inside a garden bed rather than right next to a walkway. I like tucking projects like this just behind the front row of plants so they’re useful without being in anyone’s path.
For picky-looking yards: If anyone in your family is not sold on the “plastic fork garden art” idea, let the vines cover most of it before showing it off. Once greenery fills in, neighbors usually notice the healthy climbing plants first and the clever support second.