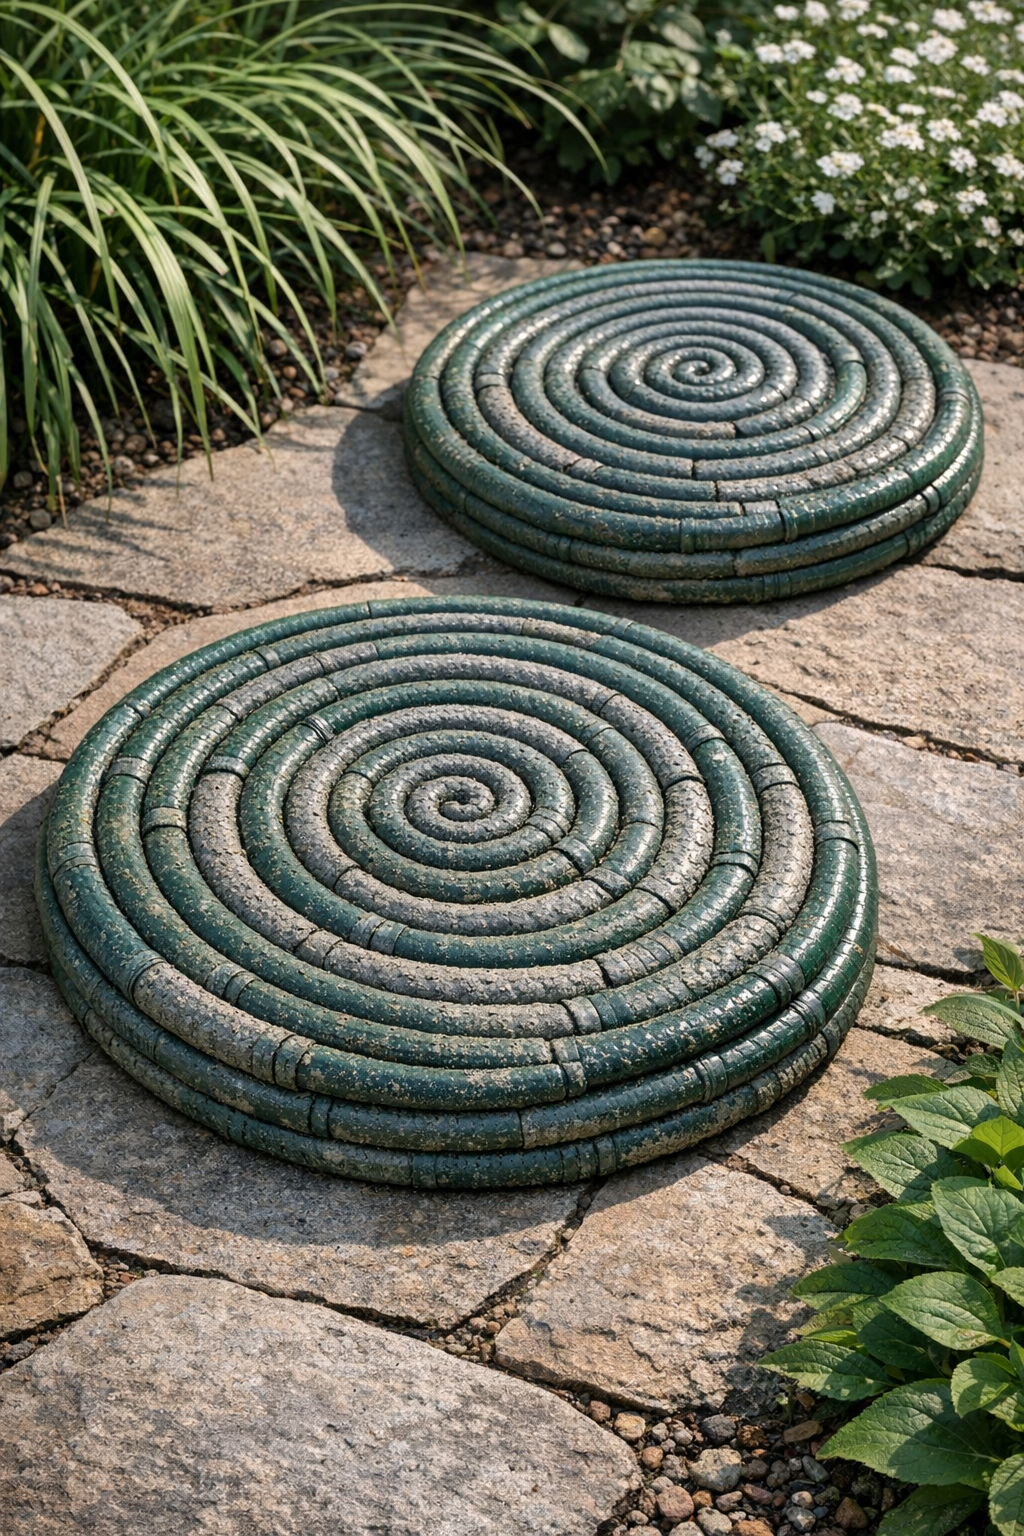
I love a project that turns something awkward and hard to toss into something genuinely useful, and this one does exactly that. These heavy coiled outdoor slabs are made by shaping old plastic garden hoses into round forms, then filling them with cement for a sturdy, modern-looking result that works beautifully as garden stepping pads, patio accents, or plant stands.
As someone who is always trying to balance a busy workweek with practical home projects, I really appreciate DIYs like this that feel dramatic without being complicated. If you have a couple of worn-out hoses taking up space in the garage, this is a smart weekend project for beginners and seasoned DIYers alike.
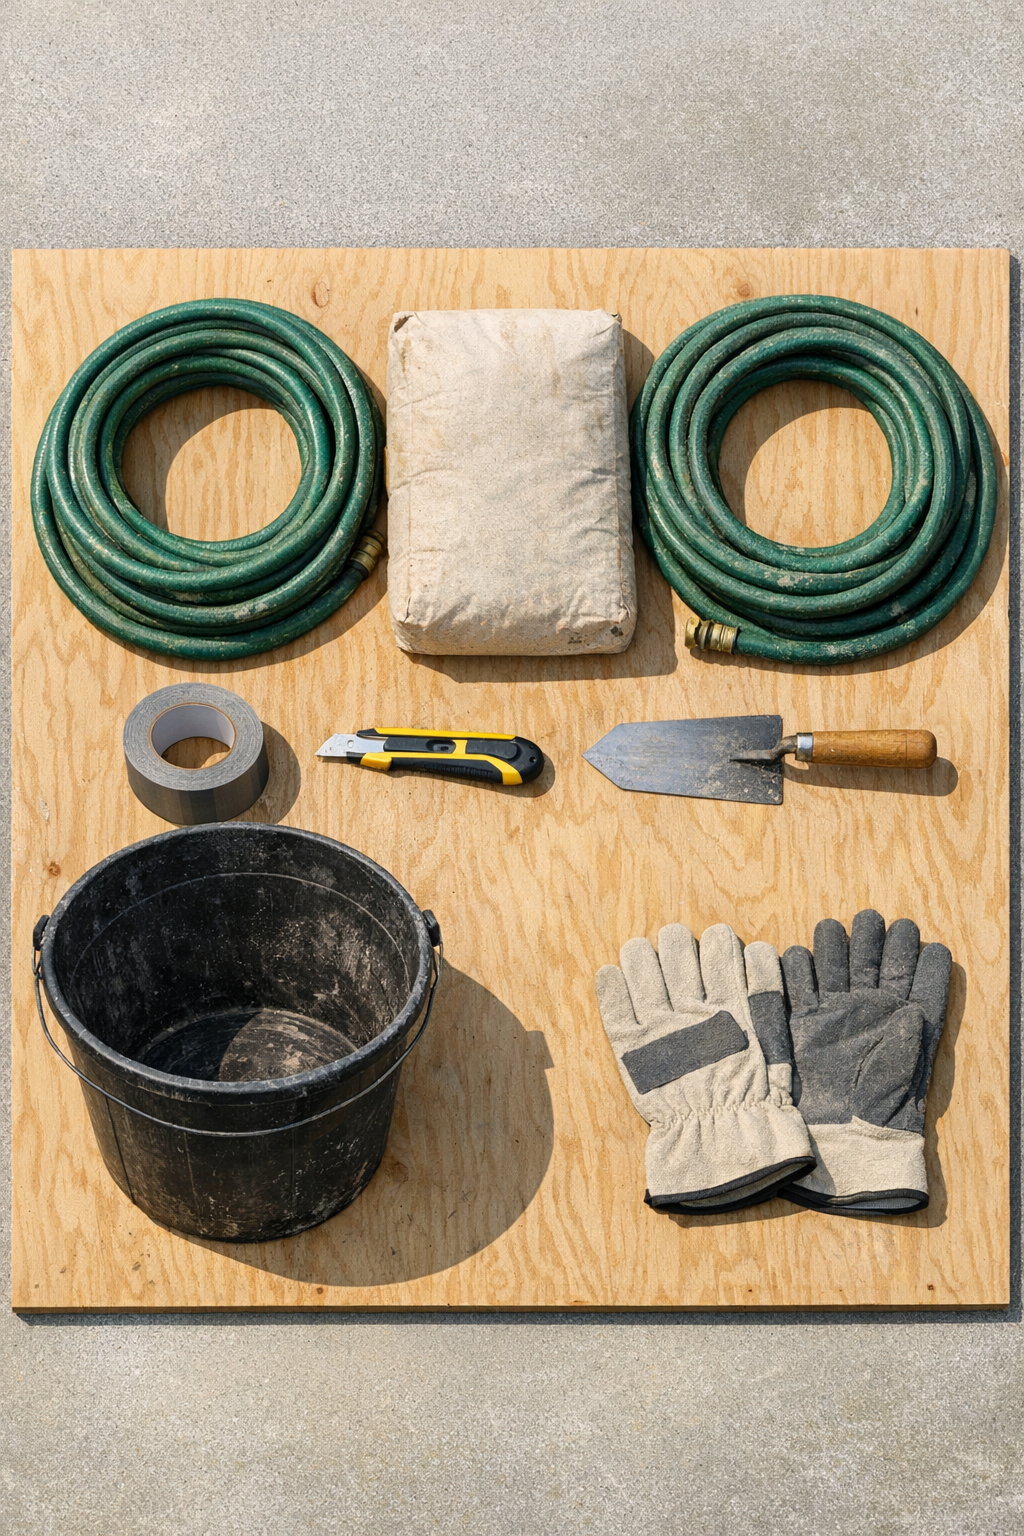
Materials
2 old plastic garden hoses, 25 feet each
Instructions
1. Clean the old hoses and let them dry fully so dirt and loose debris do not get mixed into the cement.
2. Cut off any metal hose ends with a utility knife so each hose is open and ready to be filled.
3. Coil the first hose into a tight flat spiral about 18 to 20 inches wide on your work surface, then tape the outer edge in several places to help it hold its shape.
4. Tape the hose at every 4 to 5 inches around the coil, and add a few tape bridges across neighboring rings so the spiral stays snug while you fill it.
5. Repeat the coiling and taping process with the second hose to create a matching slab form.
6. In a mixing bucket, combine the cement mix with water according to the package directions until it reaches a thick, spoonable consistency.
7. Scoop the wet cement into one open end of the first hose a little at a time, lifting and gently shaking sections of the hose so the mix settles deeper into the coil.
8. Keep filling until the entire hose feels packed and firm, then seal the end with a wrap of duct tape to prevent wet cement from pushing back out.
9. Press and nudge the filled coil back into a flat round slab shape, adjusting the rings so the spacing stays even and the top surface sits level.
10. Fill the second hose the same way, then shape it into a matching slab beside the first one on the board.
11. Let both slabs cure undisturbed for 24 to 48 hours, or until they feel hard and heavy enough to move without shifting.
12. Once cured, place the slabs in your yard, along a garden path, or on a patio as bold outdoor stepping pads or decorative bases.
Variations & Tips
Make them larger: If you have longer hoses, create wider coils for statement patio pads, but keep the spiral tight so the slab stays stable.
Use quick-setting mix: When I’m squeezing in a project between errands and work, quick-setting cement can make this much easier, just be ready to work fast.
Keep the fill thick: Cement that is too watery is harder to control inside the hose and can leave soft spots, so aim for a thick mix that still moves with gentle shaking.
Check placement before curing: If you want the slabs in a very specific shape, do a final adjustment right after filling because they become much harder to reshape once the cement starts to set.
Try a matching set: I like making two or three at once so a garden path looks intentional instead of pieced together over time.
Leave the hose in place: The plastic hose acts as the outer shell here, so there is no need to remove it after curing unless you want a different finish and are prepared for extra cleanup.