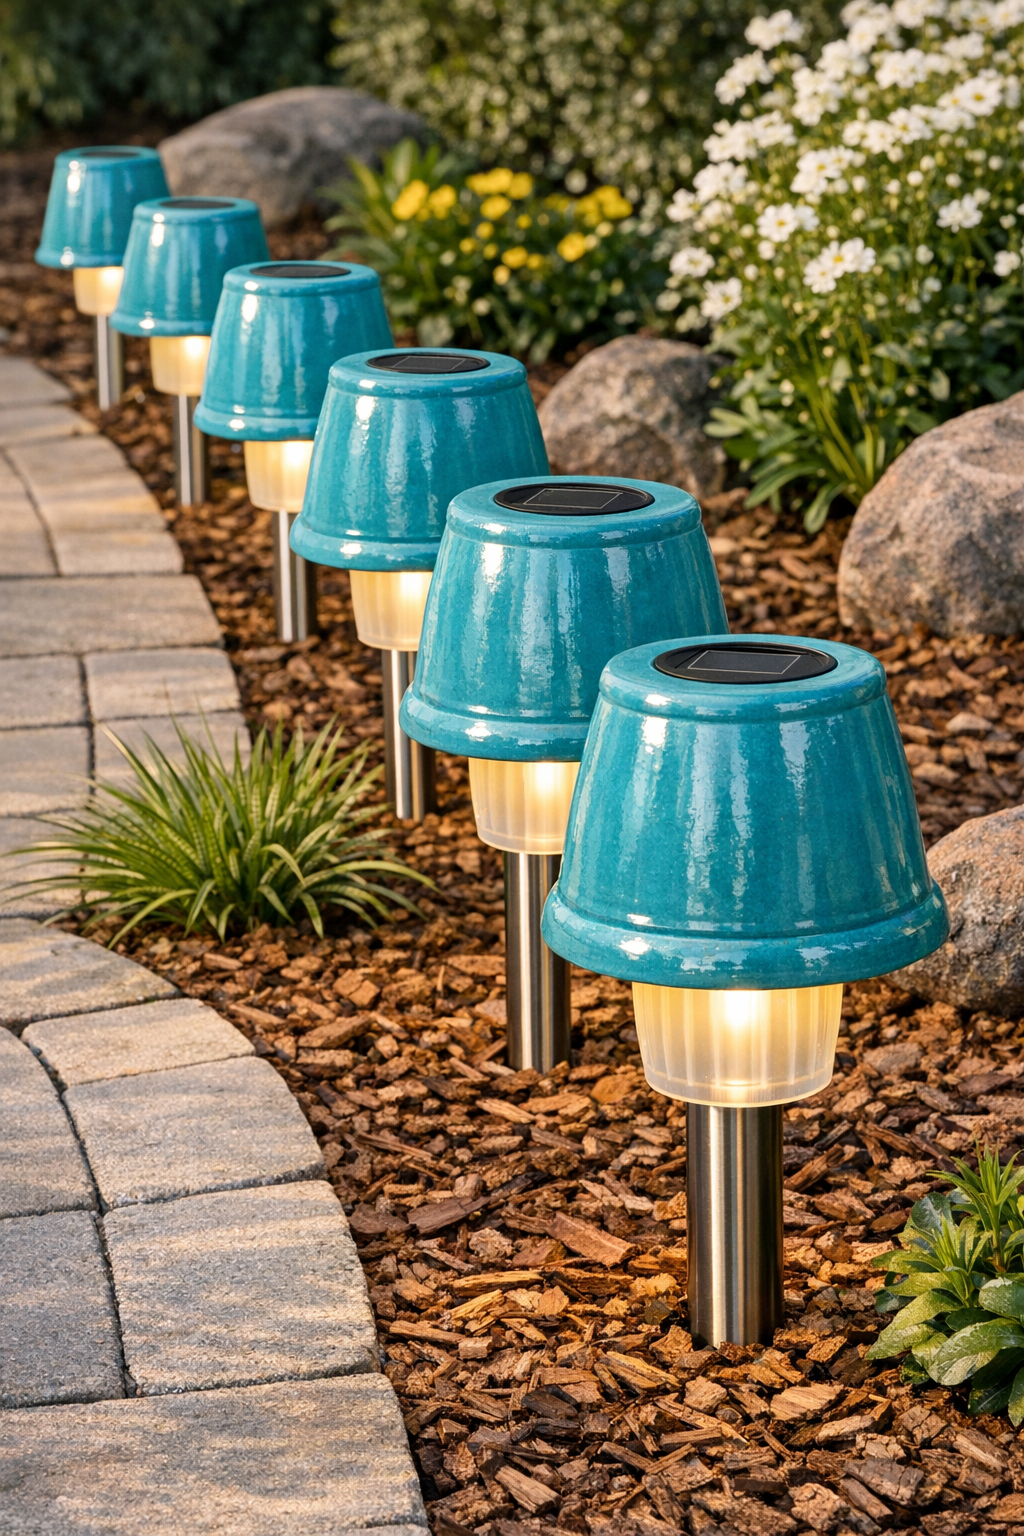
I love a project that pulls double duty, and this one does exactly that: it turns ordinary solar pathway lights into colorful garden features by pairing them with inverted ceramic pots that look like sculptural planters by day and glowing lanterns by night. If your walkway needs a little more personality without the fuss of wiring or a big landscaping overhaul, this is the kind of weekend DIY that makes a noticeable difference fast.
Because I spend so much time thinking about presentation in the kitchen, I naturally bring that same eye to outdoor spaces too. This project is especially good for anyone who likes polished details, already has a few sturdy glazed pots on hand, and wants a walkway accent that feels custom rather than straight-from-the-store. The key is drilling carefully through the ceramic so the pot can slip neatly over the metal stake and solar light assembly.
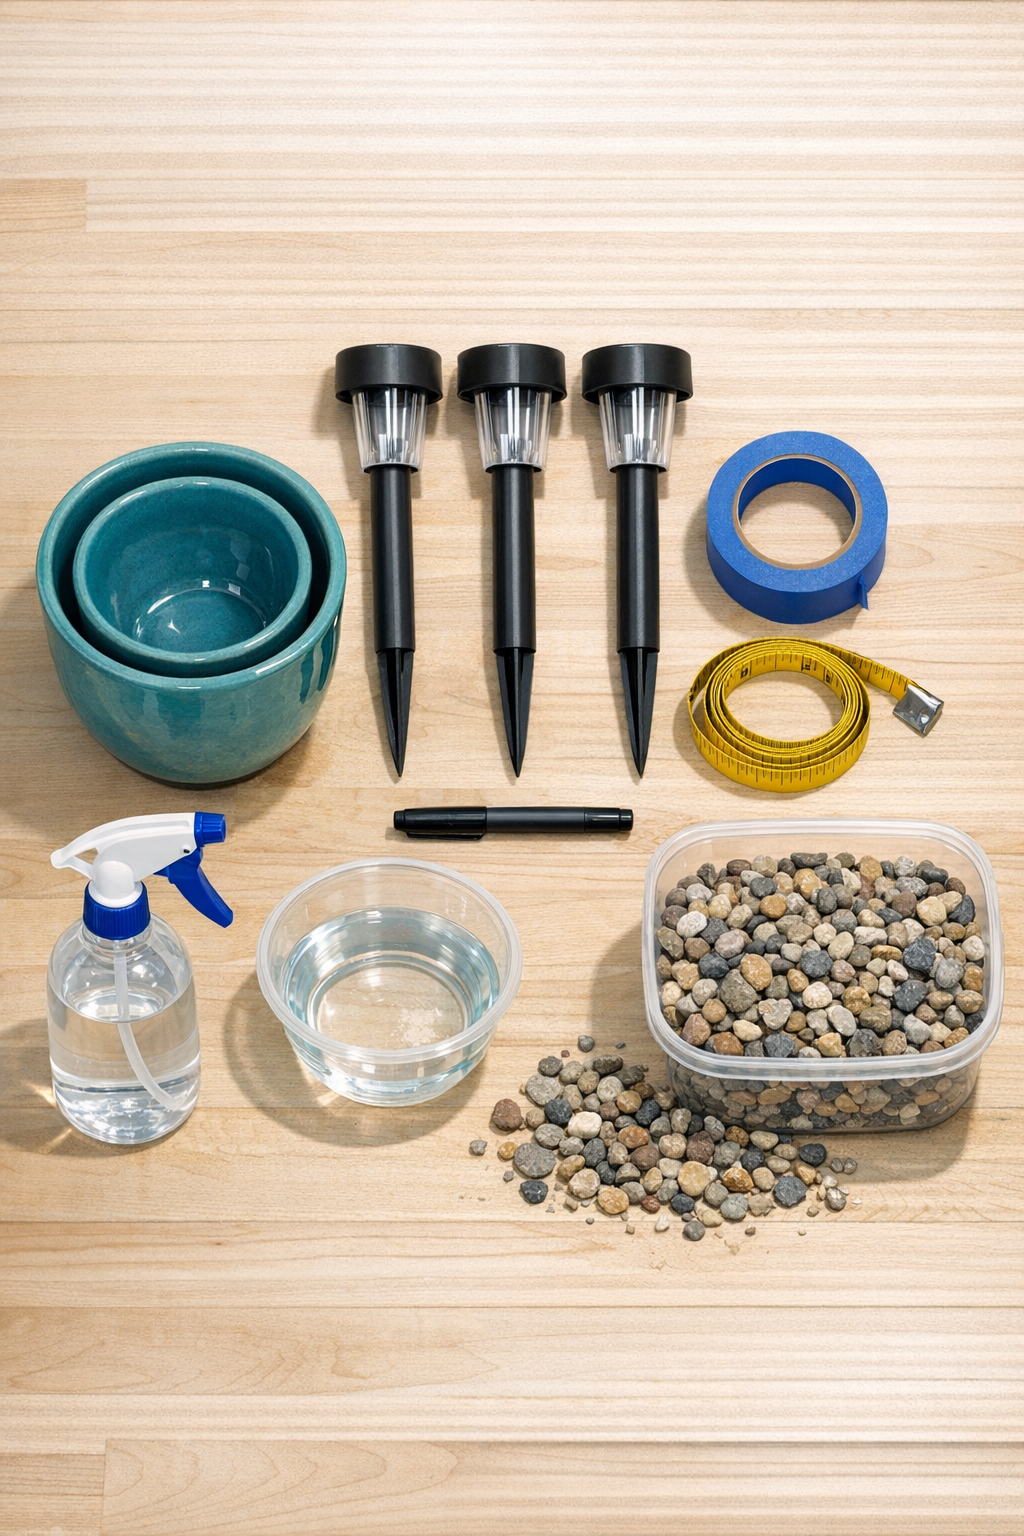
Materials
Instructions
1. Choose ceramic pots that are wide enough to cover the solar light head and narrow enough at the rim to sit attractively near the ground once inverted. Check that the metal stake and light stem can pass through a drilled opening in the pot bottom without forcing it.
2. Mark the center of each pot bottom with a marker, then place painter’s tape in an X over that spot to help reduce skipping. Measure the widest part of the light stake or stem assembly and mark a circle slightly larger than that measurement.
3. Set the pot upside down on a folded towel or rubber mat so it does not wobble. Keep the taped area damp with water before and during drilling to help control heat and ceramic dust.
4. Drill a pilot hole slowly through the center using a ceramic- or tile-rated bit, applying light pressure and stopping often to add water. Once the pilot hole is through, enlarge it gradually until the opening fits over the stake or light stem.
5. Smooth the hole edges lightly so the ceramic does not scrape the light stem during assembly. Test-fit the pot over the stake before moving on to the next pot, and widen the hole a little more if needed.
6. Install the metal stakes along the walkway at evenly spaced intervals, pushing them firmly into level ground. Add a little pea gravel around the base of each stake if the soil is soft or if you need to improve drainage and stability.
7. Remove the light tops if your model allows, then slide each drilled ceramic pot upside down over its metal stake. Reattach the solar light top so it sits centered beneath the pot, allowing the light to glow outward from underneath in the evening.
8. Adjust the pot height and angle so the rim sits evenly above the soil or mulch and the solar panel still receives direct sunlight. If needed, raise or lower the light stem slightly so the fixture looks balanced from every approach to the walkway.
9. Repeat for the remaining lights, stepping back after each one to keep the spacing and height consistent. Turn the lights on or allow them to charge, then check the look at dusk and make small placement corrections if one side appears uneven.
Variations & Tips
Use one test pot first: If you have never drilled glazed ceramic before, practice on a single pot before committing to the full set. Ceramic can vary a lot in thickness, and that first hole tells you how slowly you need to work.
Match the pot to the light output: Darker or thicker pots block more glow, while lighter-colored or thinner-walled pots create a brighter effect. I like turquoise here because it reads cheerful in daylight and still feels crisp and clean in the garden.
Keep the solar panel exposed: Some pathway lights charge from the top, so make sure the panel is not completely blocked by the pot shape. If necessary, choose lights with a taller stem or a separate top cap that sits below the drilled opening.
Try a grouped arrangement: Instead of a straight walkway line, place three or five in a clustered bed near an entry for a more decorative focal point. Odd-number groupings often look the most natural.
Add planting around the base: Low groundcovers, creeping thyme, or small annuals soften the look beautifully without interfering with the light. I’d keep taller plants away from the solar panel so performance stays reliable.
Work slowly when drilling: In cooking, rushing usually shows up in the final dish, and the same is true here. Light pressure, steady water, and patience are what keep glazed pots from cracking.
Bring them in for winter if needed: In a Midwestern freeze-thaw cycle, glazed ceramic can be unpredictable outdoors. If your pots are not rated for year-round exterior use, store them before hard freezes to help them last.