
I love a front-door project that looks theatrical from the sidewalk but is actually simple to assemble in an afternoon, and this glowing jellyfish hanger absolutely fits that bill. The whole idea is built around an oversized white plastic mixing bowl that becomes the jellyfish bell, with strands of blue LED fairy lights hanging down like luminous tentacles. When the light fades in the evening, it gives off that floating, aquarium-like glow that makes people stop and look twice.
This is a great project for anyone who wants seasonal porch decor that feels a little whimsical without needing power tools or advanced crafting skills. I’m always drawn to projects that use humble household items in unexpected ways, and this one has that satisfying kitchen-meets-decor charm I can’t resist.
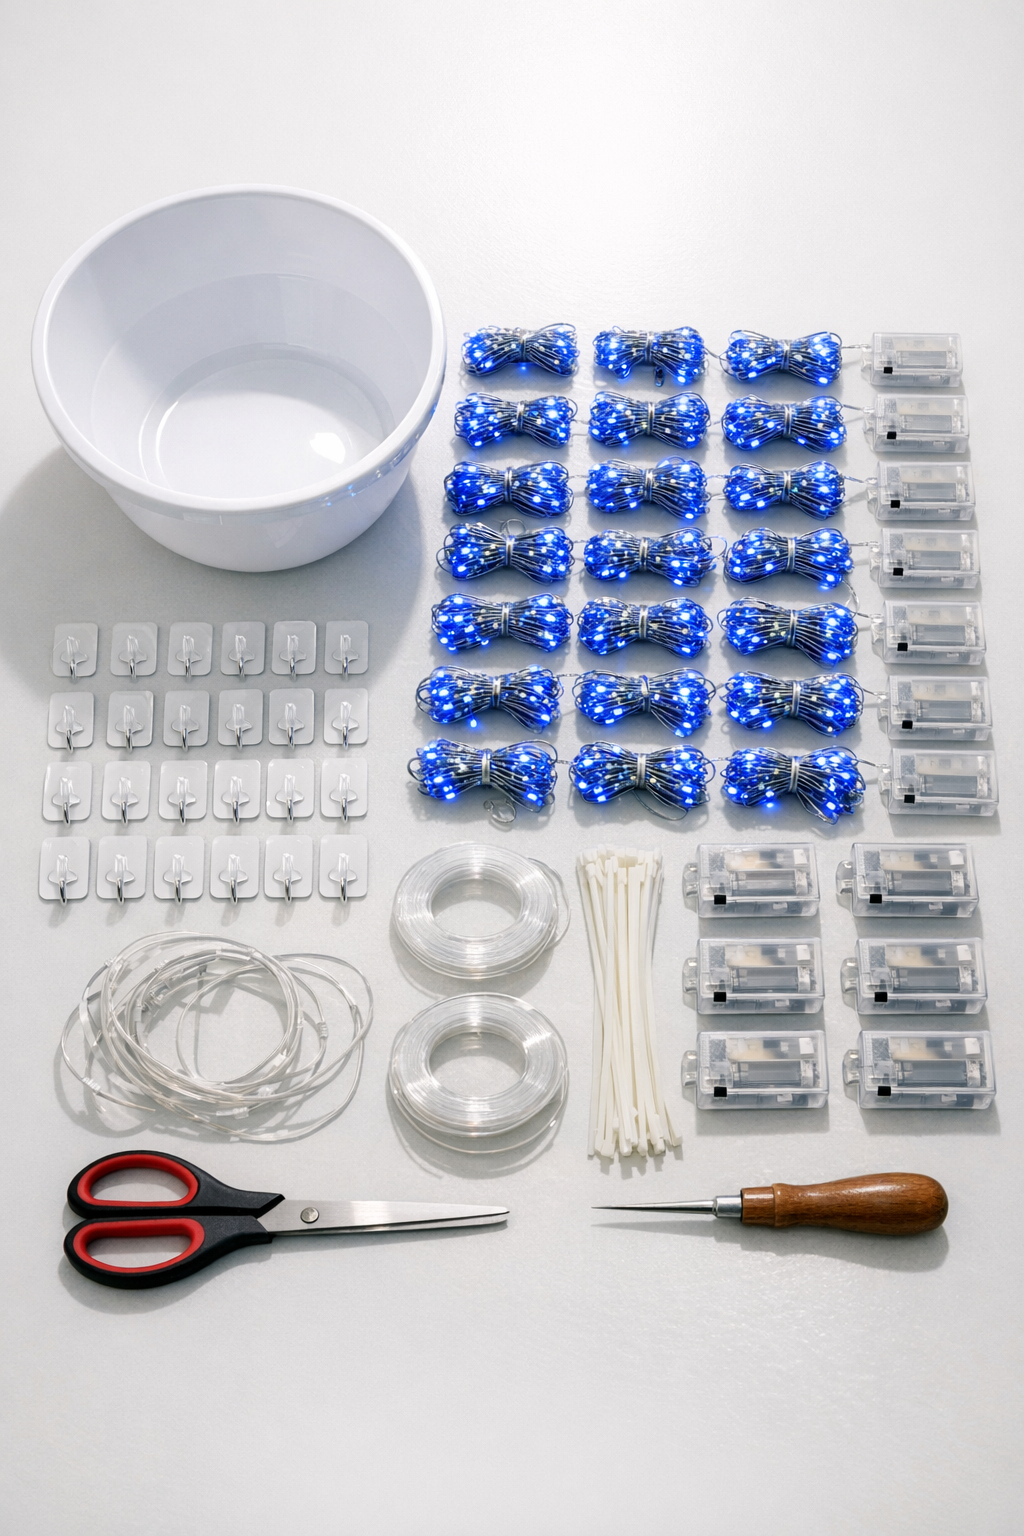
Materials
Instructions
1. Clean and dry the mixing bowl thoroughly, then turn it upside down so it looks like a jellyfish bell. If there are stickers or residue on the bowl, remove them now so the surface is smooth and bright.
2. Cut the craft foam or cardboard into a circle or square that fits inside the top center of the upside-down bowl. This support plate helps distribute the weight of the hanging lights so the plastic bowl doesn’t crack.
3. Use a small awl, heated nail, or drill with a very small bit to make 8 evenly spaced holes around the lower rim area of the bowl. Add 1 hole in the top center for the main hanging line.
4. Thread a length of fishing line through the top center hole and tie it securely around the support plate on the inside of the bowl. Add a dab of hot glue and a strip of clear packing tape over the knot for extra stability.
5. Divide the 40 fairy light strands into 8 groups of 5 strands each. Keeping them grouped makes the tentacles hang more evenly and gives the finished jellyfish a full, balanced shape.
6. Attach one group of 5 light strands to each rim hole area using zip ties, securing them snugly just under the bowl’s edge. Let the strands hang freely so they drape straight down like tentacles.
7. Arrange the battery packs or power leads inside the bowl, spacing them evenly so the hanger doesn’t tilt to one side. Use clear tape and a small amount of outdoor-safe adhesive to keep the packs from shifting.
8. Turn on the lights and check the drape, then trim any zip tie tails and gently separate the strands with your fingers. If you want a softer, more oceanic look, tuck in a few strips of iridescent ribbon or sheer tulle between the light strands.
9. Tie a hanging loop at the top of the fishing line, making sure the jellyfish sits level when lifted. Test the balance indoors before moving it to the front door.
10. Install the adhesive hook on the upper center area of your front door or porch ceiling according to the package directions. Hang the jellyfish and adjust the tentacles so they fall naturally and don’t bunch together.
Variations & Tips
Add more movement: Mix in narrow strips of white curling ribbon, pearlized ribbon, or sheer tulle to make the tentacles flutter in the breeze between the light strands.
Use fewer power packs: If you can find curtain-style fairy lights or multi-drop strand lights with many hanging sections on one power source, the project becomes lighter and much easier to manage.
Make it weather-friendlier: A covered porch is best for this project. I’d avoid leaving battery packs fully exposed in rain, and I recommend tucking them up inside the bowl with extra clear tape for light moisture protection.
Create color changes: Blue is the classic jellyfish look, but cool white, aqua, or color-changing LEDs can give you a more magical effect depending on the season.
Keep the bowl glowing softly: If your bowl is very opaque, cut a small inner ring from the foam support instead of a full solid plate so more light can bounce around inside the dome.
Check door function: Before final installation, open and close the door several times to make sure the hanging tentacles don’t catch on hardware, storm doors, or nearby planters.
Try a clustered look: For a fuller jellyfish, stagger the tentacle lengths by wrapping a few strands slightly higher before securing them, which gives the bottom edge a more natural, layered silhouette.