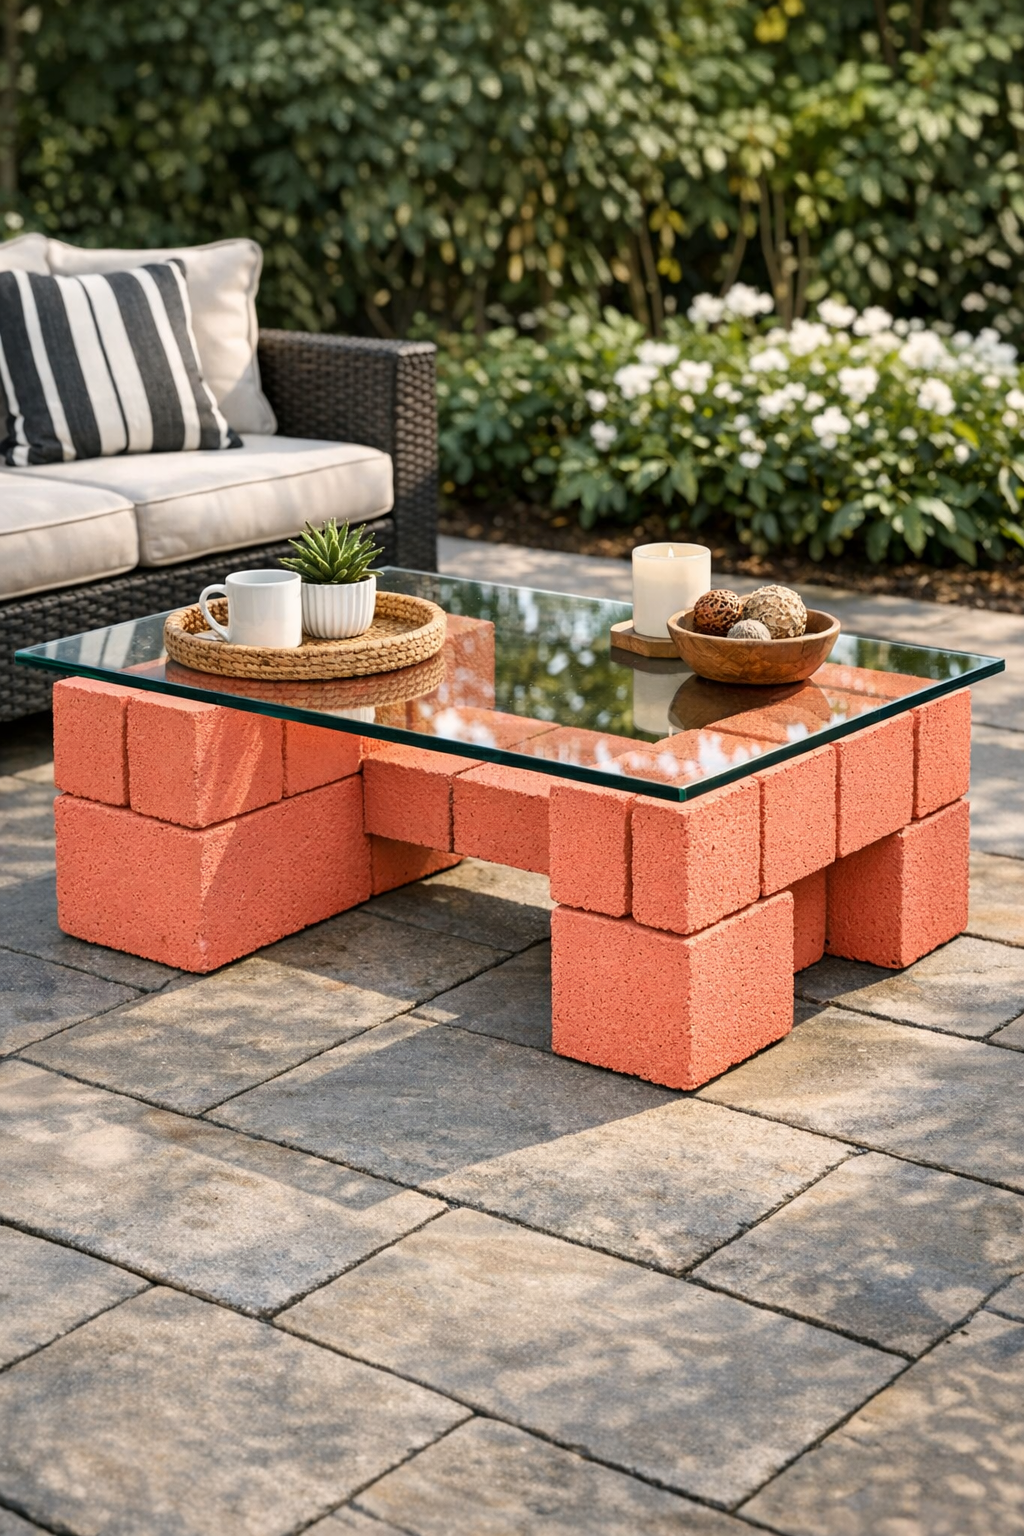
This outdoor coffee table is one of those backyard projects I love because it looks polished and expensive, but it’s surprisingly simple to put together in an afternoon. By stacking and painting cinder blocks, then topping them with a sheet of tempered glass, you get a sturdy patio table with clean lines and plenty of personality.
I especially like this kind of project for busy families, first apartments, and anyone trying to make a patio feel welcoming without spending a fortune. It’s also a wonderful way to add color outdoors, and since the base is made from cinder blocks, it holds up beautifully to wind, weather, and everyday use.
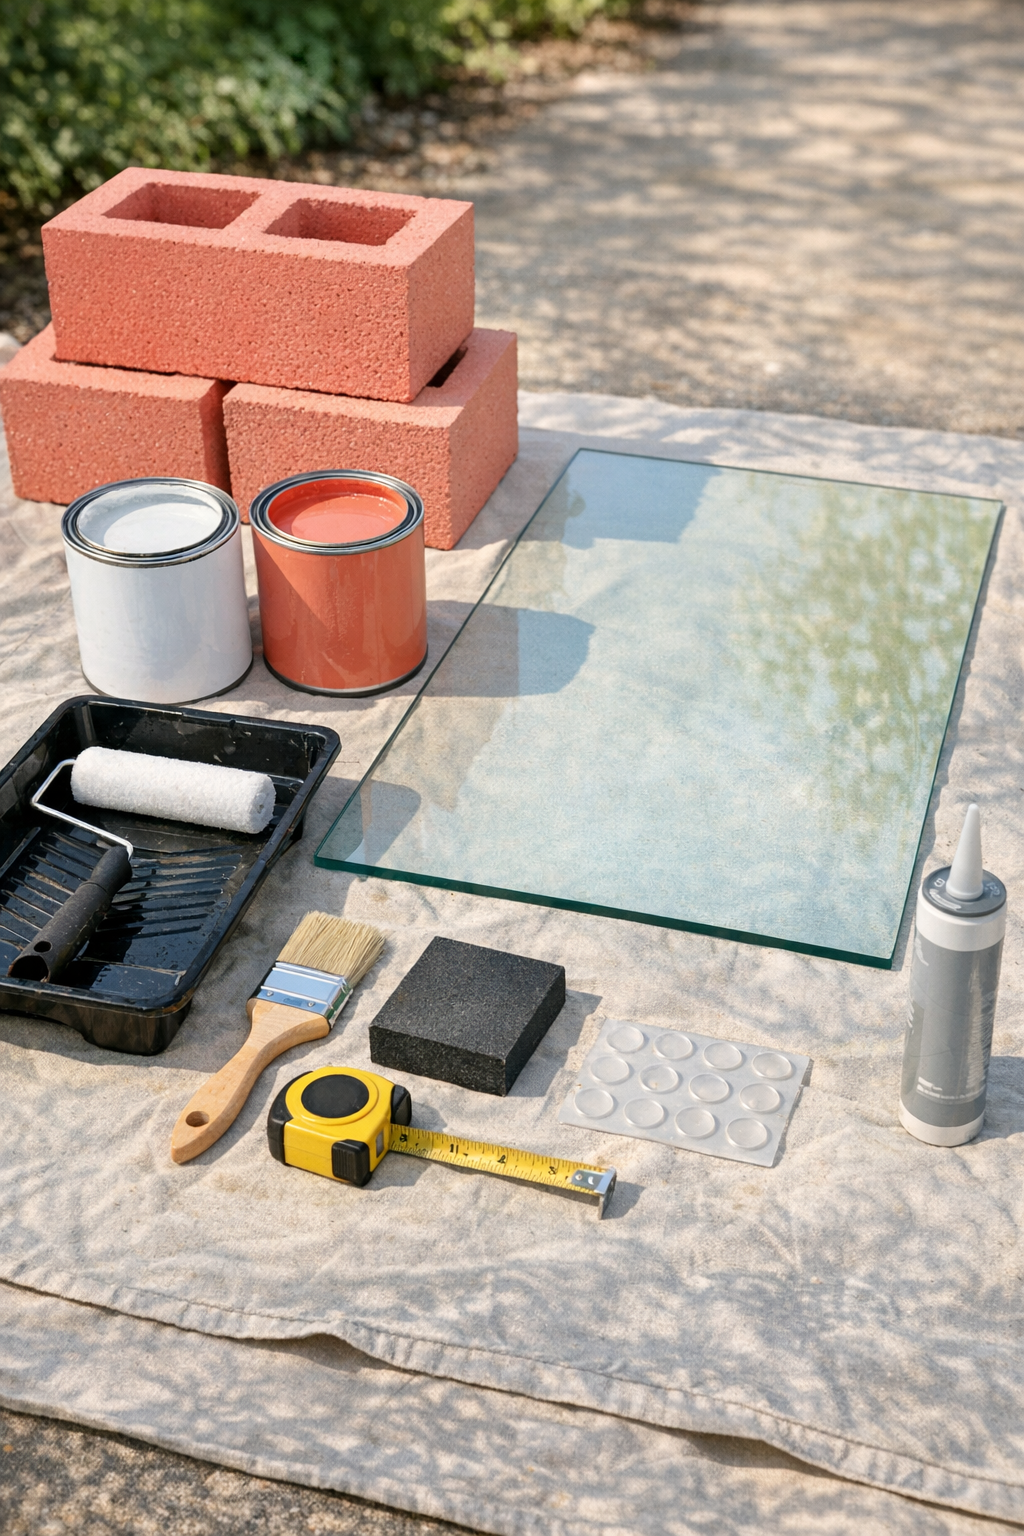
Materials
6 standard cinder blocks, 8 in. x 8 in. x 16 in.
Instructions
1. Choose a flat, level spot on your patio or in the backyard where the table will stay. Measure the area to make sure your 24 in. x 42 in. glass top will fit comfortably with room to walk around it.
2. Lay out the drop cloth and place the cinder blocks on top. Lightly sand any rough edges or loose grit, then wipe each block with a damp rag so the primer sticks well.
3. Apply a full coat of exterior masonry primer to all visible sides of the blocks using the roller for broad surfaces and the brush for corners and openings. Let the primer dry completely according to the manufacturer’s directions.
4. Paint the blocks coral, covering the outside faces, inner openings, and top edges for a finished look. Let the first coat dry, then add a second coat if needed for even color.
5. Arrange the painted blocks in a U-shape, with two stacks of two blocks on the sides and two blocks across the back to connect the shape. Check that the layout is even and that the top edges line up as level as possible.
6. If you want extra stability, add a thin bead of exterior-rated construction adhesive between any blocks that are stacked directly on one another. Press them into place and let the adhesive set as directed before adding the glass top.
7. Place clear rubber bumper pads along the top contact points of the cinder blocks so the glass has a soft, non-slip resting surface. Space the pads evenly near the corners and along the longer spans.
8. With help from another adult, carefully lower the tempered glass tabletop onto the bumper pads and center it over the U-shaped base. Adjust it until the overhang looks even on all sides and the table feels steady.
9. Give the table a final wipe to remove dust or fingerprints, then style it with a tray, a small potted plant, or a lantern if you’d like. Let the painted base cure fully before heavy use so the finish stays pretty longer.
Variations & Tips
Color choice: Coral is such a happy patio color, but this table would also be beautiful in soft sage, charcoal, navy, or crisp white to match your outdoor cushions.
For picky decorators: If your family all likes different styles the way mine does, keep the block base neutral and bring in brighter color with planters, napkins, or a tray on top.
Glass safety: Always use tempered glass with smoothed edges for an outdoor table like this. Regular glass is not the right choice for a project that may be bumped during family gatherings.
Make it more secure: If your patio gets a lot of wind or you have active kids leaning on furniture, use a few extra rubber pads and double-check that the base is sitting perfectly level before setting the glass in place.
Add storage: The cinder block openings can hold rolled outdoor hand towels, a small planter, or battery candles, which is a fun little detail when you’re setting out snacks for company.
Weather care: If you live somewhere with freezing winters like we do in the Midwest, I recommend moving the glass top indoors during the harshest part of the season and covering the painted base when it’s not in use.