
I love a project that gives you a high-end look without the high-end price tag, and this faux wrought iron porch trellis does exactly that. By spray-painting inexpensive plastic hula hoops matte black and fastening them to a simple wooden frame, you can create a tall, graphic statement piece that looks far more custom than it really is. It has that classic scrollwork feel of old iron garden gates, but it’s lightweight, affordable, and very manageable for a weekend build.
This is a great project for anyone who wants to dress up a porch, patio wall, or garden corner without investing in real metalwork. I’m especially fond of this kind of makeover because it relies on repetition and contrast rather than complicated joinery. If you can measure, paint, and use zip ties with a little patience, you can pull this off beautifully.
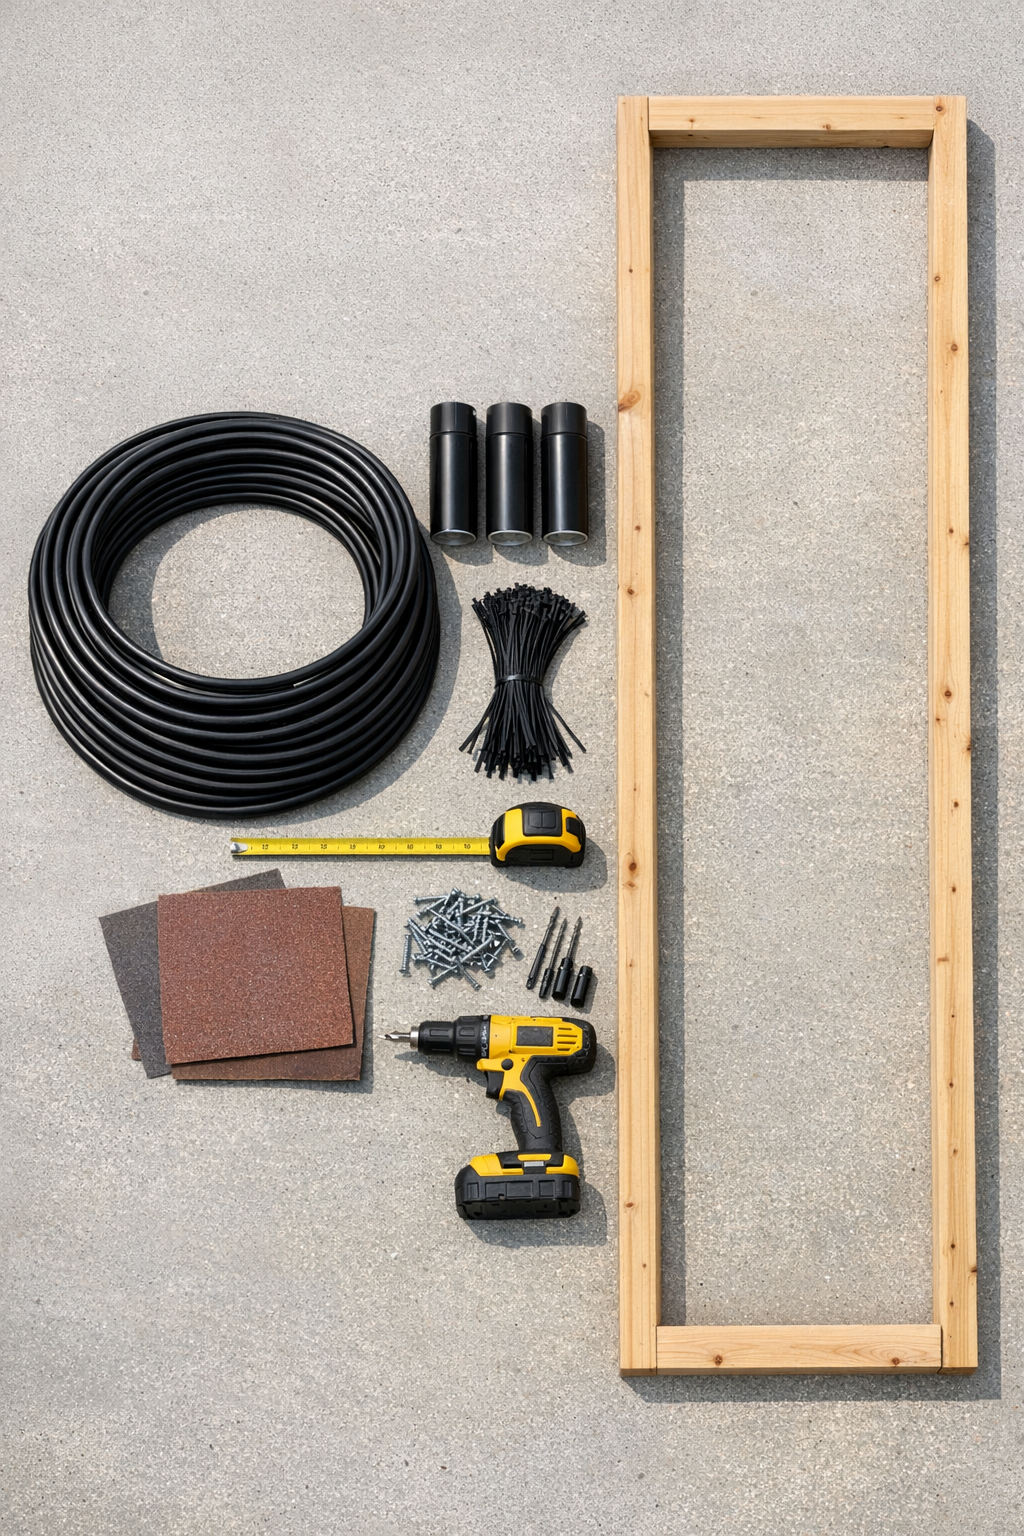
Materials
Instructions
1. Build a tall rectangular frame from the 1 x 3 boards, cutting two boards to 84 inches for the sides and two boards to 30 inches for the top and bottom. Screw the rectangle together with exterior screws, then add two leftover horizontal supports across the back for rigidity.
2. Lightly sand the frame to smooth rough edges, then wipe away dust. If the trellis will live in a very exposed spot, apply exterior paint or sealer to the wood and let it dry fully.
3. Wash the hula hoops with rubbing alcohol or degreaser to remove any slick residue, then dry them completely. This small prep step makes a big difference in how well spray paint sticks, and I never skip it with plastic.
4. Set the hoops on a drop cloth outdoors and apply a light coat of primer if you’re using it. After that dries, spray all 20 hoops with matte black paint in several light passes, turning them as needed for even coverage.
5. Let the hoops dry according to the paint directions, then add a second coat anywhere the original colors still peek through. Allow the final coat to cure fully before assembly so the finish does not scratch easily.
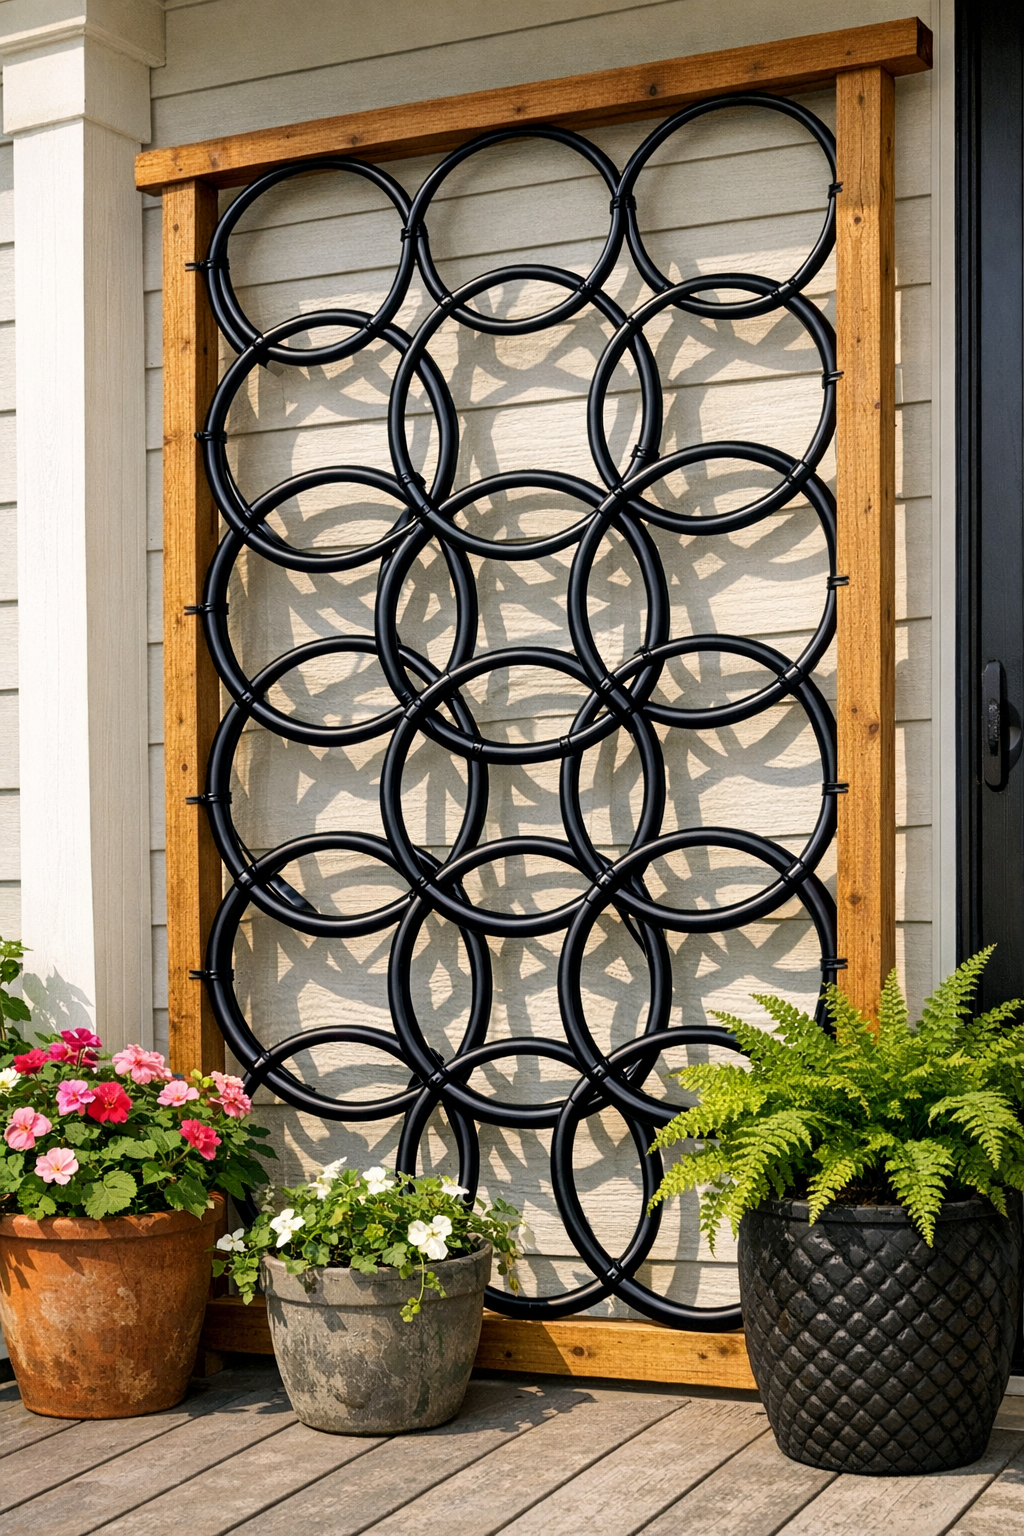
6. Lay the wooden frame flat and arrange the hoops on top in a repeating overlapping pattern. Use all 20 hoops to create a faux wrought iron look, keeping spacing as even as possible from top to bottom.
7. Start attaching the hoops with black zip ties wherever they touch the frame and where hoops overlap each other. Pull each tie snug, but not so tight that it dents the plastic.
8. Continue securing the entire design, adding extra zip ties at major intersections so nothing shifts when the frame is lifted. I like to step back every few minutes here, because small spacing adjustments make the finished piece look much more intentional.
9. Trim the tails off every zip tie as close to the lock as possible for a cleaner look. Turn the frame upright and check for loose areas, then add ties anywhere the pattern still wobbles.
10. Place the finished trellis on your porch, against an exterior wall, or beside a seating area. Anchor it with L-brackets if needed, especially in windy spots, and style it with climbing vines, lanterns, or potted plants nearby.
Variations & Tips
Square it up first: Before attaching any hoops, measure diagonally from corner to corner on the frame. If both diagonal measurements match, your frame is square and the pattern will sit more evenly.
Use outdoor-rated fasteners: Black UV-resistant zip ties hold up much better outside than standard indoor ones. If you live through harsh Midwestern summers and icy winters like I do, this is one place not to cut corners.
Try a denser pattern: For a more ornate look, overlap the hoops more tightly in the center and leave smaller open spaces. This makes the trellis read even more like decorative ironwork.
Add greenery carefully: Lightweight faux vines or a small climbing annual can soften the design beautifully, but avoid anything too heavy that could pull the hoops out of place over time.
Blend the frame: If you want the wood to disappear visually, paint the frame matte black too. That creates one continuous silhouette and gives the project a more polished, store-bought appearance.
Hide the zip ties: Position the zip tie locks toward the back or inside edges of the overlaps whenever possible. It takes a little extra fussing, but the front view looks much cleaner.
Scale it for your space: A narrower frame works well beside a front door, while a wider version can fill a blank porch wall. Just keep the hoop pattern balanced so it still feels rhythmic rather than crowded.