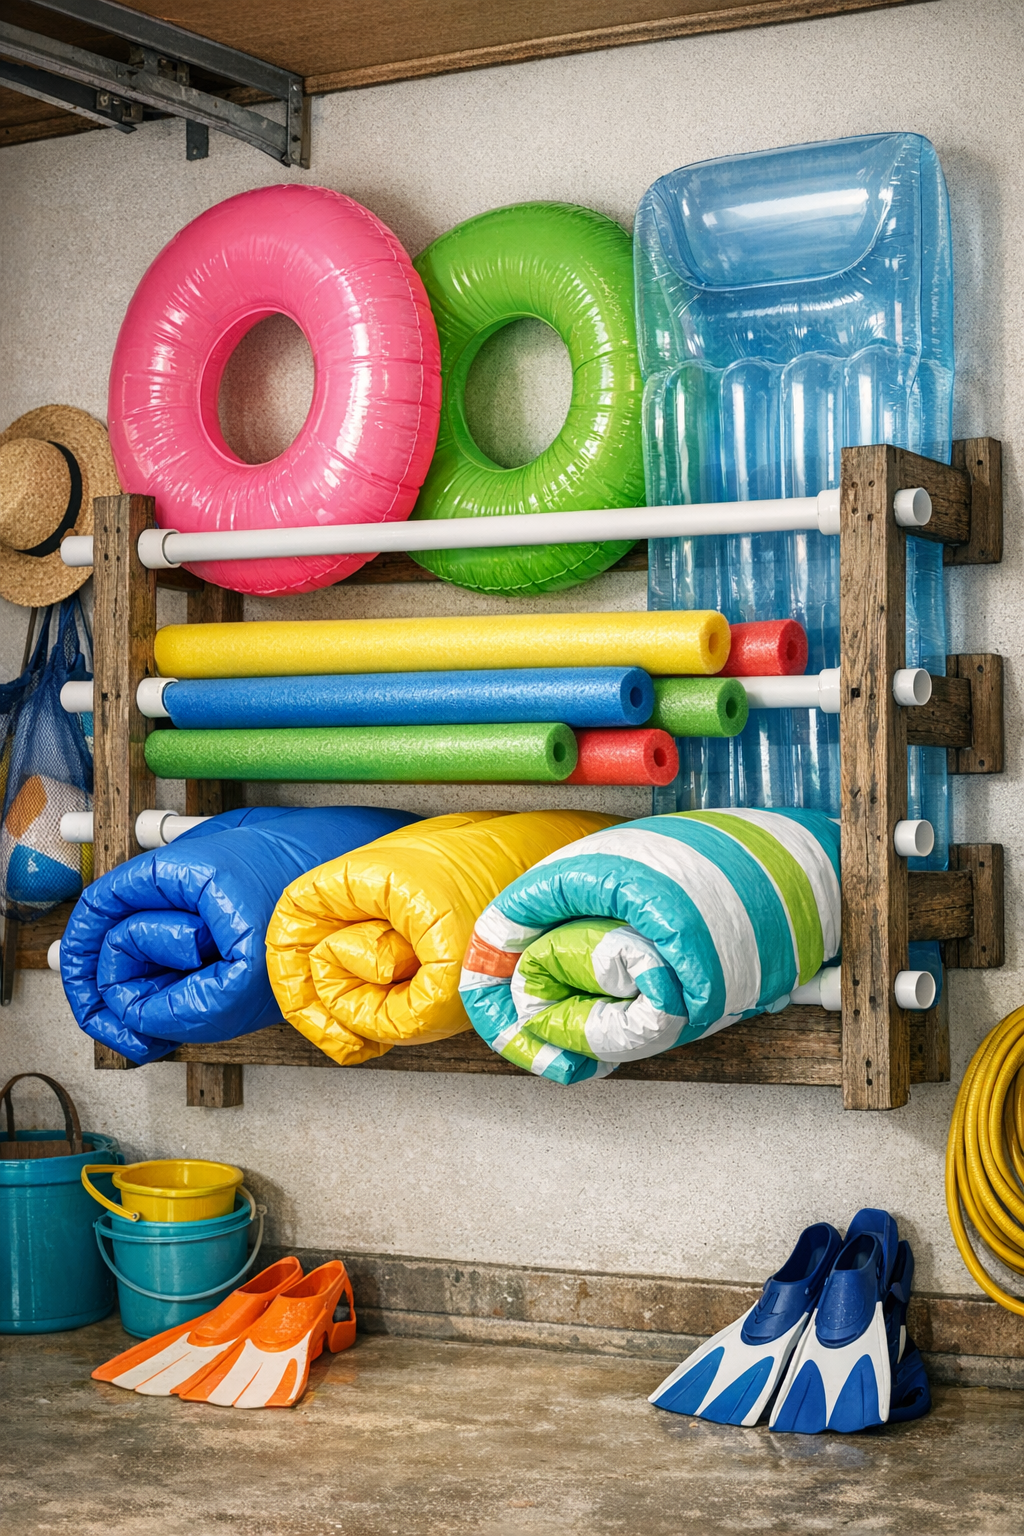
When summer gets rolling out here, pool noodles, loungers, and inflatable floats seem to multiply overnight. One hot afternoon, after tripping over a pile of floaties in the garage for about the tenth time, I got to thinking about the old wooden ladders and practical storage tricks folks used to rely on. This project borrows that same plainspoken good sense: mount sturdy wooden ladder-style supports to the wall, then thread PVC pipes through the rungs to create an easy corral for all those awkward, lightweight pool items.
What I like most about this organizer is that it keeps big summer gear up off the floor without crushing it, and you can size it to fit the space you have. If you’ve got a garage wall, shed wall, pool house, or even a covered patio with some spare room, this is a simple weekend build that makes life a whole lot tidier.
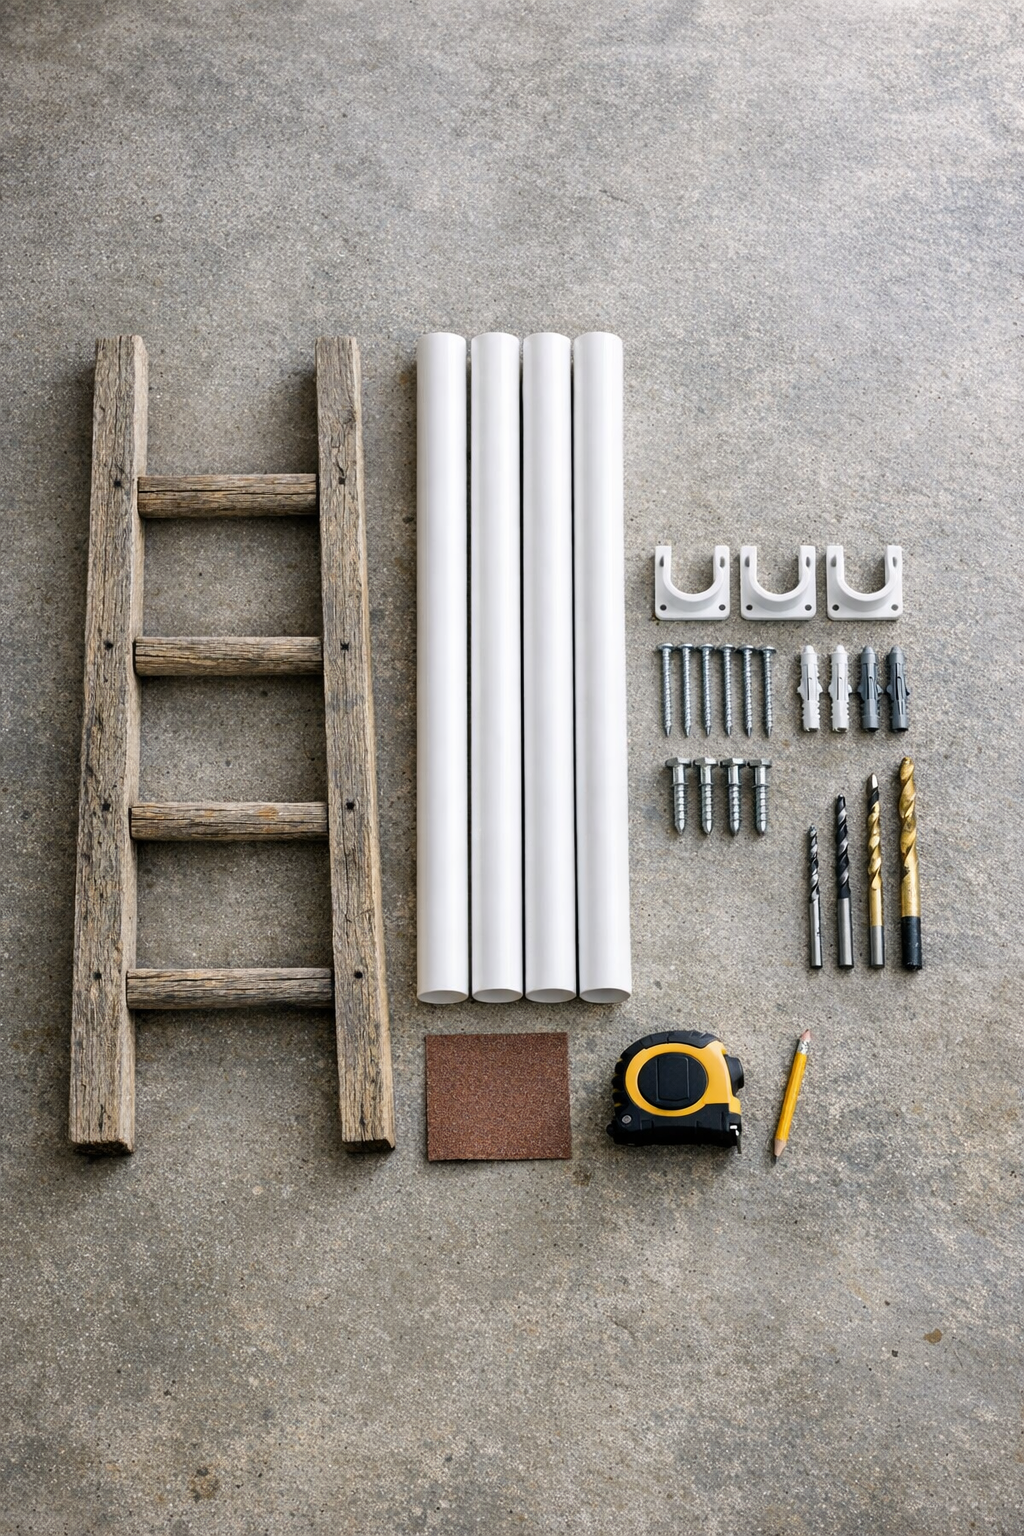
Materials
Instructions
1. Choose a wall area at least 54 inches wide and 66 inches tall, then mark the left and right edges of your organizer so both ladder sections will sit level and evenly spaced.
2. Sand the wooden ladder pieces with 120-grit first and 220-grit second, smoothing splinters while keeping that weathered look that gives the project its charm.
3. Brush on a coat of exterior sealer and let it dry fully according to the label, especially if the organizer will live in a humid garage or near the pool.
4. Hold the first ladder section against the wall vertically and mark bracket locations near the top and bottom ends; repeat with the second ladder section, spacing it 48 inches apart so the PVC pipes can span between them.
5. Drill pilot holes for the brackets and install wall anchors if needed, then fasten the first ladder section securely to the wall with screws and washers.
6. Mount the second ladder section the same way, checking with a level so the rungs on both sides line up straight across from one another.
7. Slide one 48-inch PVC pipe through the top matching rung openings on both ladder sections, then repeat with the remaining pipes through the lower rung pairs.
8. Center each PVC pipe so the ends extend evenly on both sides, then add a small bead of construction adhesive where the pipe touches the inside of each rung if you want to keep it from shifting.
9. Press gently on each pipe and tug the ladder supports to confirm everything feels solid before loading in pool noodles, rolled floats, and lightweight inflatables.
10. Store the largest floats in the back and slimmer noodles or kickboards toward the front so the organizer stays easy to use and doesn’t bow under uneven weight.
Variations & Tips
Wider storage: If you have oversized loungers or several family-sized floats, use 60-inch PVC pipes instead of 48-inch ones and space the ladder supports to match.
Freestanding option: If wall mounting isn’t practical, you can adapt this idea onto a simple freestanding frame, though I find wall storage keeps the floor much easier to sweep and hose out.
Better wood choices: Cedar, redwood, or sealed pine all work nicely if you’re building the ladder sides from scratch instead of repurposing old wooden ladder pieces.
Pipe sizing: For mostly pool noodles and small rafts, 1 1/4-inch PVC is often enough; for bulkier inflatable items, 1 1/2-inch PVC gives a sturdier, more substantial rail.
Stud mounting: Whenever possible, fasten into wall studs rather than relying only on anchors. That old rule has saved me many a headache over the years.
Keep it long-lasting: Let wet floats drip outside for a little while before storing them. It helps prevent puddles on the floor and keeps the wood looking better through the whole season.