I love a project that turns something worn-out into something that looks like it came straight from a garden center, and this one does exactly that. With a couple of frayed bath towels and a bag of cement mix, you can make sturdy faux stone yard structures that add instant charm to a flower bed, porch, or tucked-away corner of the garden.
I especially like this project for beginners because it’s inexpensive, forgiving, and honestly a little fun in the messy way all the best DIYs are. I’ve made versions of these for my own yard when I wanted that aged stone look without hauling home anything heavy, and they’re also great if you enjoy adding handmade touches outdoors.
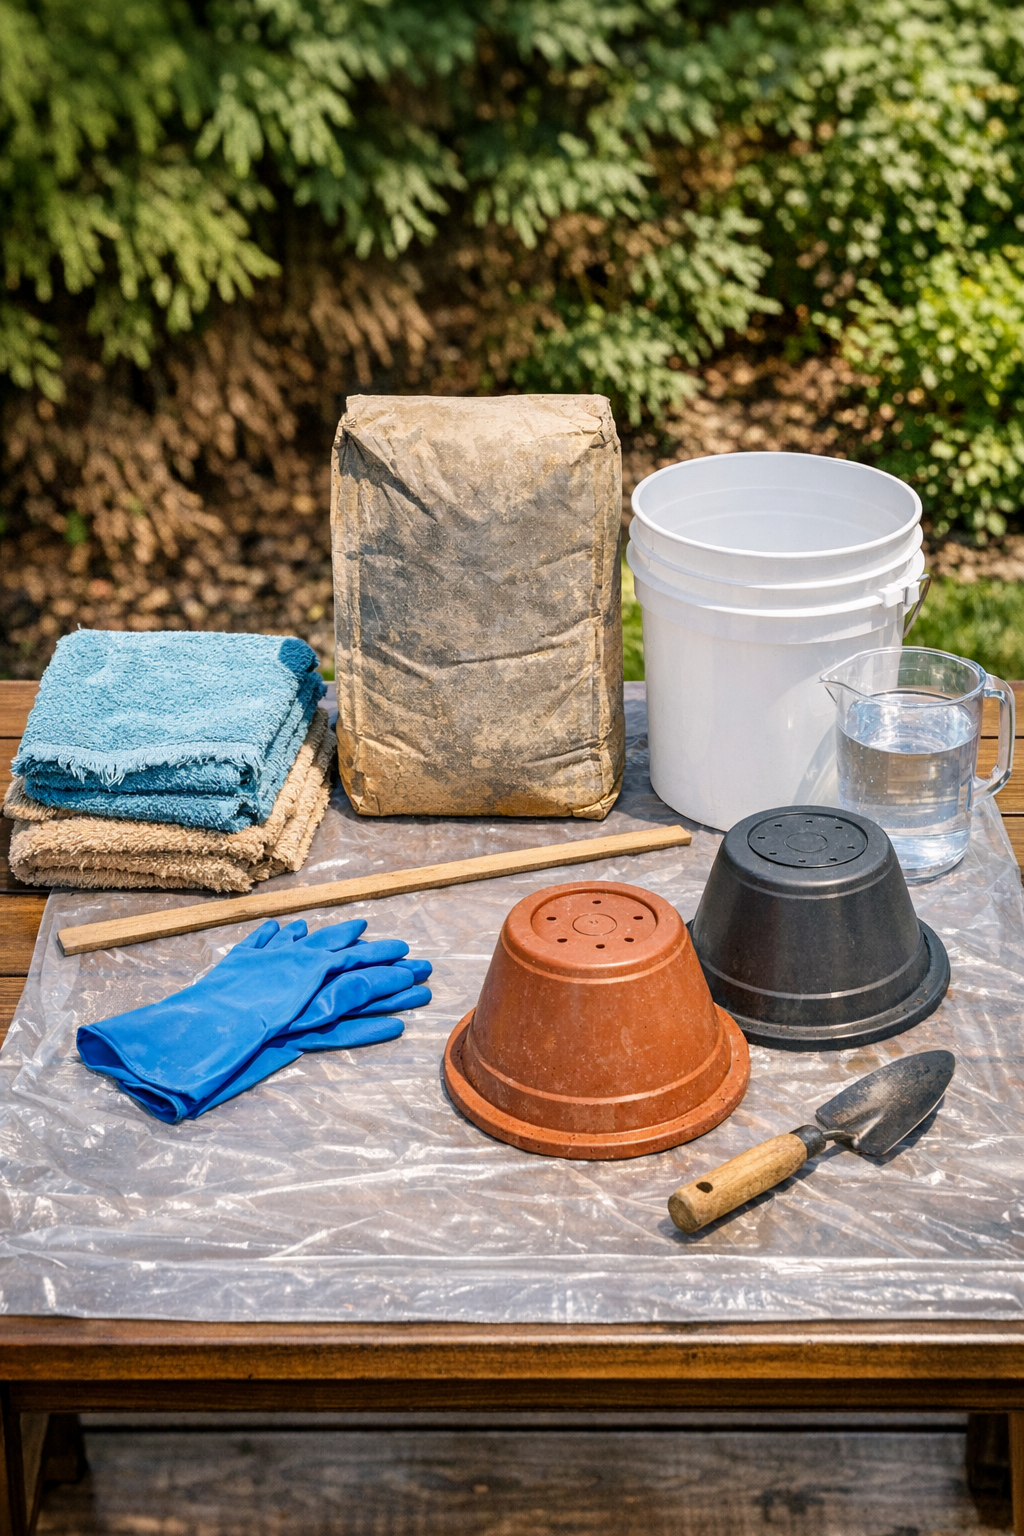
Materials
Instructions
1. Set up your work area outdoors or in a well-ventilated garage by spreading out the drop cloth and placing the two upside-down planters several inches apart. Coat the outside of each planter lightly with cooking spray or petroleum jelly so the cement towel will release more easily later.
2. In the mixing bucket, combine the cement mix with 2 1/2 quarts of water and stir until it reaches a thick pancake-batter consistency. Add a little more water only if needed, because the mixture should cling to the towels instead of running off.
3. Submerge the first bath towel fully into the cement mixture and work it through with gloved hands so every part is saturated. Lift it slowly and let the excess drip back into the bucket for a few seconds.
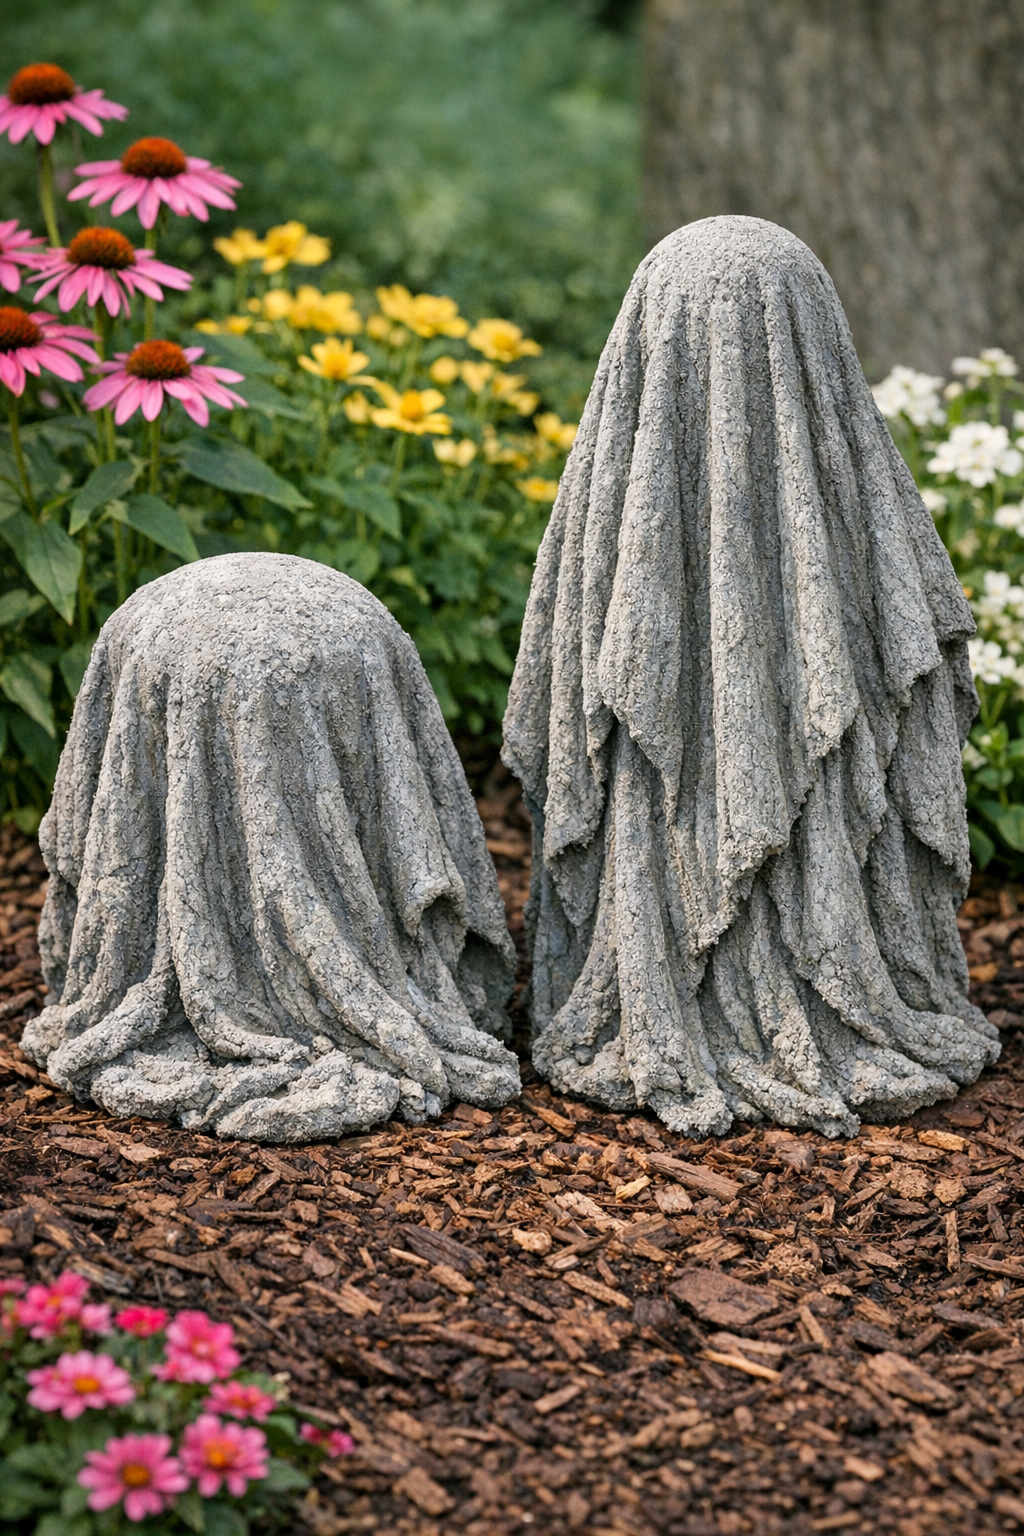
4. Drape the soaked towel over the first upside-down planter, centering it so the folds fall evenly on all sides. Gently shape the edges into natural-looking ridges and curves to mimic weathered stone.
5. Repeat the soaking and draping process with the second towel on the second planter. If either piece looks thin in spots, scoop a little extra cement mixture onto those areas and smooth it lightly with gloved hands or a trowel.
6. Let both pieces cure undisturbed for 24 to 48 hours until they feel hard and dry to the touch. If the weather is very hot and dry, lightly mist them once after a few hours to help prevent surface cracking.
7. Carefully lift each hardened towel structure off its mold and turn it upright. Set them on the ground and check for wobble, trimming or sanding only if a rough edge keeps them from sitting flat.
8. Allow the structures to continue curing for another 24 hours before placing them in the yard. If you want extra weather resistance, brush on a thin coat of exterior concrete sealer and let it dry completely.
Variations & Tips
Shape choice: For taller pieces, use taller nursery pots or stacked buckets as molds. For wider, lower structures, use squat planters so the finished forms look more like stone stools or pedestals.
Texture tip: The more natural and uneven the folds, the more convincing the faux stone finish looks. I’ve found that resisting the urge to make everything perfectly even gives the best garden-style result.
For picky decorators: If your family likes a cleaner look outdoors, keep the folds simpler and more symmetrical for a tidier shape. If you enjoy cottage-garden charm like I do, let the edges ripple and wrinkle a bit more.
Color variation: After the pieces cure fully, you can dry-brush them with a little gray, tan, or mossy green exterior paint for an aged stone look. Use a light hand so the towel texture still shows through.
Best placement: These work nicely beside potted plants, near a walkway, or as decorative risers in a garden bed. I like grouping the two together so they look intentional, almost like matching yard ornaments.
Durability tip: Let the structures cure several days longer before heavy rain or freezing temperatures if possible. A little patience here really helps them last longer outdoors.