There’s something mighty satisfying about turning a few humble, inexpensive supplies into a garden border that looks like it has been there for years. This project uses cut vinyl rain gutters as molds, then wet cement plus two simple additions to create sturdy half-round yard borders that can edge a flower bed, walkway, or little kitchen garden with a clean, finished look. I’m especially fond of projects like this because they stretch a dollar and still leave you with something handsome and practical.
Out where I live, we’ve always believed a tidy border makes even the simplest patch of earth feel cared for. If you want a border that is heavier and longer-lasting than plastic edging, but easier on the budget than stone, this is a fine weekend project. It’s a good fit for beginners too, so long as you don’t mind a little mixing, lifting, and getting your hands dusty.
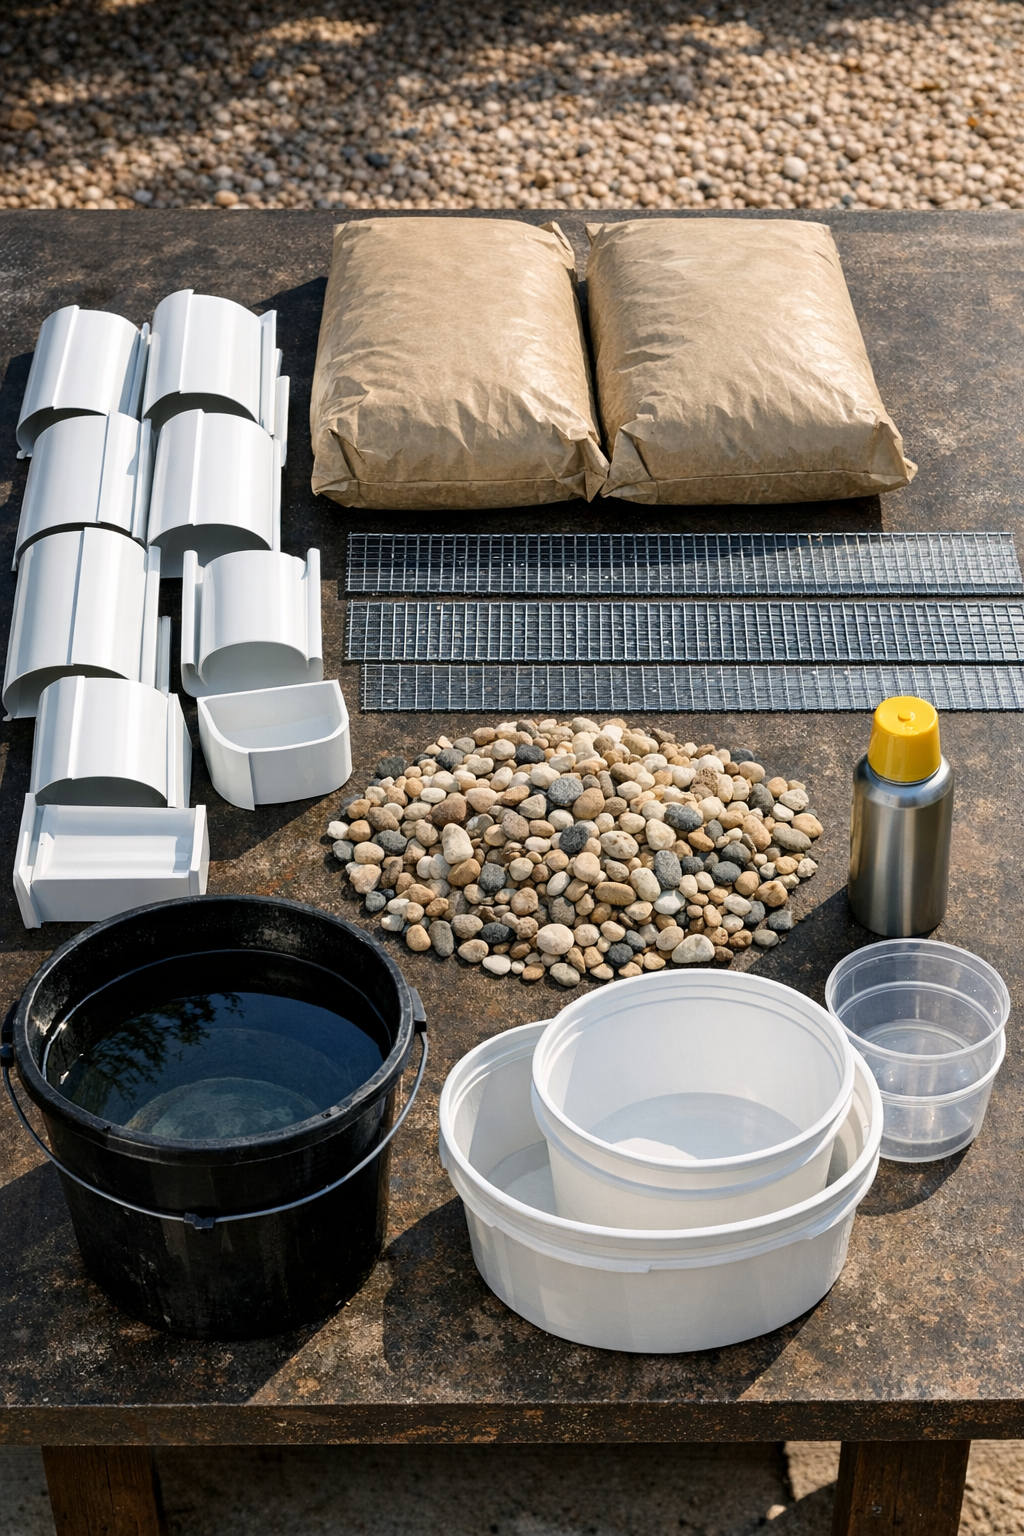
Materials
Instructions
1. Cut the vinyl gutter into equal 15-inch lengths, then rinse and dry each piece so the cement will set against a clean surface.
2. Set the gutter pieces open-side up on a flat, level work surface covered with plastic, and brace them with scrap boards, bricks, or packed soil so they do not roll.
3. Lightly coat the inside of each gutter section with cooking spray or a thin smear of petroleum jelly, making sure to cover the curved bottom and ends.
4. Cut the galvanized wire mesh so each piece fits inside a gutter section with a little space around the edges; this reinforcement helps keep the border from cracking later.
5. In a bucket or mixing tub, combine the concrete mix with water a little at a time until it reaches a thick oatmeal consistency that holds its shape but still spreads easily.
6. Fill each gutter section halfway with wet concrete, tapping the sides gently to settle out air pockets.
7. Lay one strip of wire mesh into the wet concrete in each mold, then press it down so it sits roughly in the center of the finished piece.
8. Add more concrete until each mold is nearly full, leaving about 1/4 inch at the top so the mix does not spill when moved.
9. If you want a decorative face, press small pea gravel or river stones lightly into the exposed surface while the concrete is still wet, spacing them evenly.
10. Smooth the top with a scrap of wood or a trowel, then tap the molds again to release trapped bubbles and level the mixture.
11. Let the pieces rest undisturbed until the concrete firms up, usually several hours for fast-setting mix, then cover loosely with plastic and cure for 24 to 48 hours.
12. Carefully flex the vinyl gutter or peel it away from the concrete, remove each half-pipe border piece, and set them aside to continue hardening another day before installation.
13. Dig a shallow trench along your flower bed or path, set the curved border pieces side by side with the flat edge down, and pack soil around them to hold them steady.

Variations & Tips
Stone-Look Finish: Press more pea gravel or small river stones into just the front-facing side if you want the border to resemble old-fashioned exposed aggregate.
Color Option: Add a little masonry pigment to the concrete mix if you prefer a warmer earth tone instead of plain gray.
Shorter Sections: Make 10- or 12-inch pieces instead of 15-inch ones if you need to edge a curved bed; shorter lengths follow bends much more easily.
Stronger Borders: Don’t skip the wire mesh. In my experience, that little bit of reinforcement makes a big difference once the weather starts freezing and thawing.
Easier Release: If a piece sticks in the gutter mold, let it cure a bit longer, then gently flex the vinyl rather than prying at the concrete with force.
Best Placement: These look especially nice around cottage-style flower beds, vegetable patches, or a gravel walkway where that half-round shape shows up clearly.
Make-Ahead Advice: Cast all your sections one day, let them cure fully, and install them later in the week; fully hardened pieces are less likely to chip during placement.