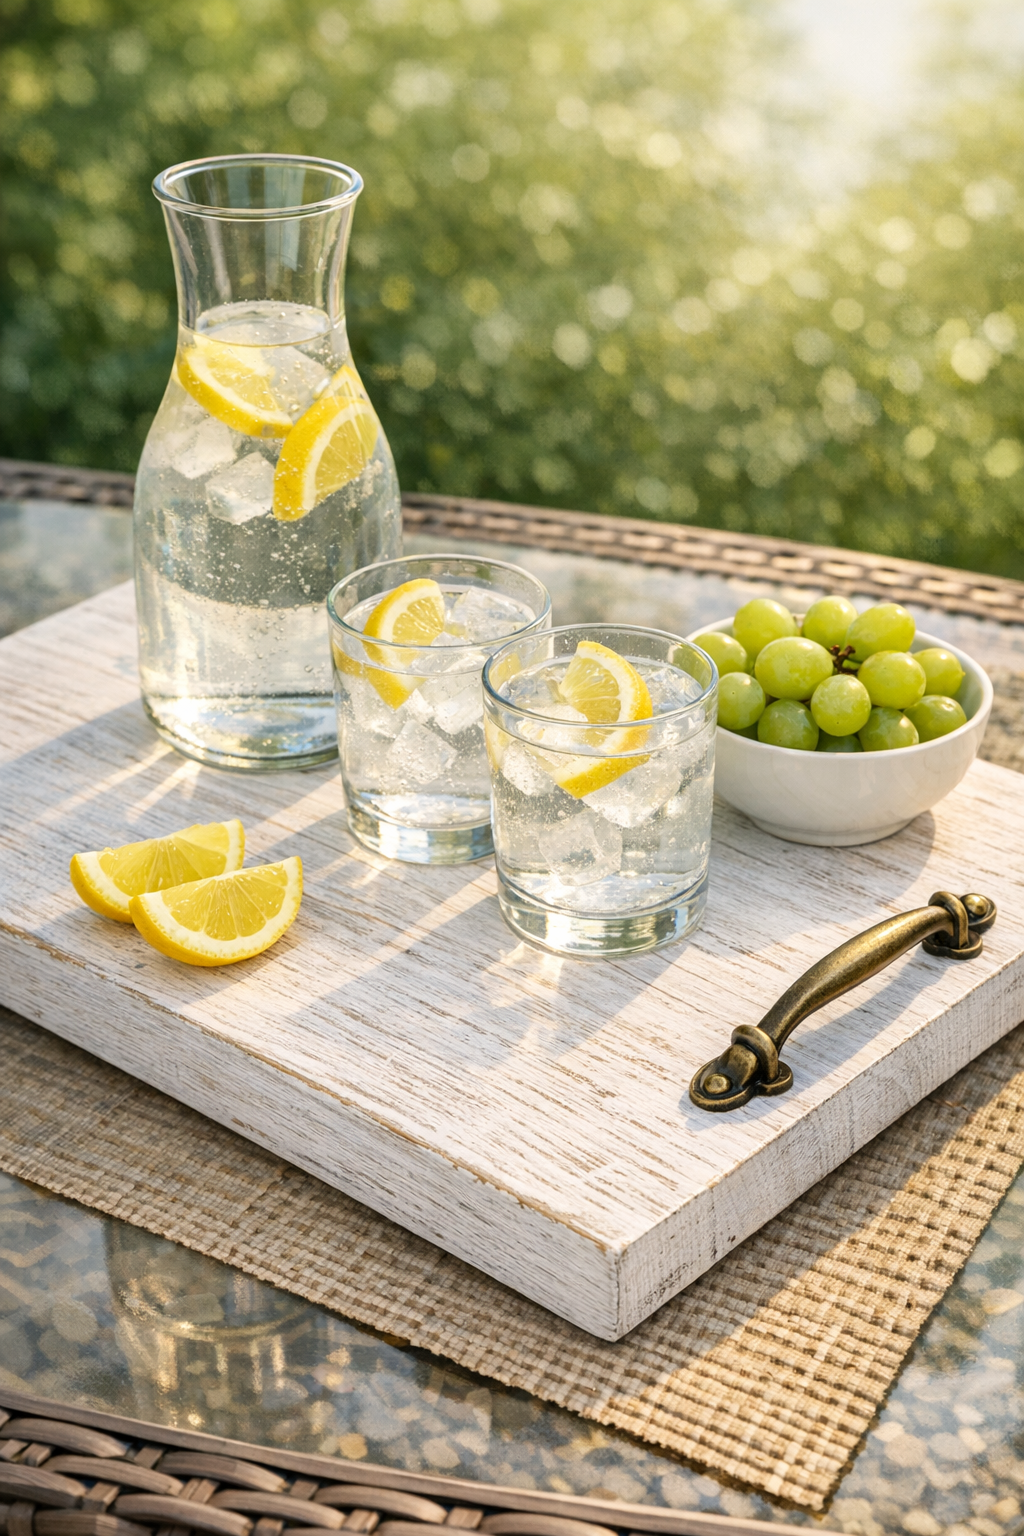
I love a project that solves a real entertaining problem without asking for a full weekend in the workshop, and this outdoor beverage tray does exactly that. We’re turning a simple wooden cutting board into a sturdy serving tray by adding vintage-style drawer handles and a soft whitewashed finish, which makes it practical for carrying drinks outside and attractive enough to leave out on the table.
Because I cook and entertain often, especially once Midwest patio weather finally cooperates, I’m always looking for pieces that can move easily from kitchen to backyard. This one is ideal for summer parties, casual brunches, and even weeknight dinners on the deck. If you can measure, drill, and tighten a screw, you can make this.
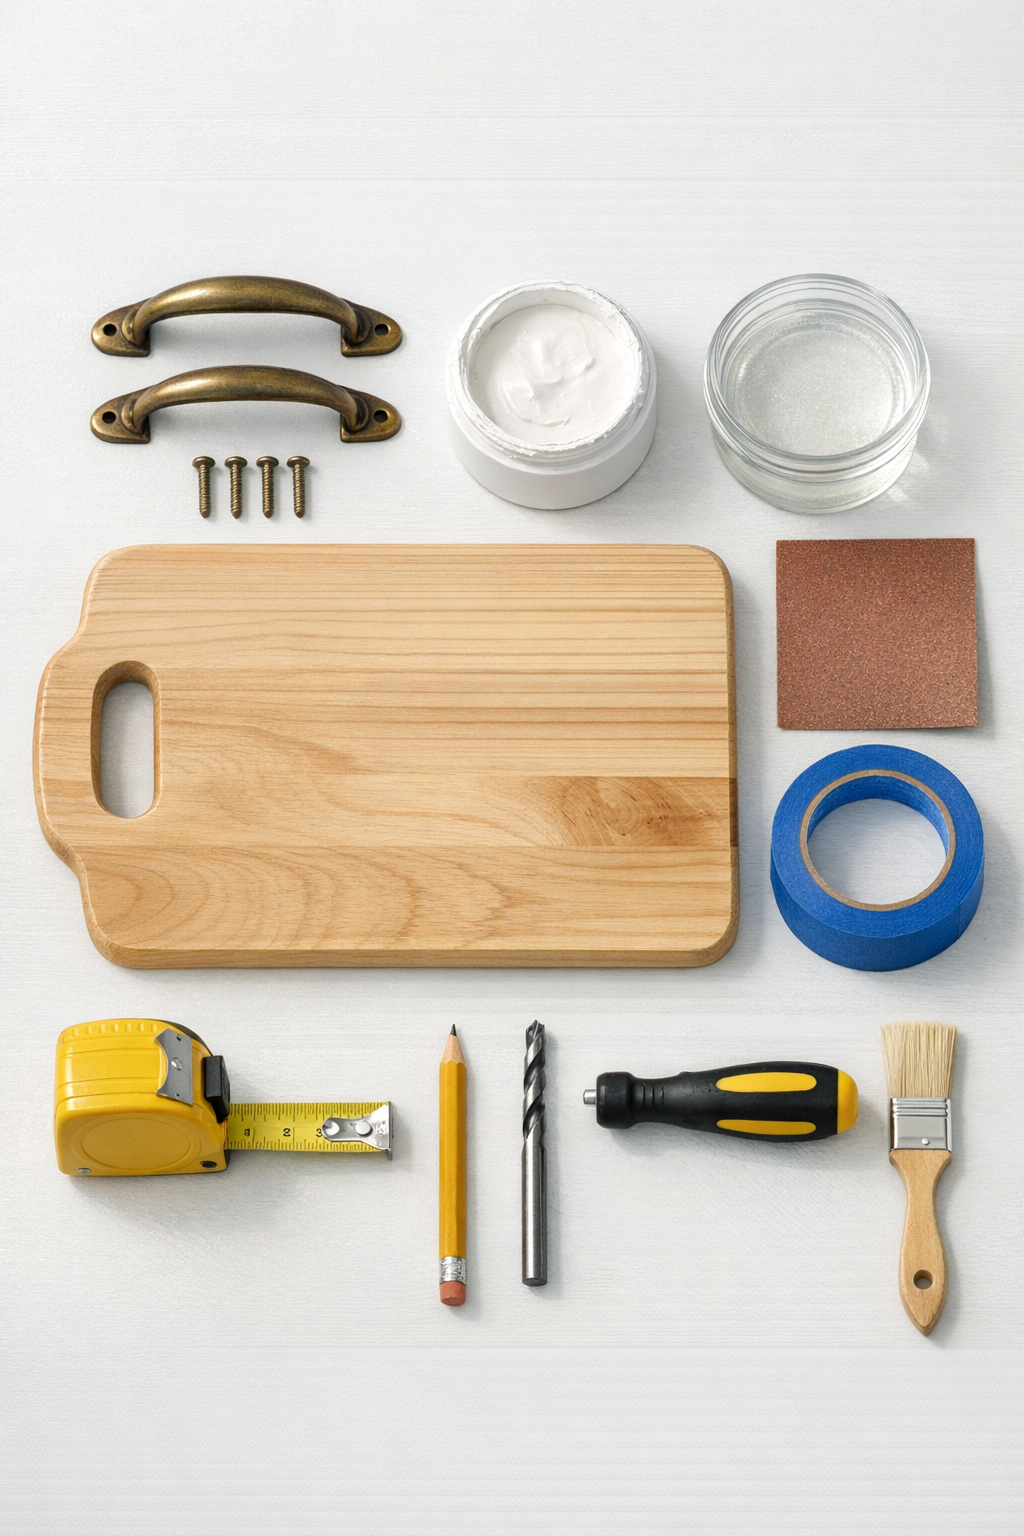
Materials
Instructions
1. Lightly sand the entire cutting board with 120-grit sandpaper, then smooth it with 220-grit so the paint will adhere evenly and the surface feels clean to the touch.
2. Wipe away all dust with a damp lint-free rag and let the board dry completely before painting.
3. Mix the white paint with the water to create a thin whitewash, then brush it over the front and sides of the board in long strokes, wiping back any heavy areas with a clean rag so the wood grain still shows.
4. Let the first coat dry for 30 minutes, then add a second light coat if you want a brighter whitewashed look; allow it to dry fully.
5. Brush a thin coat of clear matte sealer over the painted surface and sides, then let it cure according to the product directions so the tray can handle condensation and outdoor use better.
6. Measure and mark the handle placement on both long sides of the board, centering each handle and keeping it about 1 1/4 inches down from the top edge so your grip feels balanced when the tray is full.
7. Apply painter’s tape over the marked drilling spots to help reduce splintering, then drill the screw holes straight through each side of the board.
8. Attach the drawer handles with the mounting screws, adding washers on the back if needed, and tighten them until secure without over-tightening and crushing the wood fibers.
9. Check that both handles feel even and sturdy, then gently sand or touch up any rough drilled edges with a bit of leftover paint if necessary.
10. Let the tray sit until the finish is fully cured, then use it to carry glasses, a pitcher, or a small ice bucket out to the patio.
Variations & Tips
Use food-safe finishes wisely: If you plan to serve sliced fruit or snacks directly on the board, choose a food-safe topcoat or reserve the tray for glasses, bottles, and bowls rather than bare food.
Try a different paint treatment: A solid matte color works just as well as whitewash, but I like the whitewashed look because it keeps some of the board’s grain visible and feels a bit more relaxed for outdoor dining.
Match the hardware to your space: Antique brass gives this tray warmth and a slightly collected look, but black iron, brushed nickel, or porcelain-pull handles can shift the style from farmhouse to more modern.
Choose the right board thickness: In my experience, a board under 3/4 inch thick can feel flimsy once loaded with drinks, so a heavier cutting board is worth it here.
Add small feet if desired: Adhesive rubber feet on the underside help protect a table and keep the tray from sliding, especially if you’re serving on a slick metal or glass patio surface.
Mind the balance: Before drilling, place a few glasses on the board and do a quick dry run with the handles held in position. It’s a simple extra minute that helps the tray carry comfortably when full.