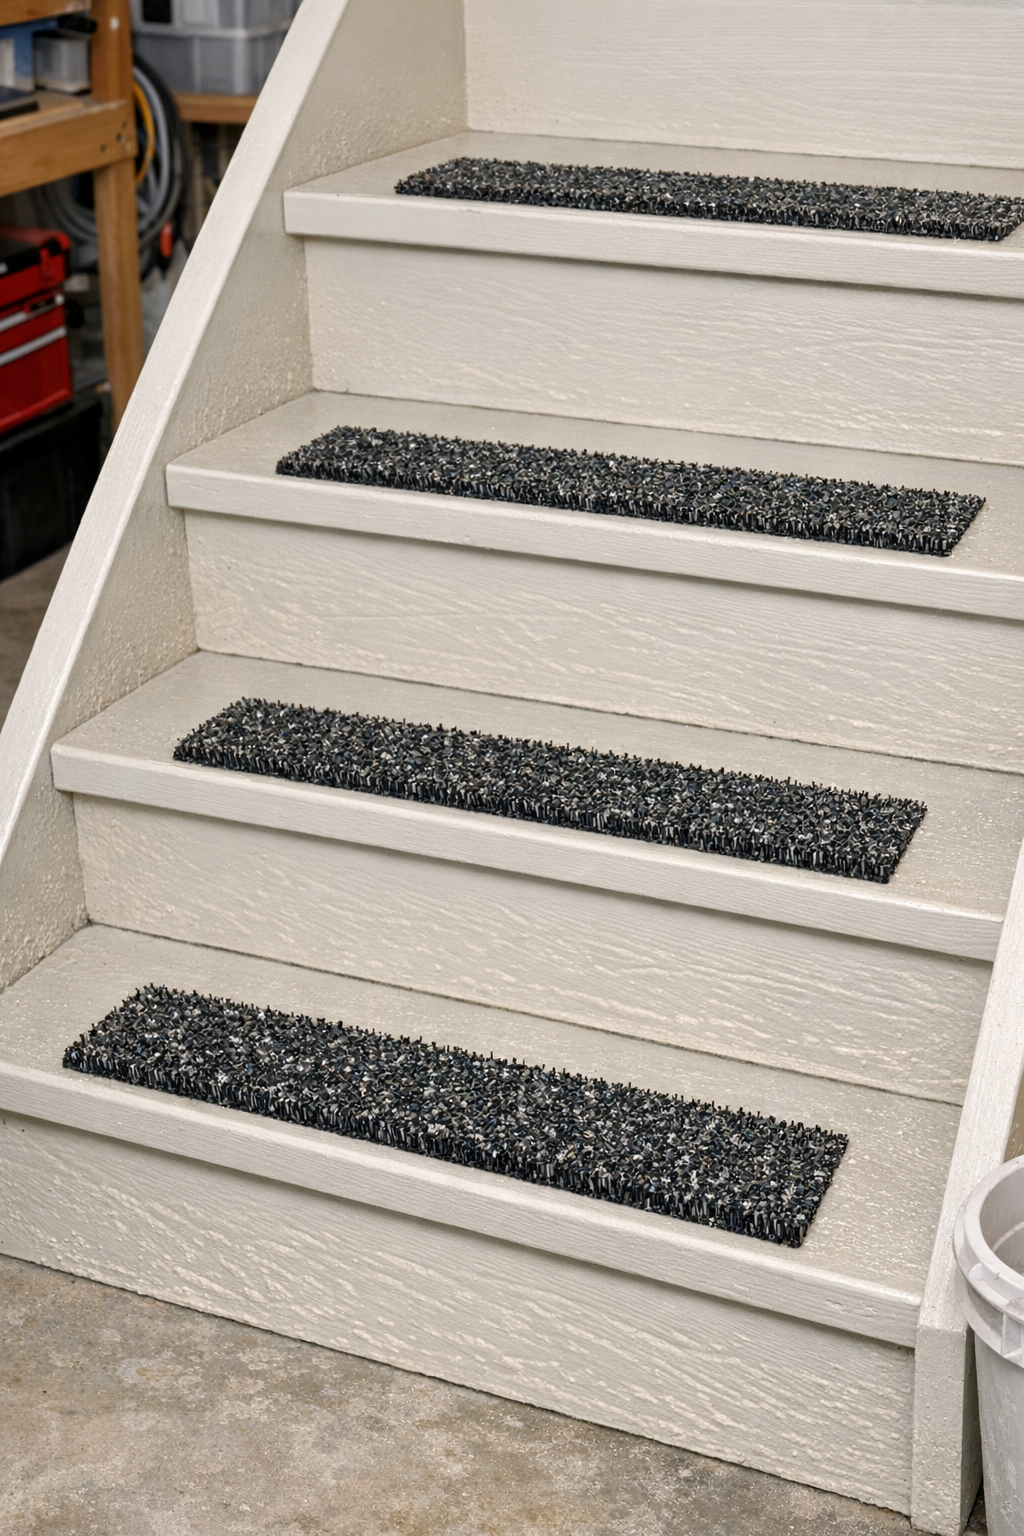
If you’ve ever looked at a worn-out utility broom and thought, “There has to be one more life in that plastic,” this project is exactly the kind of practical little win I love. These DIY non-slip stair treads use stiff broom bristles and a common liquid binder to create rugged, grippy pads that work especially well on painted basement stairs, workshop steps, or slick porch steps that need more traction.
I’m always drawn to projects that are inexpensive, useful, and a little unexpected, and this one checks all three boxes. If you’re comfortable working carefully with heat and don’t mind a hands-on, workshop-style DIY, you can make durable custom treads with just two core materials and a few basic tools.
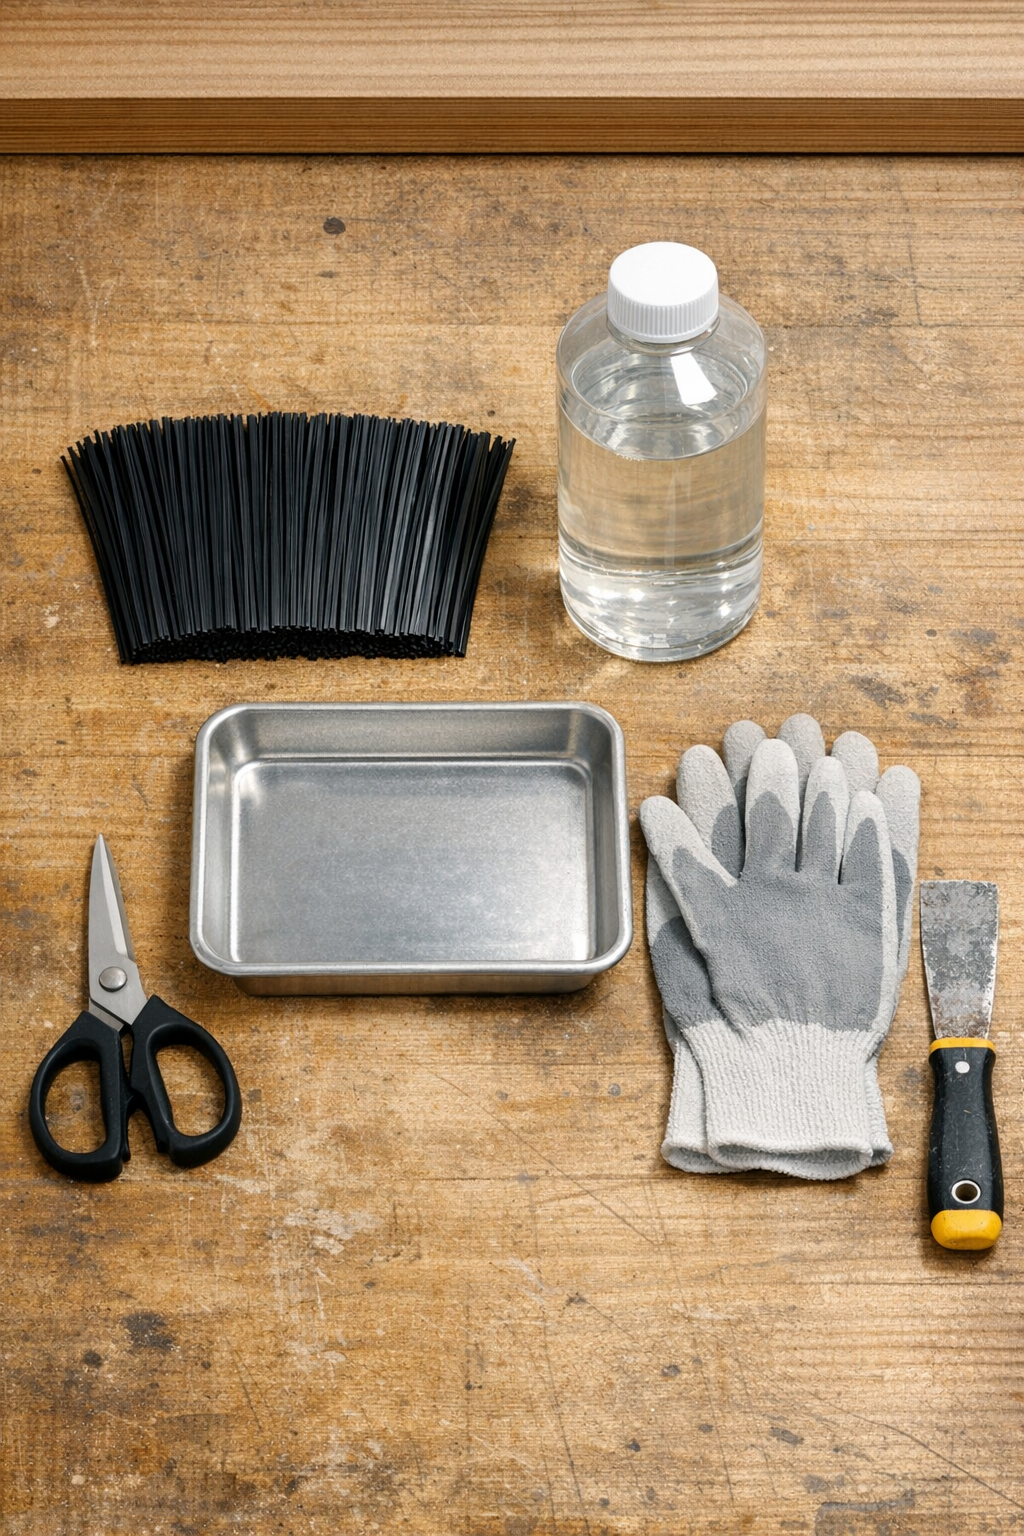
Materials
Stiff plastic broom bristles, 6 to 8 cups loose cut bristles, enough for 4 stair treads approximately 4 inches by 24 inches each
Instructions
1. Cut the stiff plastic bristles from the broom head and trim them into pieces about 1/2 inch to 3/4 inch long so they melt and pack more evenly.
2. Clean the stairs where the treads will go, then let the surface dry completely; if the paint is glossy, scuff each area lightly with 80-grit sandpaper for better grip.
3. Mark out each tread location with painter’s tape, keeping the strips about 1 inch back from the front edge of the stair and centered side to side.
4. Make a simple mold by folding up the edges of heavy-duty foil into a shallow tray about 4 inches by 24 inches, then line it with parchment paper.
5. Pour a thin layer of polyurethane into the lined mold, using just enough to lightly coat the bottom without pooling deeply.
6. Spread a dense, even layer of cut broom bristles over the wet polyurethane until the whole strip is covered and the bristles touch edge to edge.
7. Add a little more polyurethane over the top and press the bristles firmly with a putty knife so the liquid binds them together while leaving plenty of bristle ends exposed for traction.
8. Warm the packed strip carefully with a heat gun on a low setting, moving constantly until the bristle surfaces soften and fuse slightly; do not overheat or scorch the material.
9. Let the tread cure flat until fully hardened, then peel it from the parchment and repeat the process until you have enough strips for your stairs.
10. Brush a fresh coat of polyurethane onto the back of each strip and press it into the taped stair area, then remove the tape and let the treads cure fully before use.
Variations & Tips
For wider coverage: Make two narrower strips per stair instead of one wide tread; I find this easier to mold, easier to handle, and more consistent if you’re fitting several steps in one weekend.
For outdoor stairs: Use an exterior-grade clear polyurethane so the binder holds up better to moisture and temperature swings.
For safer heating: Work outside or in a very well-ventilated garage and keep the heat gun moving; when I’m squeezing in projects after work, I’ve learned that rushing the heat step is what causes warped spots.
For stronger adhesion: If the stair surface is dusty, glossy, or old, clean it thoroughly and scuff it first; a little prep makes a huge difference in how long the treads stay put.
For a neater finish: Trim any uneven edges with sturdy shears after curing so all the tread strips match before installation.
For testing first: Make one small sample piece before committing to a full staircase; it’s the best way to check grip, flexibility, and cure time with the exact broom bristles you have on hand.