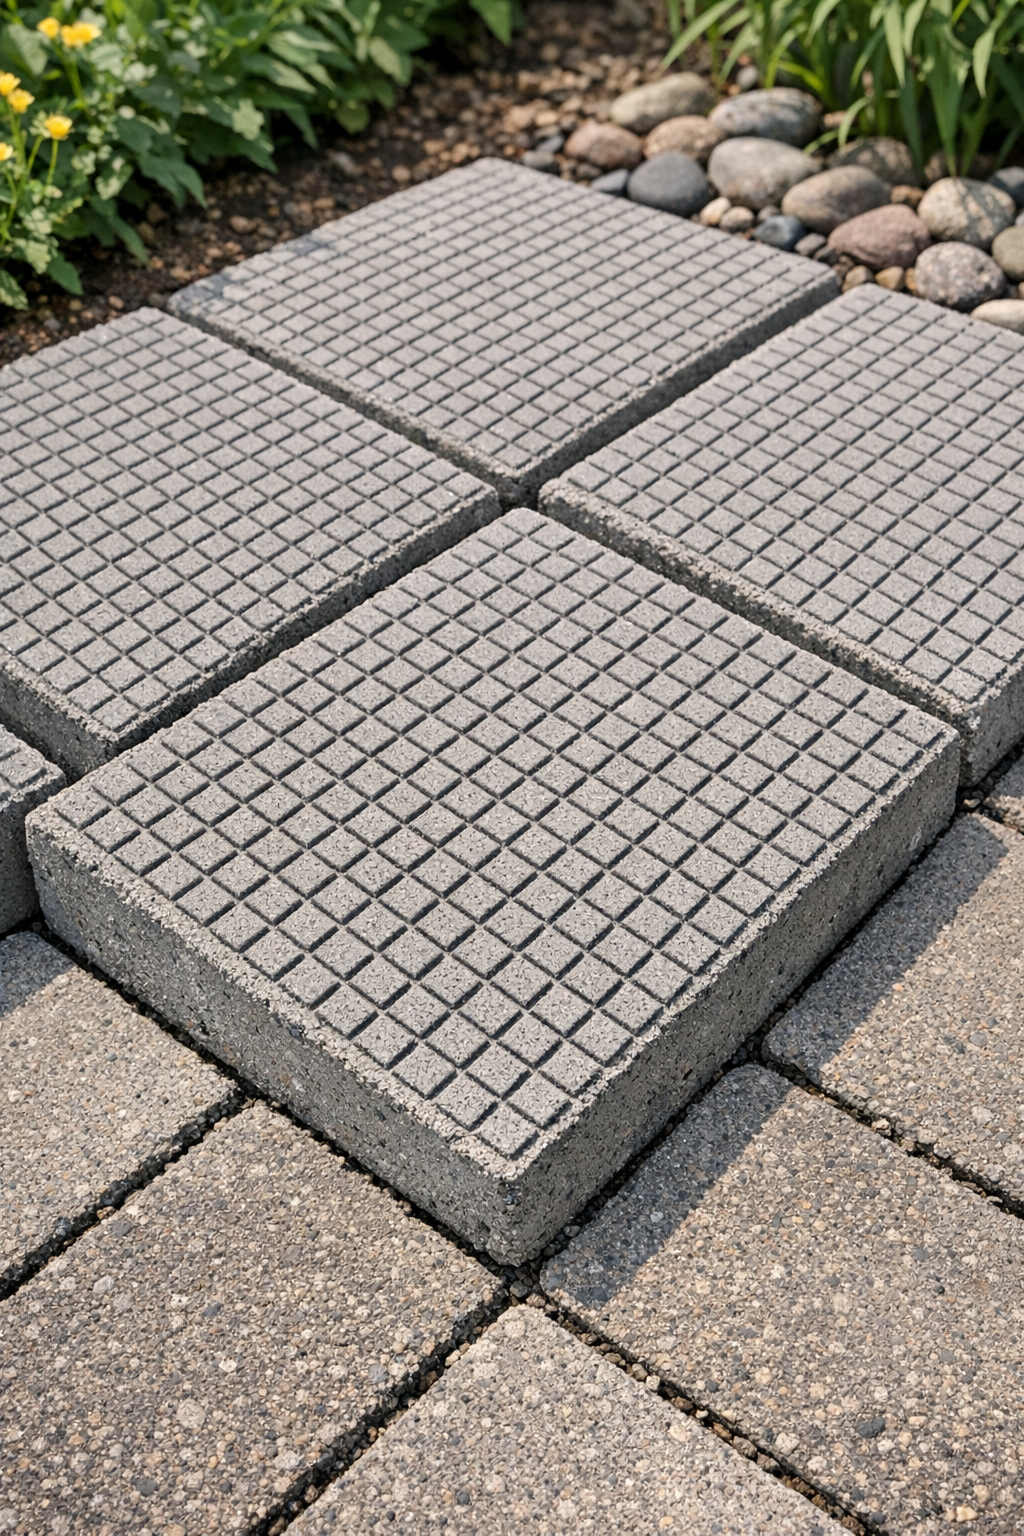
There is something mighty satisfying about turning two plain, inexpensive materials into something that looks sturdy enough to belong in a real garden path. These heavy grid-textured patio blocks are made by pressing plastic fly swatters into wet cement, and the pattern they leave behind reminds me of the old practical textures you used to see on hardworking Midwestern porches and walkways. It is simple, affordable, and a fine little weekend project if you want to dress up a patio corner, stepping path, or muddy spot by the back door.
I especially like this project for beginners, because it does not ask for fancy tools or tricky measurements. If you can mix cement and press a pattern evenly, you can make these. Around my place, I am always looking for ways to make outdoor spaces more useful without spending a fortune, and this is exactly the sort of clever fix I would have loved to tuck away in my recipe box of household ideas years ago.
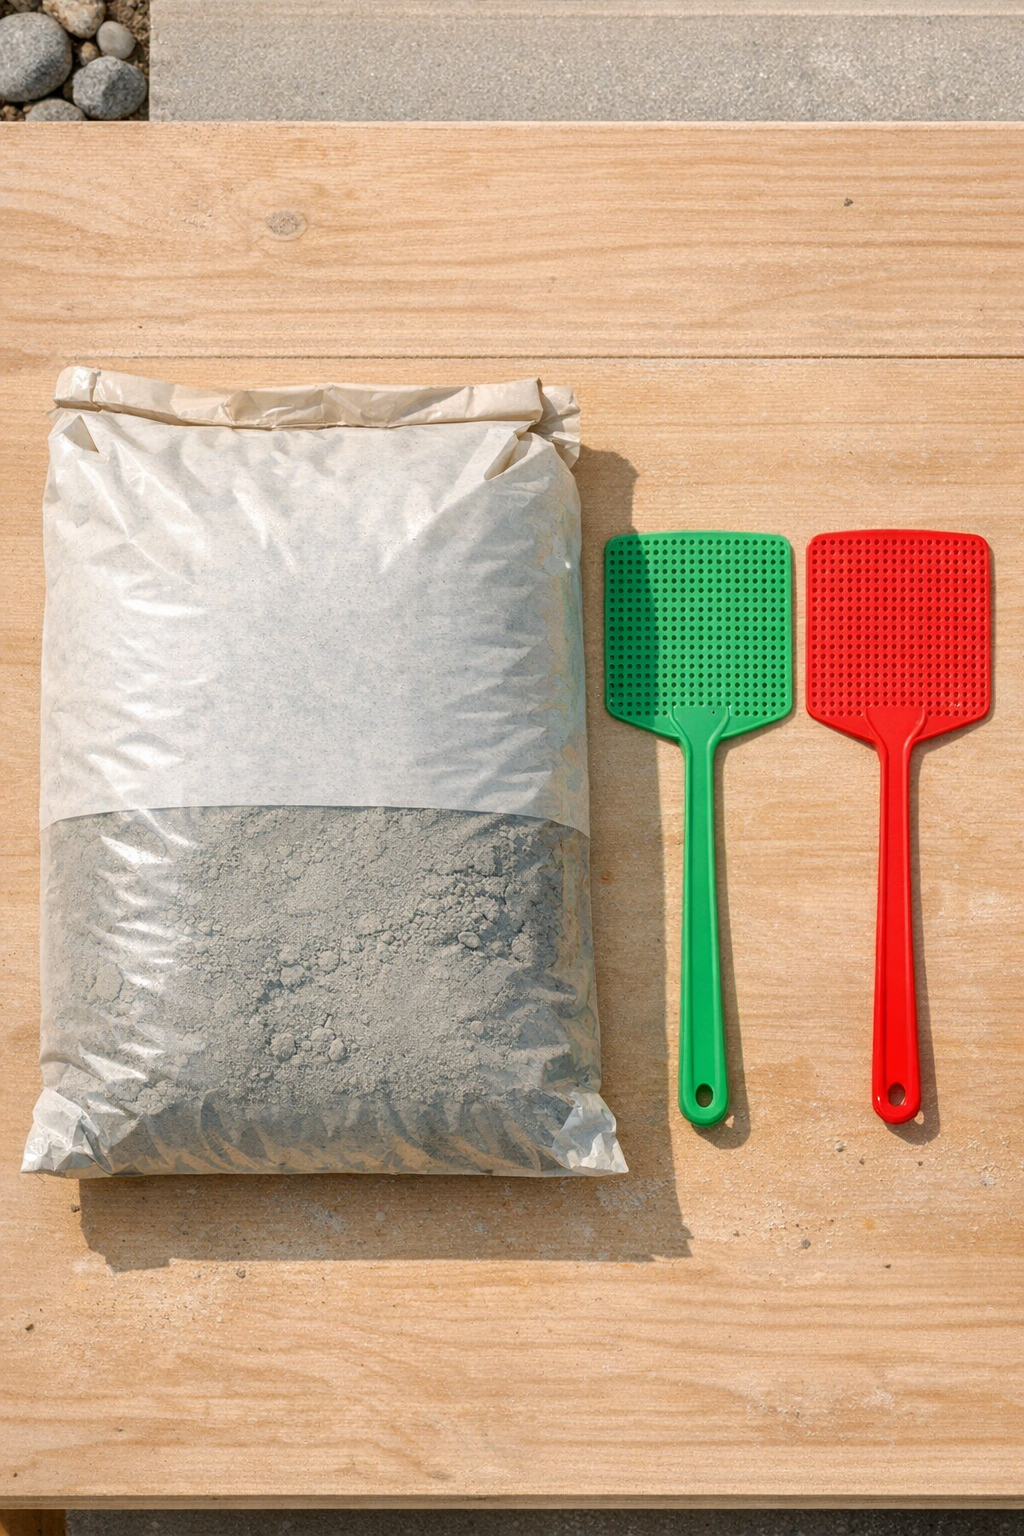
Materials
1 bag fast-setting concrete or cement mix, 50 pounds
Instructions
1. Pick a flat work area outdoors or in a well-ventilated space, and set down a mold or form for each block if you are using one. A size around 12 inches by 12 inches for each block makes them easy to move once cured.
2. Mix the cement according to the package directions until it reaches a thick, scoopable consistency like firm oatmeal. It should hold its shape when poured but still be wet enough to take an impression.
3. Fill each mold with cement to a thickness of about 1 1/2 to 2 inches, then tap the sides gently to settle the mix and release trapped air. Smooth the top lightly, but do not overwork it.
4. Let the cement sit for a few minutes until the surface is no longer runny but still very soft. This short rest helps the fly swatter pattern hold cleanly instead of sinking too deep.
5. Press one plastic fly swatter flat onto the cement surface, applying even pressure across the whole head to imprint the grid texture. Lift it straight up carefully so the pattern stays crisp.
6. Repeat the impression as needed with the same fly swatter or the second one to cover the entire surface, lining up the grid pattern neatly. If the swatter sticks, wait another minute before trying again.
7. Gently refine the edges with your fingers or a small scrap of plastic if you want a cleaner block shape. Leave the textured top untouched once you are happy with the pattern.
8. Allow the blocks to cure in the mold until firm enough to move, following the cement package timing. Once unmolded, let them continue curing for at least 24 to 48 hours before placing them in the yard or patio.
Variations & Tips
Make them larger: For a broader garden path, use bigger square or rectangular molds and keep the cement thickness close to 2 inches so the blocks stay strong.
Work in batches: I like to mix only enough cement for a couple of blocks at a time, because it gives you time to press the pattern before the surface starts setting up too fast.
Try a border: Leave a 1-inch plain edge around the outside of each block for a more finished look. It gives the textured center a nice framed appearance.
Keep the pattern clean: If the fly swatter picks up cement, rinse it off before making the next impression. A clean grid gives the sharpest texture.
Place with purpose: These are especially handy in spots that get slick or muddy, since the raised grid texture gives a little extra grip underfoot.
Let them cure fully: Around my place, patience always pays off with cement work. If you give the blocks a full cure before heavy use, they will hold up much better through weather and wear.