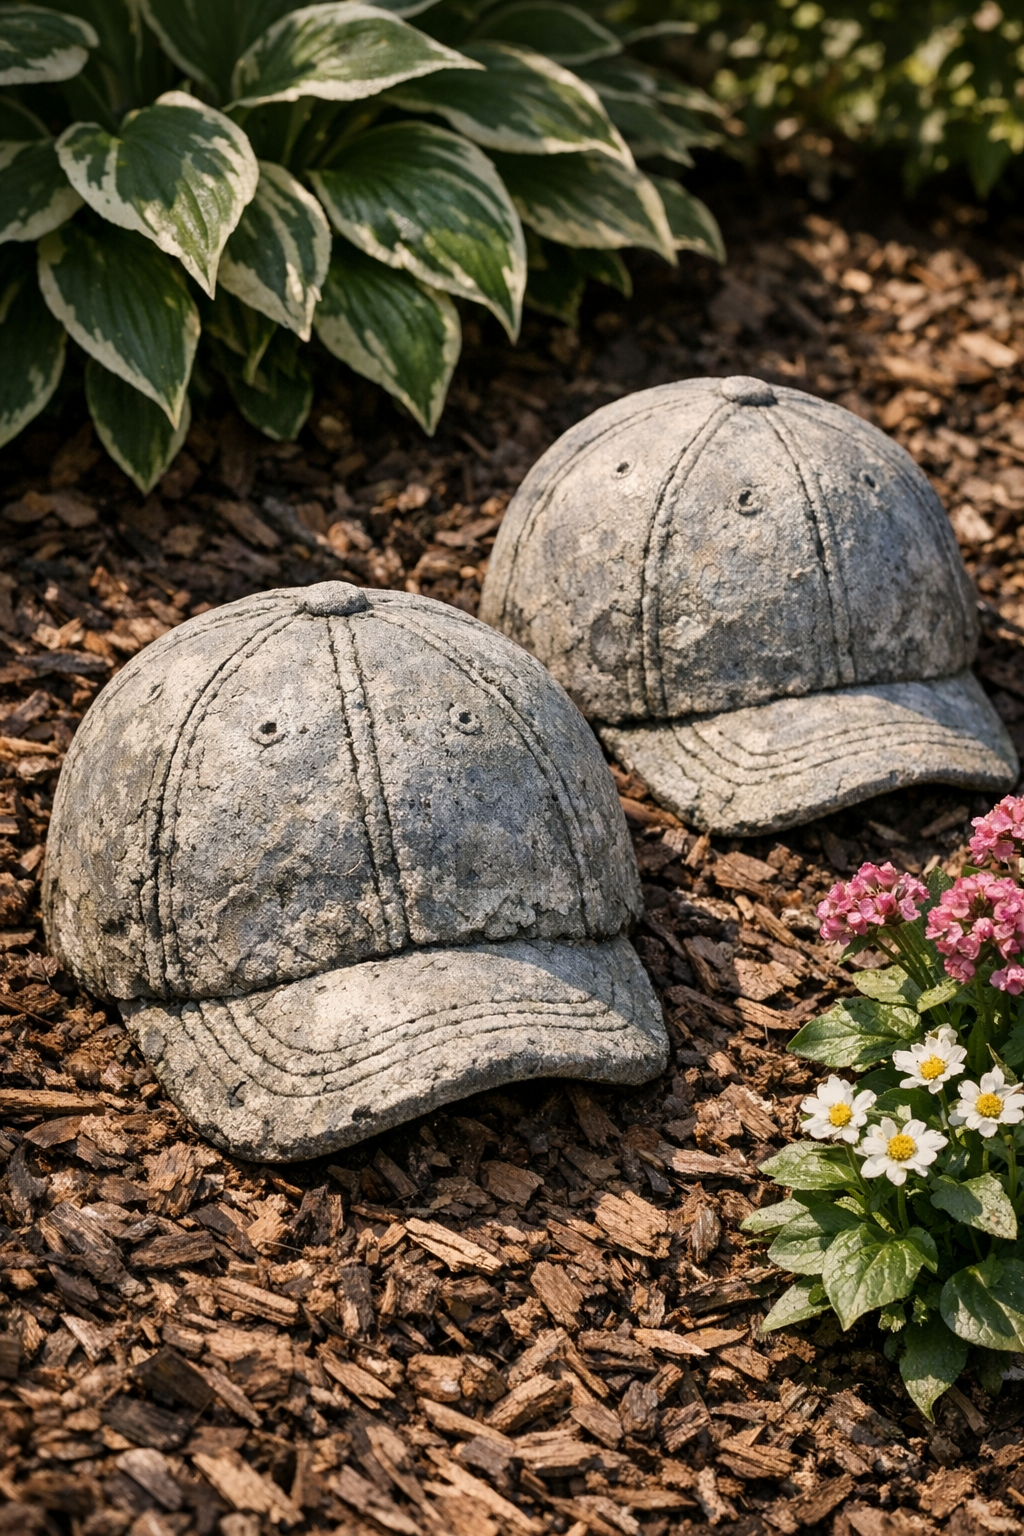
I’ve always had a soft spot for the sort of garden projects that look a little mysterious, like they’ve been sitting out by the peonies for years even when you made them last Saturday. These heavy domed garden shells are just that kind of project. By dipping old canvas baseball caps into a cement mixture and shaping them carefully, you can make two sturdy garden accents that look like weathered stone shells, little mushroom domes, or whimsical sculptural covers tucked among flowers and herbs.
What I love most is that this uses simple, humble things many of us already have on hand, and it turns them into something surprisingly handsome. If you enjoy easy concrete crafts, upcycling worn textiles, or adding a bit of old-fashioned charm to the yard without spending much, this is a fine little project to try on a dry afternoon.
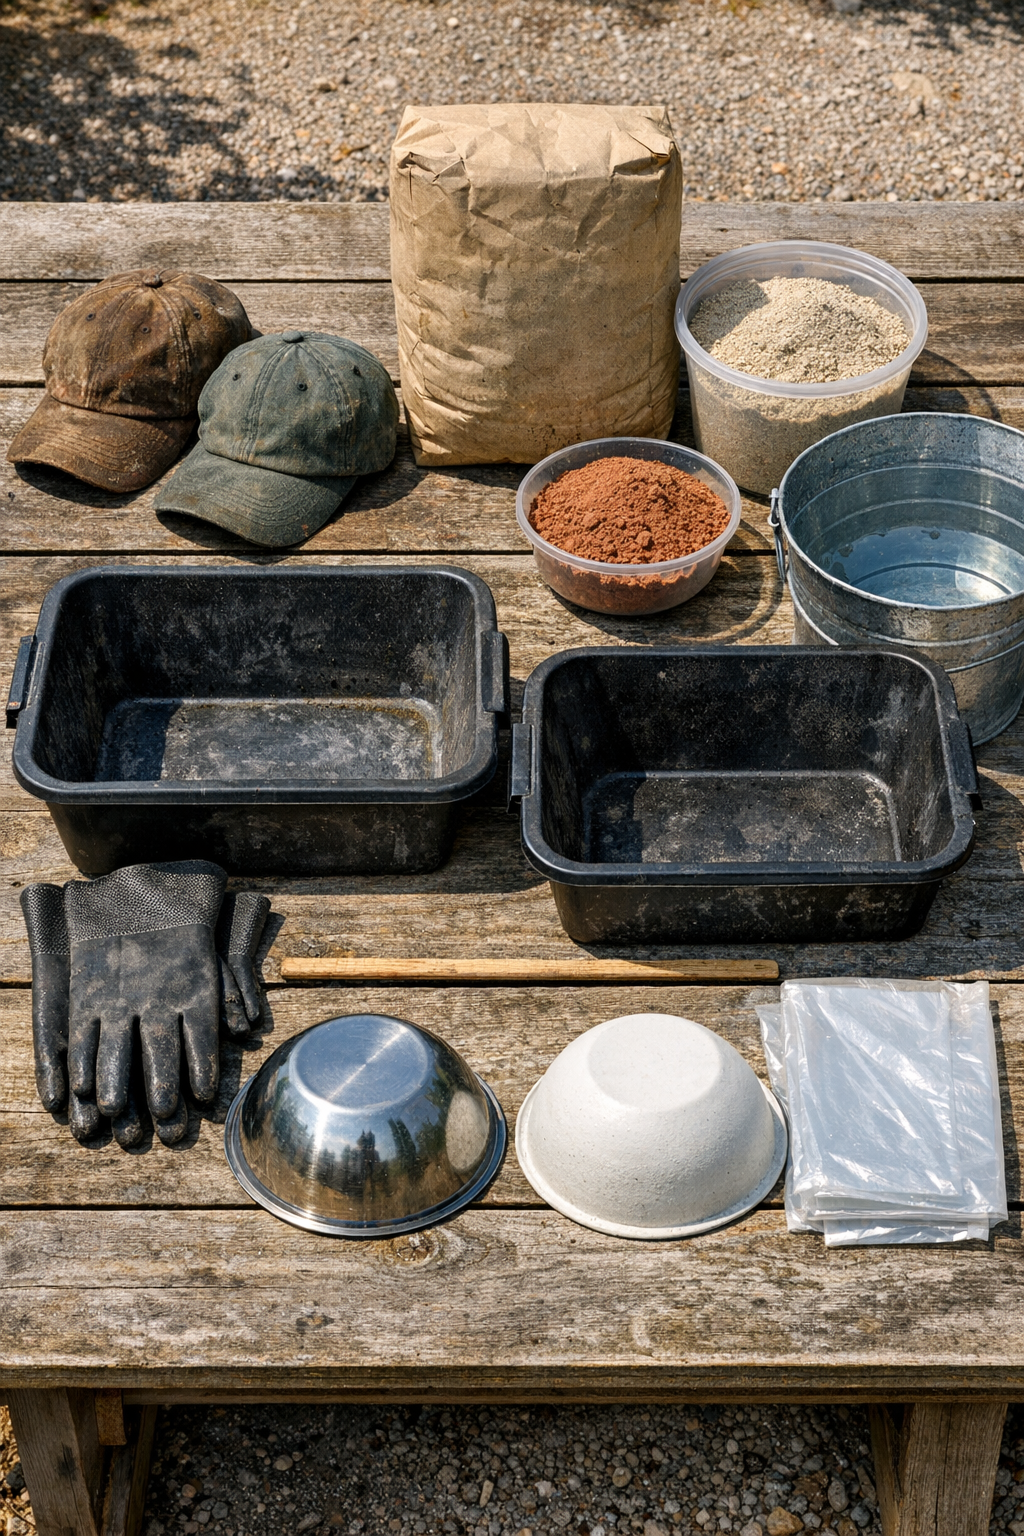
Materials
Instructions
1. Choose two canvas caps with soft, flexible crowns and trim away any loose threads, but leave the brims attached because they help create a natural shell edge.
2. Spread the plastic drop cloth over your work surface in a shaded, well-ventilated outdoor spot, then set the two bowls or nursery pots upside down a few inches apart.
3. Cover each upside-down bowl loosely with plastic wrap so the cemented caps will release easily after curing.
4. In a mixing tub, combine the Portland cement, fine sand, and the hardening powder thoroughly while dry, stirring until the color and texture look even throughout.
5. Add water a little at a time and stir until the mixture reaches the texture of thick pancake batter or loose oatmeal; it should coat fabric well without dripping like soup.
6. Put on gloves and dunk the first cap fully into the wet cement mixture, pressing and turning it until the fabric is completely saturated inside and out.
7. Lift the cap out and gently squeeze just once or twice so excess cement falls back into the tub, then smooth any dry-looking spots with your gloved fingers.
8. Drape the coated cap over one prepared bowl, arranging the crown into a rounded dome and letting the brim fall in soft, shell-like ripples around the sides.
9. Repeat the dipping and shaping with the second cap, then compare both pieces and adjust the edges so the domes feel balanced but not identical; a little variation makes them look more natural in the garden.
10. Let the two domes sit undisturbed for 24 hours, protecting them from rain and harsh direct sun so they cure slowly and evenly.
11. After the first day, lightly mist each piece with water, then leave them to continue curing for another 24 to 48 hours until they are hard all the way through.
12. Lift the shells carefully off the molds, peel away the plastic wrap, and set the finished pieces in the garden bed, beside a path, or among potted plants with the domed side up.
Variations & Tips
For a more aged look: Dust a little extra dry cement over the wet surface after shaping. I’ve done this on concrete garden pieces before, and it gives them that old farmstead look I’ve always admired.
If your mixture seems too thin: Add a small scoop of cement and sand in equal parts. The cap needs a good thick coating or it may slump too much and lose that nice domed shape.
For sturdier shells: Brush leftover cement mixture over the caps once they are draped on the molds. Pay special attention to the seams and brim edge, since those spots can cure thinner than the rest.
Placement tip: These look especially pretty tucked near low plants, at the base of a birdbath, or in a fairy garden corner. In my experience, odd little surprises in the garden are what make folks wander a bit slower and look a bit closer.
Cap choice matters: Use canvas, not stretchy synthetic mesh caps. Natural fabric soaks up the cement better and gives the finished piece a heavier, more stone-like body.
Cold-weather advice: If the air is chilly, let them cure longer before moving them. Around here in the Midwest, I’ve learned that concrete always prefers patience over hurry.