There’s a special kind of satisfaction in taking a few humble odds and ends and turning them into something sturdy enough to earn a permanent place out on the porch. This little project makes tough outdoor furniture braces from cheap plastic shower curtain rings, plus two common scrap materials, and it’s a fine fix for wobbly chairs, loose bench corners, or light-duty table supports that need a bit more backbone.
I’ve always had a hard time throwing away useful scraps, and this is exactly the sort of practical make-do project that reminds me of the old Midwestern habit of using what’s on hand before heading to town for new supplies. If you’re comfortable with simple measuring, drilling, and carefully heating plastic, this is a very approachable afternoon project that gives you a weather-friendly brace that won’t rust and won’t shatter like some brittle store-bought plastic parts can.
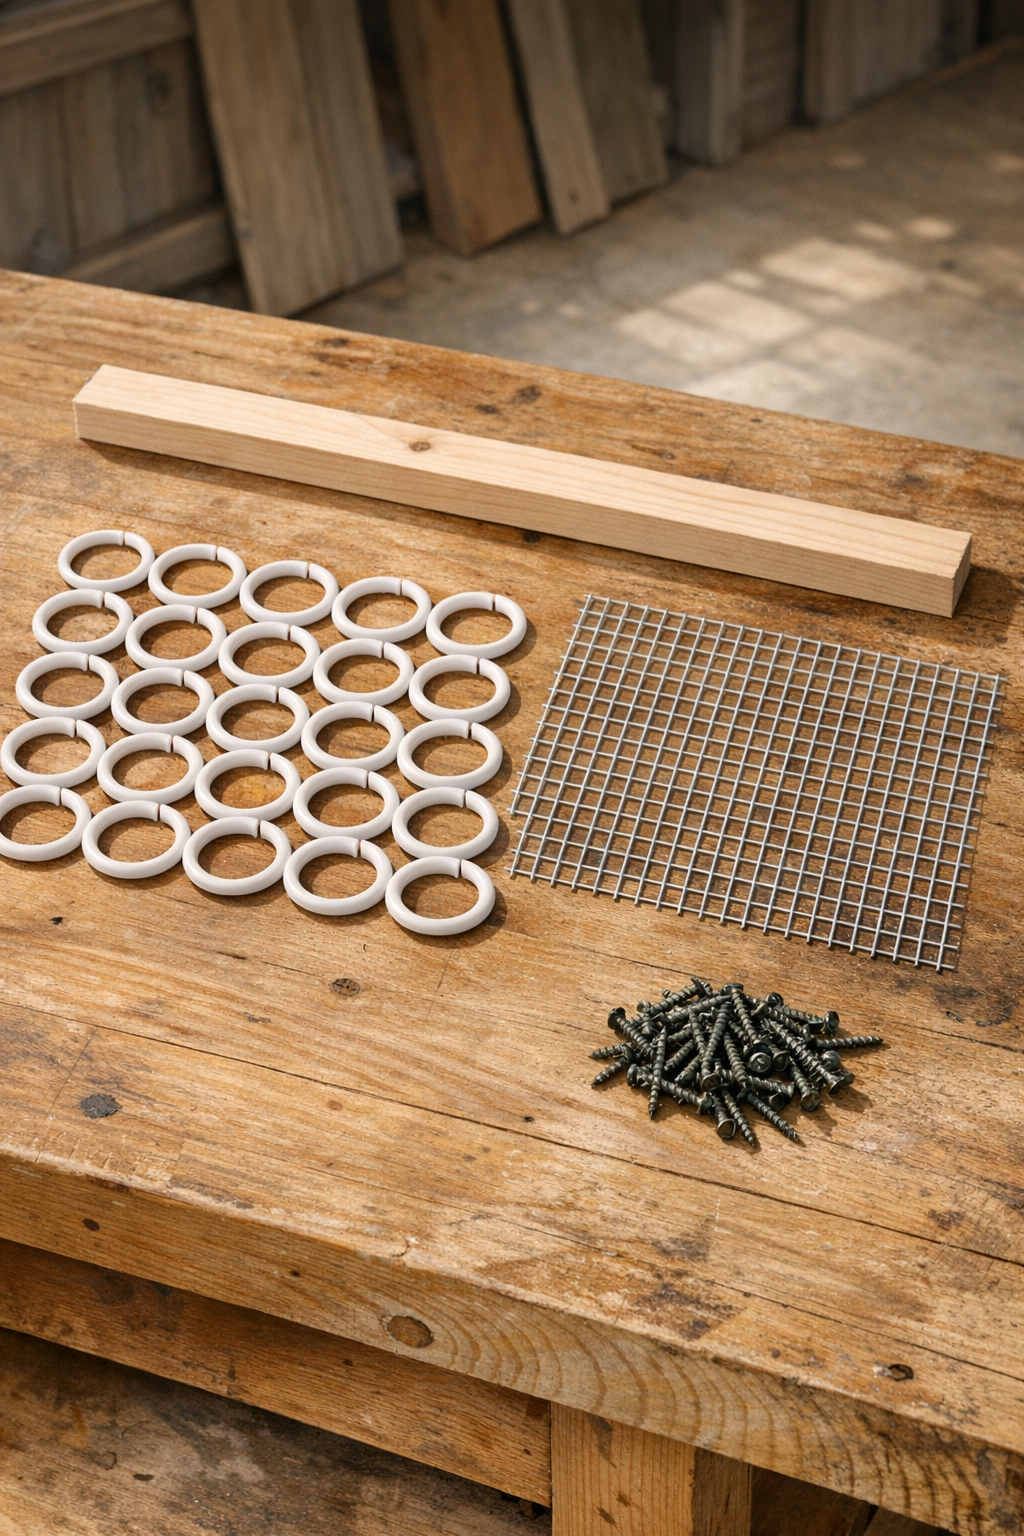
Materials
24 plastic shower curtain rings, standard size, hard plastic, about 2 inches each
Instructions
1. Cut your 1x2 scrap into brace blanks sized for your furniture, such as four pieces at 5 inches long for chair corners or two pieces at 8 inches long for a bench or small table.
2. Cut the galvanized mesh into panels slightly smaller than each wood blank, leaving about 1/4 inch clearance around the edges so the melted plastic can wrap the mesh without sharp metal sticking out.
3. Pre-drill two screw holes in each wood blank, keeping them centered and at least 3/4 inch from the ends so the wood doesn’t split later.
4. Heat your oven or toaster oven to 375°F, and line a small baking tray with one sheet of parchment paper; if you’d rather not use a kitchen oven, a dedicated craft toaster oven is the better choice for this job.
5. Arrange 6 shower rings per small brace, or 10 to 12 rings per larger brace, close together on the parchment so they overlap into a rough rectangle just larger than the wood blank.
6. Bake the rings for 8 to 12 minutes until they soften, slump, and fuse into one thick sheet; watch closely and remove them as soon as they are fully melted together.
7. Working carefully while the plastic is still hot and pliable, place a mesh panel on the melted plastic, set the wood blank on top, and cover it with the second sheet of parchment.
8. Press firmly with a flat board or a metal spatula so the hot plastic wraps around the mesh and bonds tightly against the wood faces and edges.
9. Let the piece cool for 15 to 20 minutes, then peel away the parchment and trim any thin plastic flash around the edges with sturdy scissors or a utility knife.
10. Re-open the pre-drilled holes by drilling through the plastic-covered wood from the original holes, keeping the bit straight so the screws will seat cleanly.
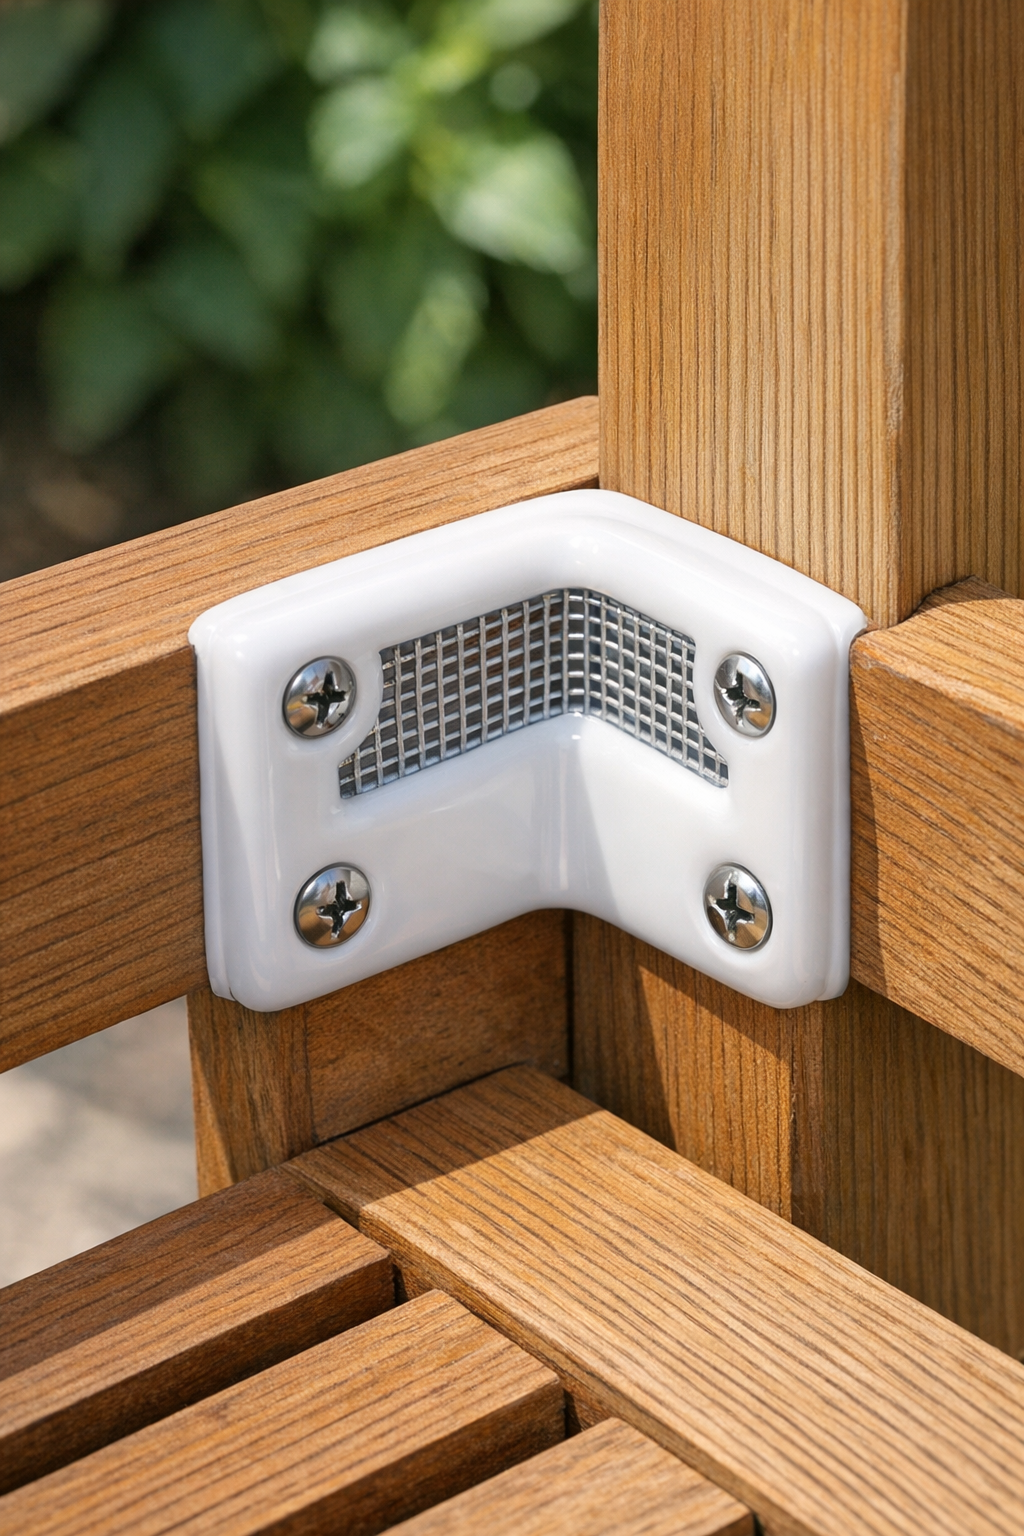
11. Position each brace at a weak corner or joint on your outdoor furniture, then fasten it with the 1 1/4-inch or 2-inch exterior screws, depending on the thickness of the frame pieces.
12. Test the furniture for wobble and add a second brace on the opposite side of the joint if needed; paired braces usually give the strongest, longest-lasting repair.
Variations & Tips
For larger furniture: Use more shower rings and a longer wood blank to make wider braces for benches, picnic tables, or porch swings. Just keep the mesh inset from the edges so no metal is exposed.
For a neater finish: Round the wood blank corners before covering them with plastic. The melted plastic flows more smoothly around soft corners than sharp square ones.
For better outdoor life: Use galvanized mesh and exterior-grade screws only. That little bit of caution goes a long way once rain, dew, and summer heat get involved.
Heat safety: Melt plastic only with good ventilation, and use oven mitts because the fused sheet stays hot longer than it looks. I treat this part like canning season—steady, attentive, and never rushed.
Color choice: White shower rings give a clean repair, but tan, gray, or black rings can blend better with darker patio furniture. If appearance matters, choose rings to match the piece before you begin.
Best use: These braces are excellent for reinforcing light- to medium-duty furniture joints, but I would not rely on them for structural repairs on load-bearing legs that are already badly rotted or cracked through.