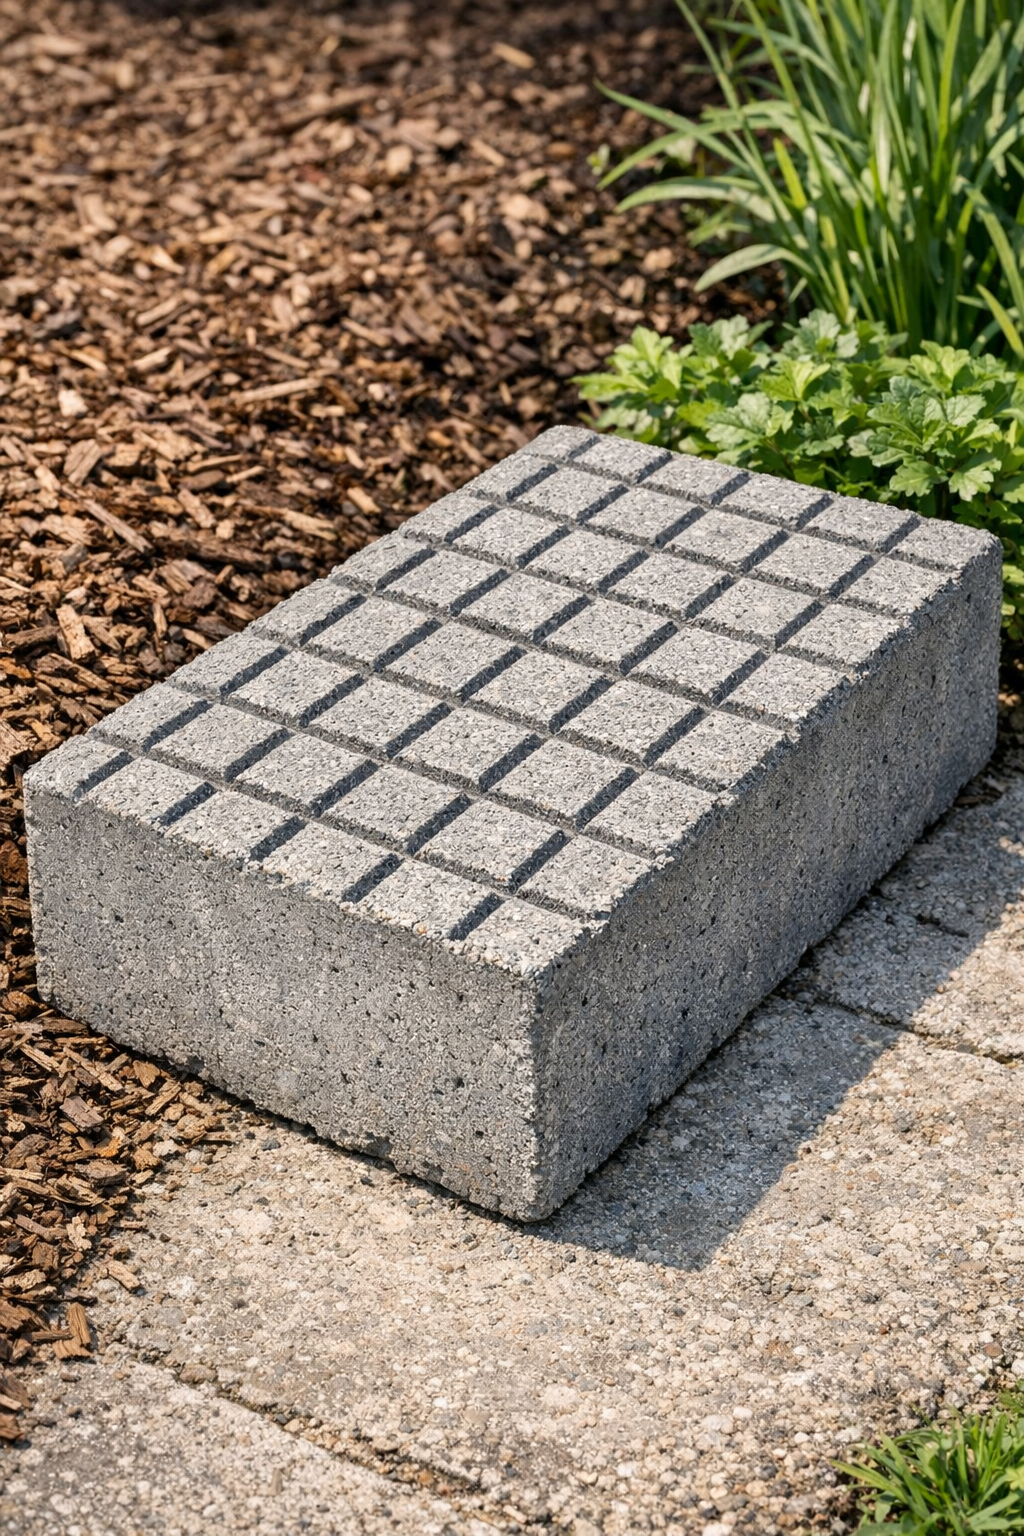
There’s something mighty satisfying about making a yard piece that looks like it came from an old garden center or a fancy landscape supply lot, when really it started with just a couple of simple items and a bit of elbow grease. These heavy crosshatched yard blocks are made by pressing metal wire grill baskets into wet cement, which leaves behind that handsome crisscross pattern that catches the light and gives plain concrete a lot more character.
I’m fond of projects like this because they’re practical, sturdy, and unfussy, the kind of thing that fits right into a Midwestern yard. You can use these blocks as stepping stones, tuck them around a flower bed, or set them under planters where the ground stays soggy. If you like a project that feels substantial in your hands and doesn’t require a shop full of tools, this one is a good place to start.
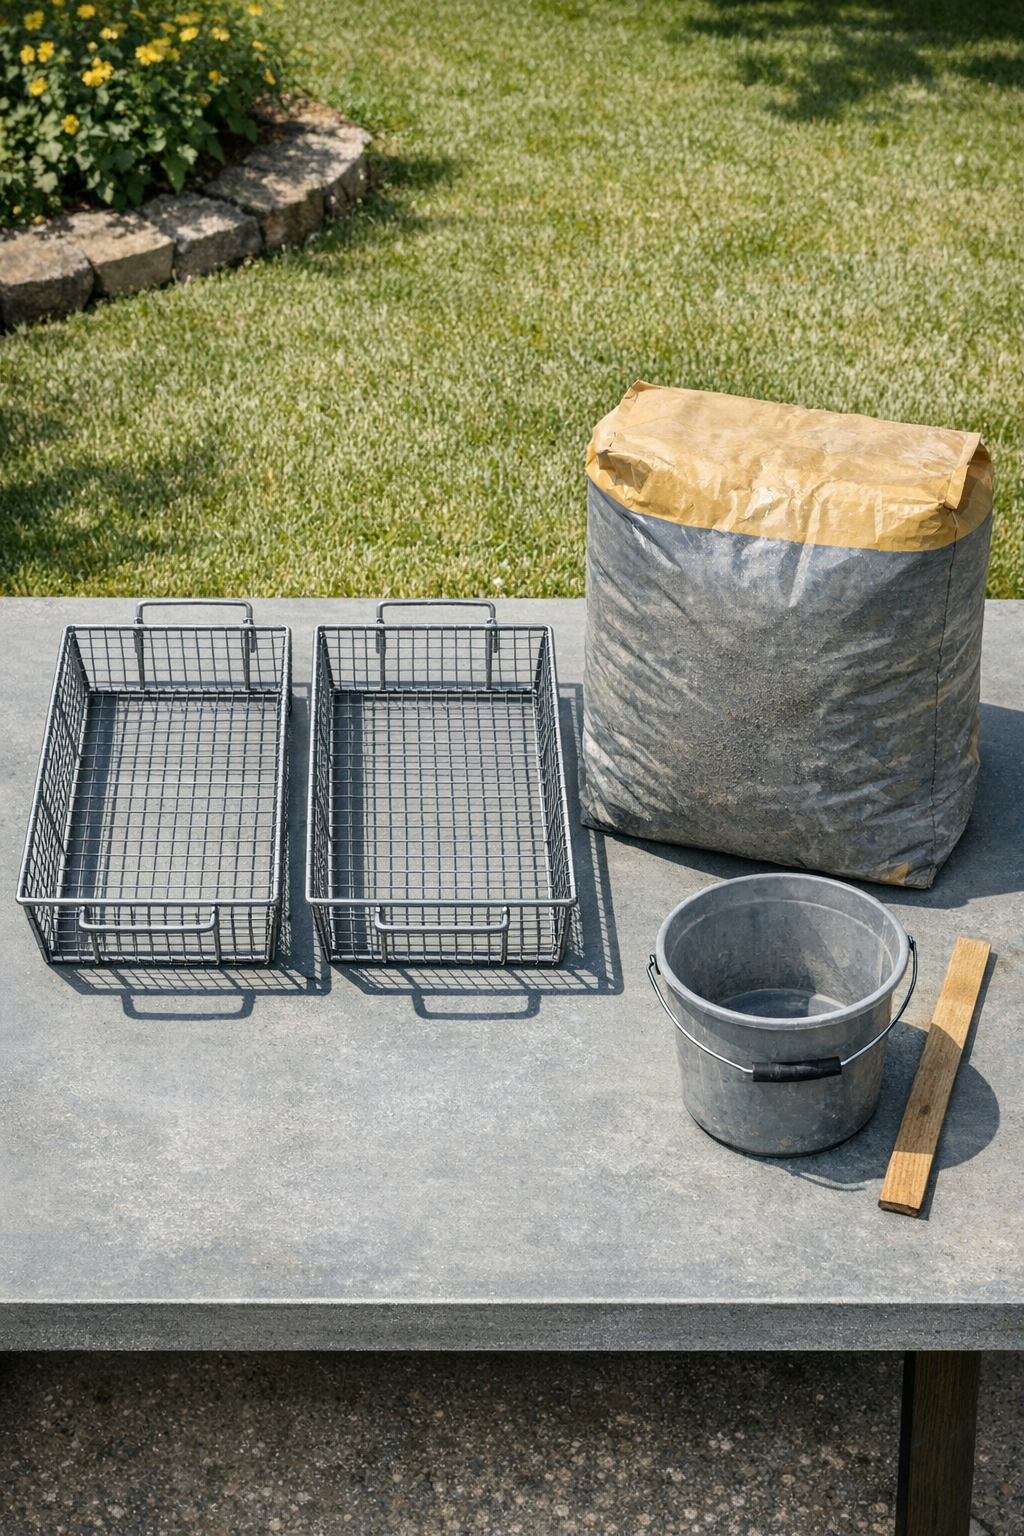
Materials
Instructions
1. Pick a flat outdoor work area and lay down the plastic drop cloth to keep the cement from sticking to the ground. Lightly coat the inside face of both grill baskets with cooking oil or mold-release spray so they release cleanly later.
2. Set one grill basket flat on the plastic with the deeper side facing up to act as your mold. Press the corners down so it sits as level as possible.
3. Pour the cement mix into a bucket or wheelbarrow and add water a little at a time, stirring until it reaches a thick peanut-butter consistency. The mix should hold its shape when scooped but still spread easily into the basket.
4. Fill the basket mold with cement to a depth of about 1 1/2 to 2 inches, pushing it into the corners with your gloved hand or a trowel. Smooth the top just enough to level it without making it soupy.
5. Lift the second grill basket and press it firmly straight down onto the wet cement to emboss the crosshatched pattern. Press evenly across the whole surface so the grid marks are consistent from edge to edge.
6. Gently lift the top basket back off, starting at one end and pulling slowly so you don’t tear the pattern. If any section sticks or smears, tap it back into shape with your fingers or a small trowel.
7. Let the block sit undisturbed until it firms up, usually 30 to 60 minutes for fast-setting cement depending on weather. Once it can hold its shape, carefully remove the outer basket mold.
8. Leave the block on the plastic to cure for 24 hours before moving it, then keep it in a shaded spot and lightly mist it for another day or two if the weather is hot and dry. Full strength comes with a longer cure, so wait several days before putting it into heavy yard use.
Variations & Tips
Make it more rustic: For an older farmhouse look, don’t over-smooth the cement before pressing the basket in. A slightly uneven surface gives the finished block more character, like something that has been in the garden for years.
Change the shape: If your grill baskets are square instead of rectangular, just follow the same method and make square stepping blocks. I’ve found a set of matching shapes looks especially nice marching down a side yard or toward a vegetable patch.
Add color: You can mix in a small amount of concrete colorant or brush the cured block with a masonry stain. Earthy tones like charcoal, clay, or mossy gray tend to sit naturally in the landscape.
Use as a planter base: These heavy blocks are excellent under flowerpots, rain barrels, or garden statuary because they help keep things up off muddy ground. That crosshatched texture also gives a little grip.
Watch the moisture: If the cement is too wet, the pattern will slump and blur; if it’s too dry, the basket won’t leave a clean impression. I always aim for a thick, scoopable mix that holds a ridge when stirred.
Work safely: Wear gloves and avoid breathing cement dust when mixing. Concrete can be hard on the skin, so I always keep a bucket of rinse water nearby, same as I’ve done for years with messy kitchen and garden jobs alike.