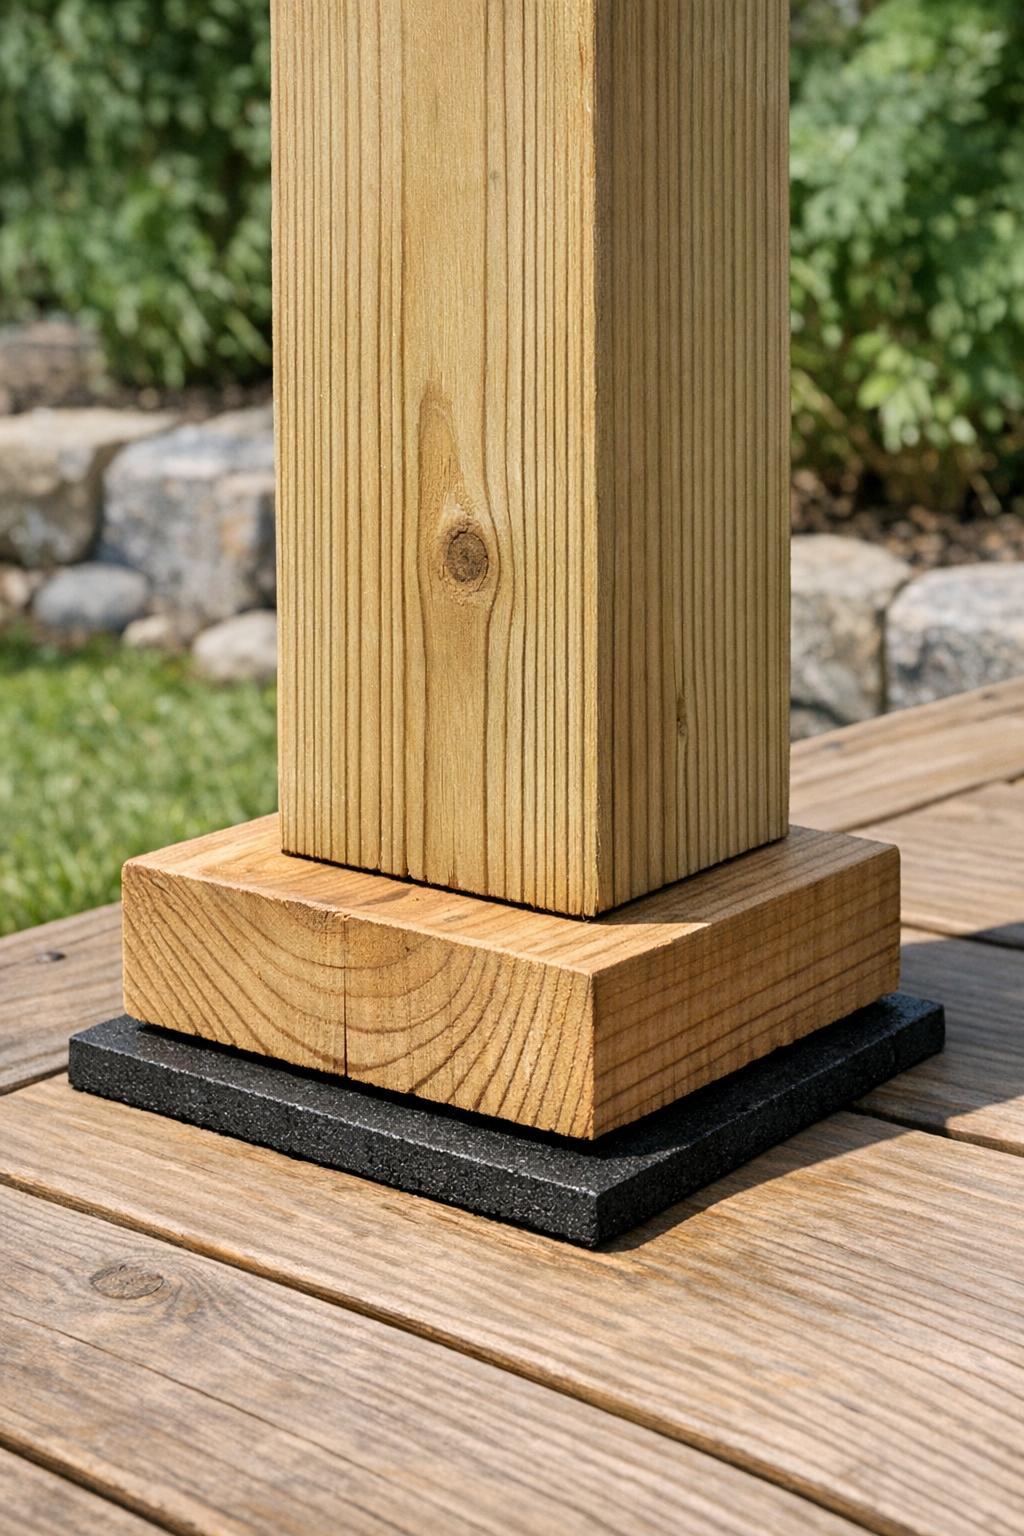
If you have a wobbly deck post, a shed support that needs a little lift, or an outdoor post sitting where moisture tends to collect, this is the kind of practical fix I get excited about. In this project, I’m turning old rubber hot water bottles into heavy-duty post base pads using just one other main material. It’s a simple upcycling idea, but it creates a tough buffer between wood and the surface below, which can help reduce direct moisture contact and add a bit of grip.
I love projects like this because they use what you already have on hand and solve a real household problem without a big trip to the hardware store. This is best for handy beginners and confident DIYers working on small outdoor structures, garden posts, or utility supports. As always, for anything structural or load-bearing on a home, I recommend checking local building requirements and using this as a supplemental support method rather than a substitute for engineered hardware where code applies.
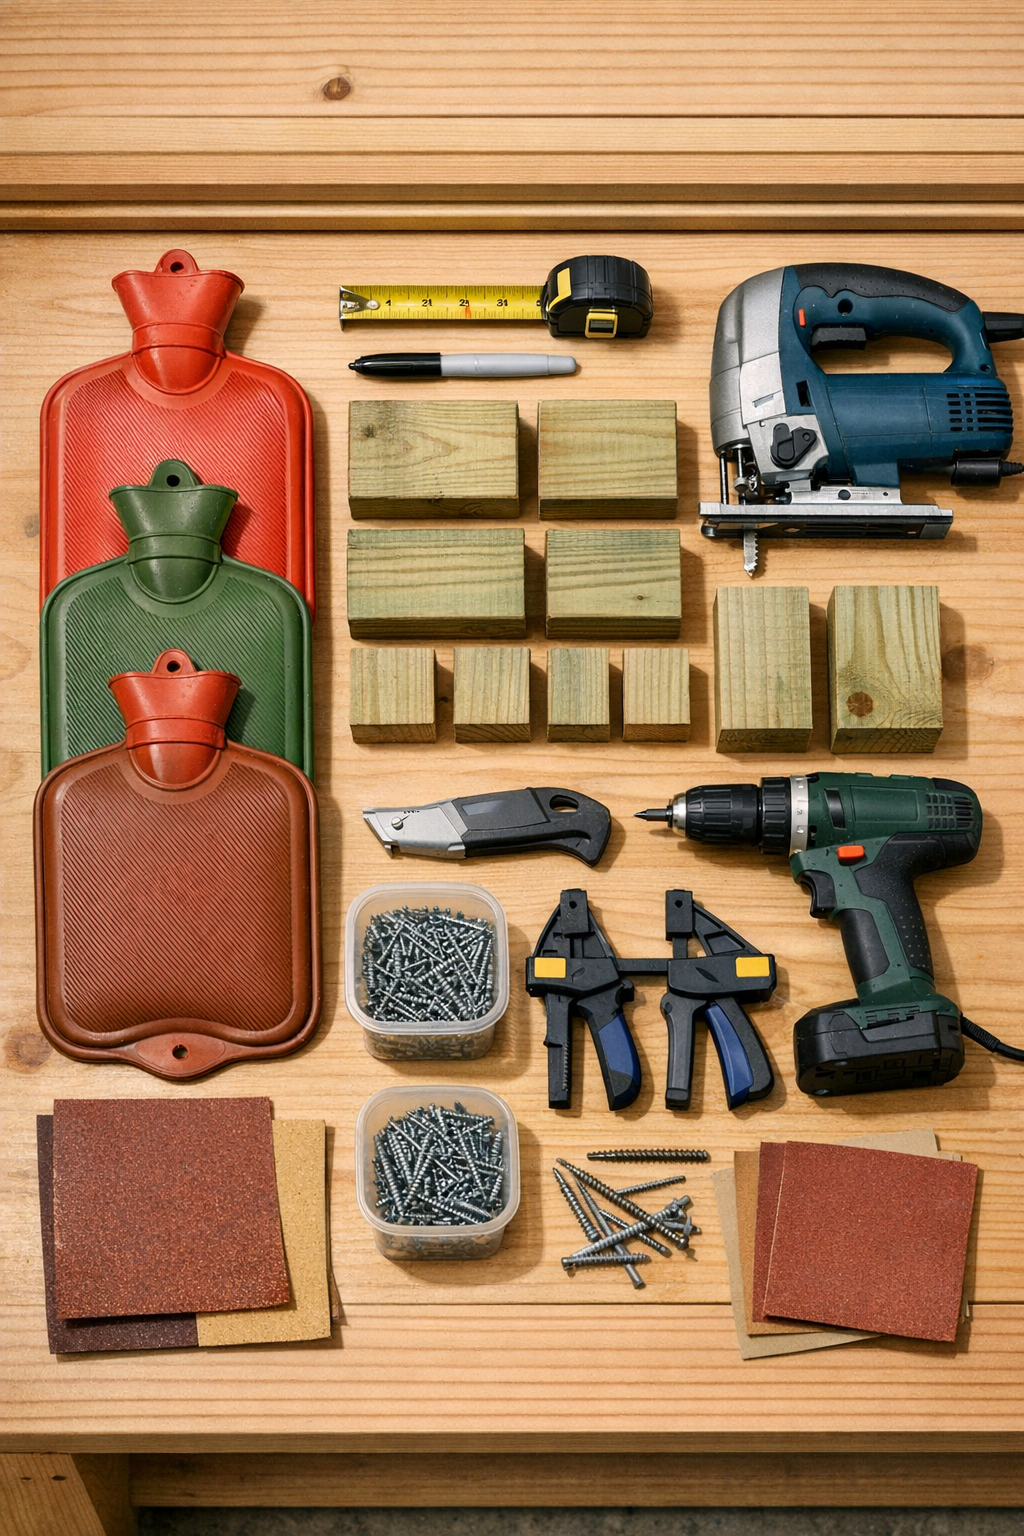
Materials
Instructions
1. Clean the hot water bottles with warm soapy water, rinse well, and let them dry completely so the rubber is easy to mark and cut.
2. Cut each pressure-treated lumber block to 5 1/2 inches square, then sand the edges lightly so they sit flat and won’t catch the rubber.
3. Remove the neck and ribbed edges from each hot water bottle with a utility knife or heavy scissors, then slice the remaining flat rubber into rectangular pieces slightly larger than the wood blocks.
4. Rough up one side of each rubber piece with 80-grit sandpaper to help the adhesive grip better, and wipe away any dust.
5. Spread a thin, even layer of exterior construction adhesive on one face of each wood block, then press a rubber piece onto the adhesive-coated side.
6. Clamp the rubber-covered blocks or weight them down with something heavy, and let the adhesive cure according to the package directions.
7. Trim the rubber flush with the wood using a utility knife once the adhesive has fully cured, then smooth any uneven edges with 120-grit sandpaper.
8. Mark the center area where the deck post will sit, set the block in place with the rubber side down, and check that it rests flat without rocking.
9. Lift the post slightly and slide the base underneath, or position the base before setting a new post down onto it, making sure the full weight lands evenly on the wood face.
10. If needed for a utility post or non-code repair, drive two deck screws through the side of the post into the wood block to keep it from shifting, taking care not to split the block.
Variations & Tips
For extra thickness: If your rubber is thin, glue two layers together before attaching them to the wood block. I like this option when I want a little more cushioning and grip.
For damp areas: Use pressure-treated lumber and exterior adhesive only. Outdoor projects in my part of the Midwest see plenty of rain and freeze-thaw cycles, so weather resistance really matters.
For picky measurements: Cut the wood block about 1/2 inch larger than the post footprint if you want a little extra margin around the edges. That small overhang can make placement easier.
For cleaner cuts: Warm the rubber slightly by leaving it in the sun for a few minutes before trimming. It usually cuts more smoothly when it isn’t stiff.
For family-safe building habits: Keep this project for sheds, planters, small platforms, and similar practical jobs unless a licensed pro approves it for structural use. I always tell my family that sturdy and safe comes before clever.
For less slipping during setup: Sweep the concrete or paver surface before setting the base down. A little grit underneath can make even a well-made base sit unevenly.