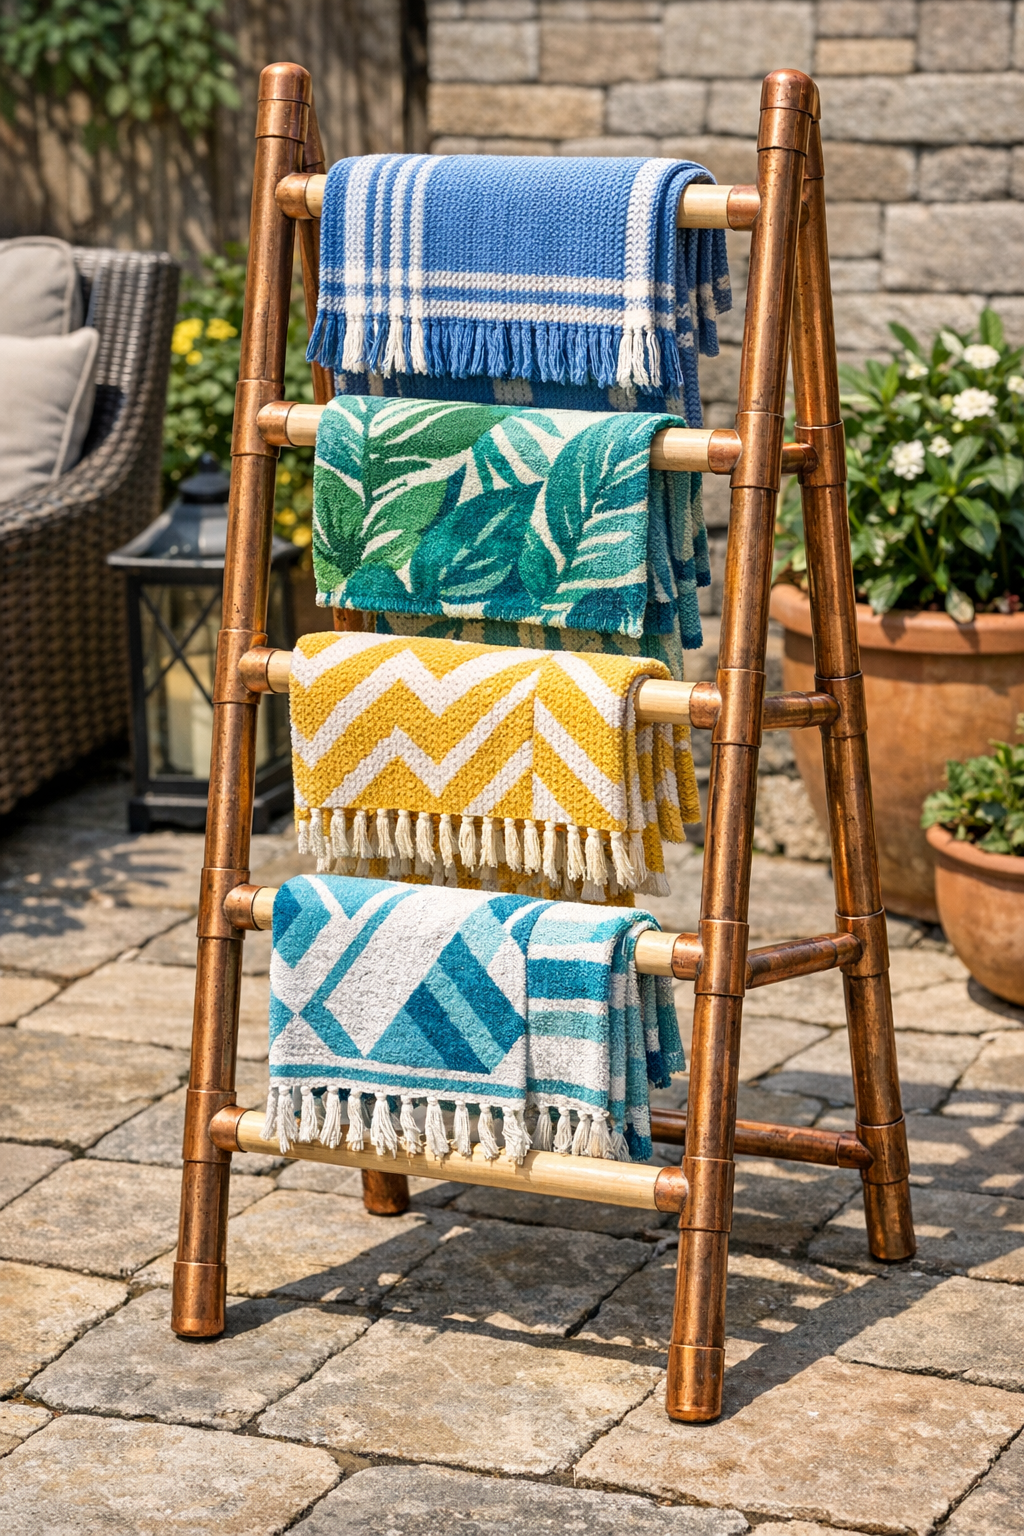
There’s something about a summer night in the backyard that makes folks want to linger a little longer. Where I live, once the sun drops and the fireflies start blinking over the grass, everybody goes reaching for a light blanket. That’s exactly why this outdoor blanket ladder is such a smart little project: it gives you a tidy, handsome place to keep throws close at hand, instead of piled on a chair or dragged back and forth from the house.
I’m especially fond of this build because it mixes warm wood with weathered copper in a way that feels both sturdy and graceful. If you’re comfortable measuring carefully and drilling clean holes, you can make this in an afternoon, and it’s well suited for a porch, patio, screened-in deck, or beside a fire pit where extra blankets are always welcome.
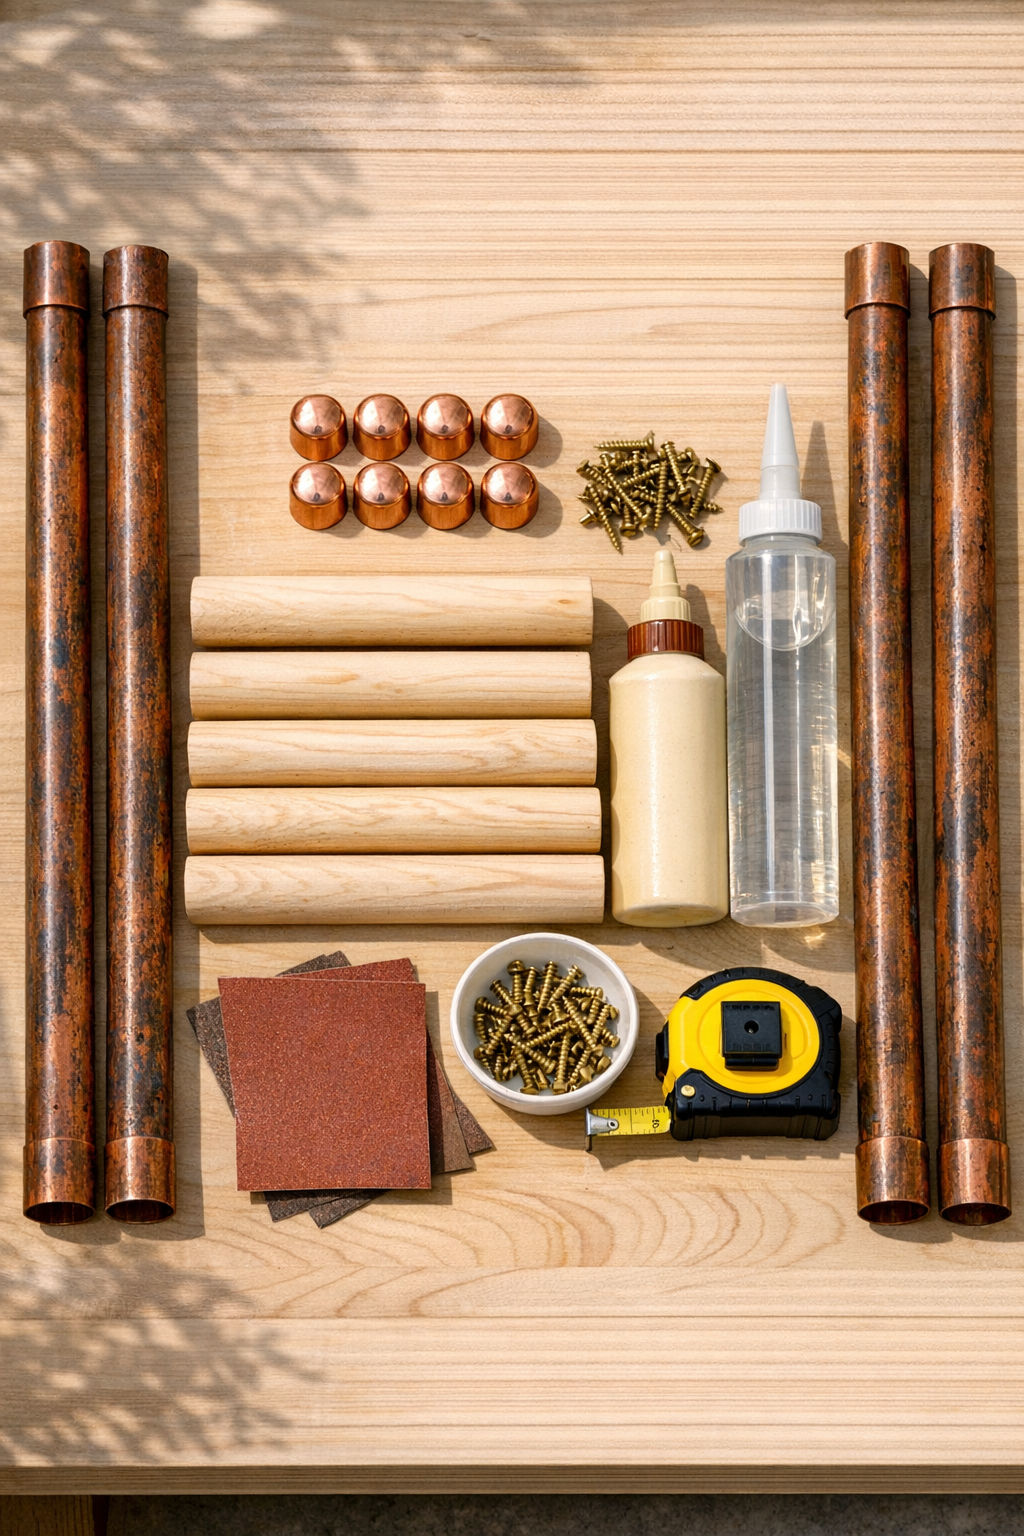
Materials
4 copper pipes, 3/4-inch diameter, 72 inches long
Instructions
1. Cut or confirm your copper pipes at 72 inches long and your birch dowels at 24 inches long, then lay everything on a flat surface to check that the pieces match in size.
2. Sand all four dowels first with 120-grit and then with 220-grit paper until they feel smooth in your hands, and wipe away every bit of dust.
3. Seal the dowels with two light coats of outdoor polyurethane or spar urethane, letting the first coat dry before adding the second, so the wood can better handle damp evening air.
4. Pair the copper pipes into two leg sets, and mark rung locations on each pipe at 12 inches, 28 inches, 44 inches, and 60 inches from the bottom end.
5. Wrap painter’s tape around each pipe at the mark lines and use a square or careful measuring to transfer each rung mark to the matching pipe so the holes line up evenly across both sides.
6. Clamp one copper pipe securely and drill a 1 1/4-inch hole through both sides at each marked rung location, keeping the drill level so the dowels will pass through straight.
7. Repeat the drilling on the remaining three pipes, checking often that matching holes sit at the same height on every leg piece.
8. Dry-fit one dowel through the first pair of copper legs, then slide on the second pair to make sure the spacing gives you a stable ladder shape with the legs angled slightly outward at the bottom.
9. Add a small bead of exterior wood glue and a dab of construction adhesive where each dowel meets each copper pipe hole, then slide the ladder fully together.
10. Drill a small pilot hole through the copper pipe and just into each dowel end area, then drive one stainless steel screw at every joint to lock the rungs in place.
11. Press the copper end caps onto the top and bottom openings of all four pipe legs, adding a little construction adhesive inside the caps if they fit loosely.
12. Install the rubber feet on the bottom ends, set the ladder upright, and check that it stands evenly with a gentle lean that’s safe for holding folded outdoor throws.
Variations & Tips
For a more rustic look: Let the copper age naturally outdoors for a while before final assembly, or gently buff only the high spots so you keep some of that weathered color.
If you want a wider ladder: Increase the dowel length to 30 inches instead of 24, but keep the rung marks matched perfectly on every pipe so the frame doesn’t twist.
For heavier blankets: Use hardwood dowels instead of standard birch and shorten the spacing between rungs a little so the structure feels even sturdier under weight.
For easier drilling: Start each hole with a smaller pilot bit through the copper before using the full-size hole saw or step bit, and clamp everything firmly so the pipe doesn’t roll.
To protect your patio: Don’t skip the rubber feet; they keep the copper from scratching concrete or decking and help the ladder stay put on dewy evenings.
My best practical tip: Before gluing anything, do a full dry fit and stand the ladder where you plan to use it. I’ve learned over many years that a project can look just right on the bench and feel entirely different once it’s out on the porch where real life happens.