
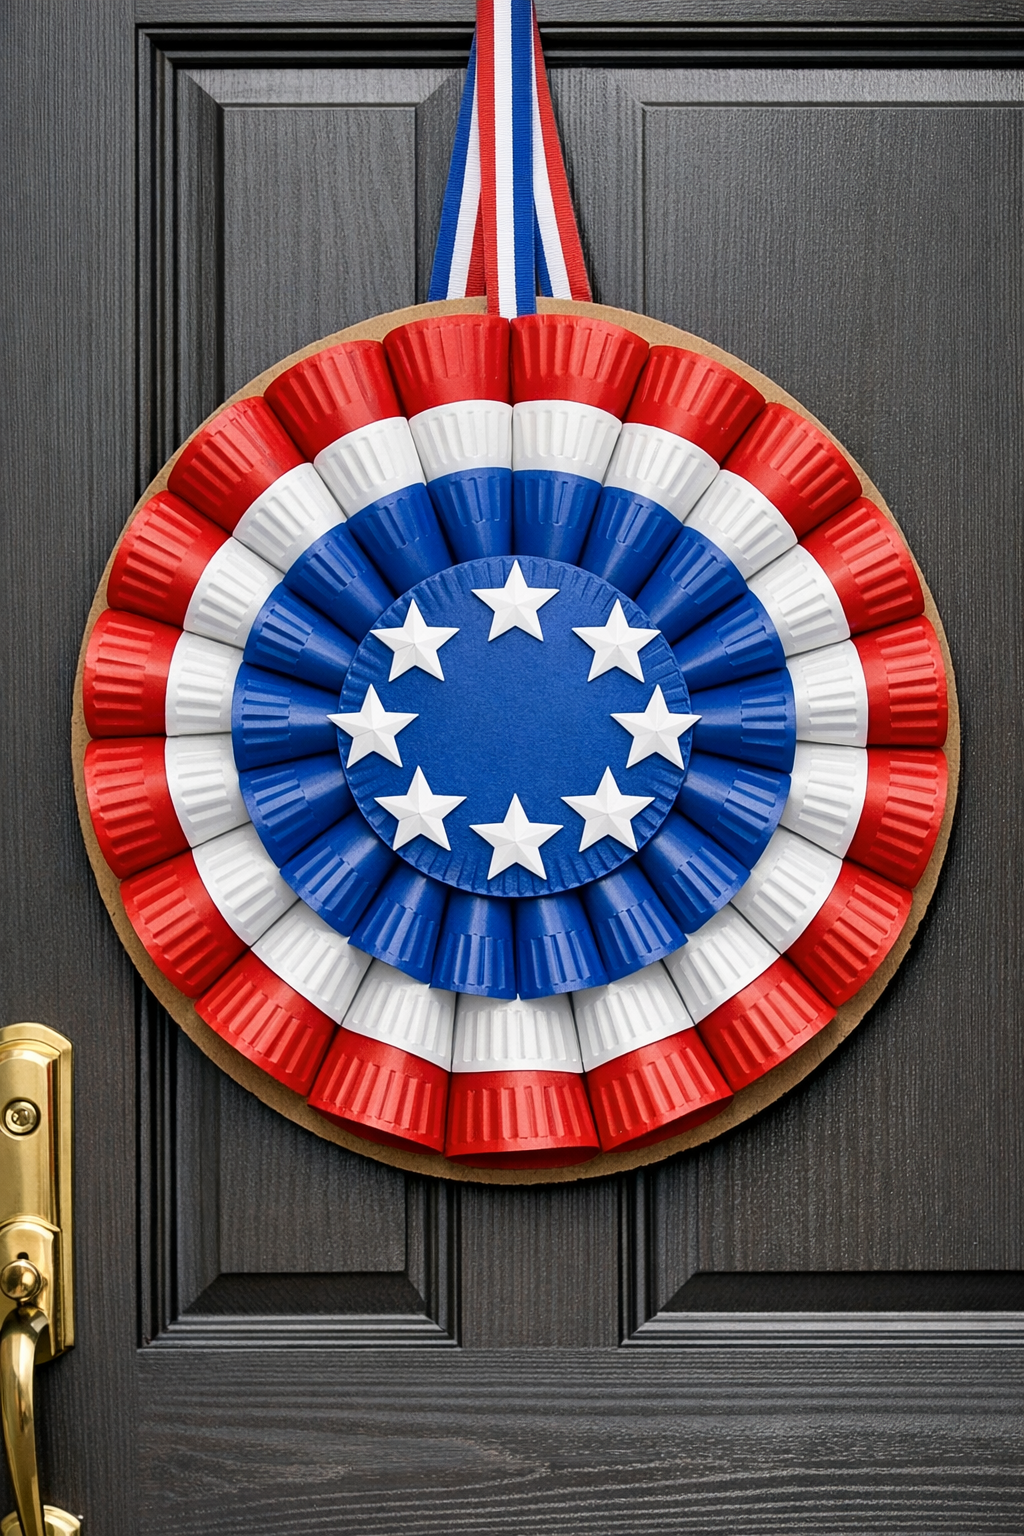
I love a project that looks big and festive without eating up an entire weekend, and this giant patriotic rosette door hanger is exactly that. By folding simple red and blue paper plates and stapling them onto a sturdy round pizza box, you get a full, dimensional front door decoration that feels custom and eye-catching for Memorial Day, the Fourth of July, or really any summer celebration.
This is the kind of craft I reach for when I want something cheerful on my front porch but do not want to spend craft-store-wreath money. As someone who is usually squeezing creative projects in between work and dinner prep, I appreciate that this one uses basic supplies, comes together in layers, and is forgiving if you are crafting at the kitchen table after a long day.
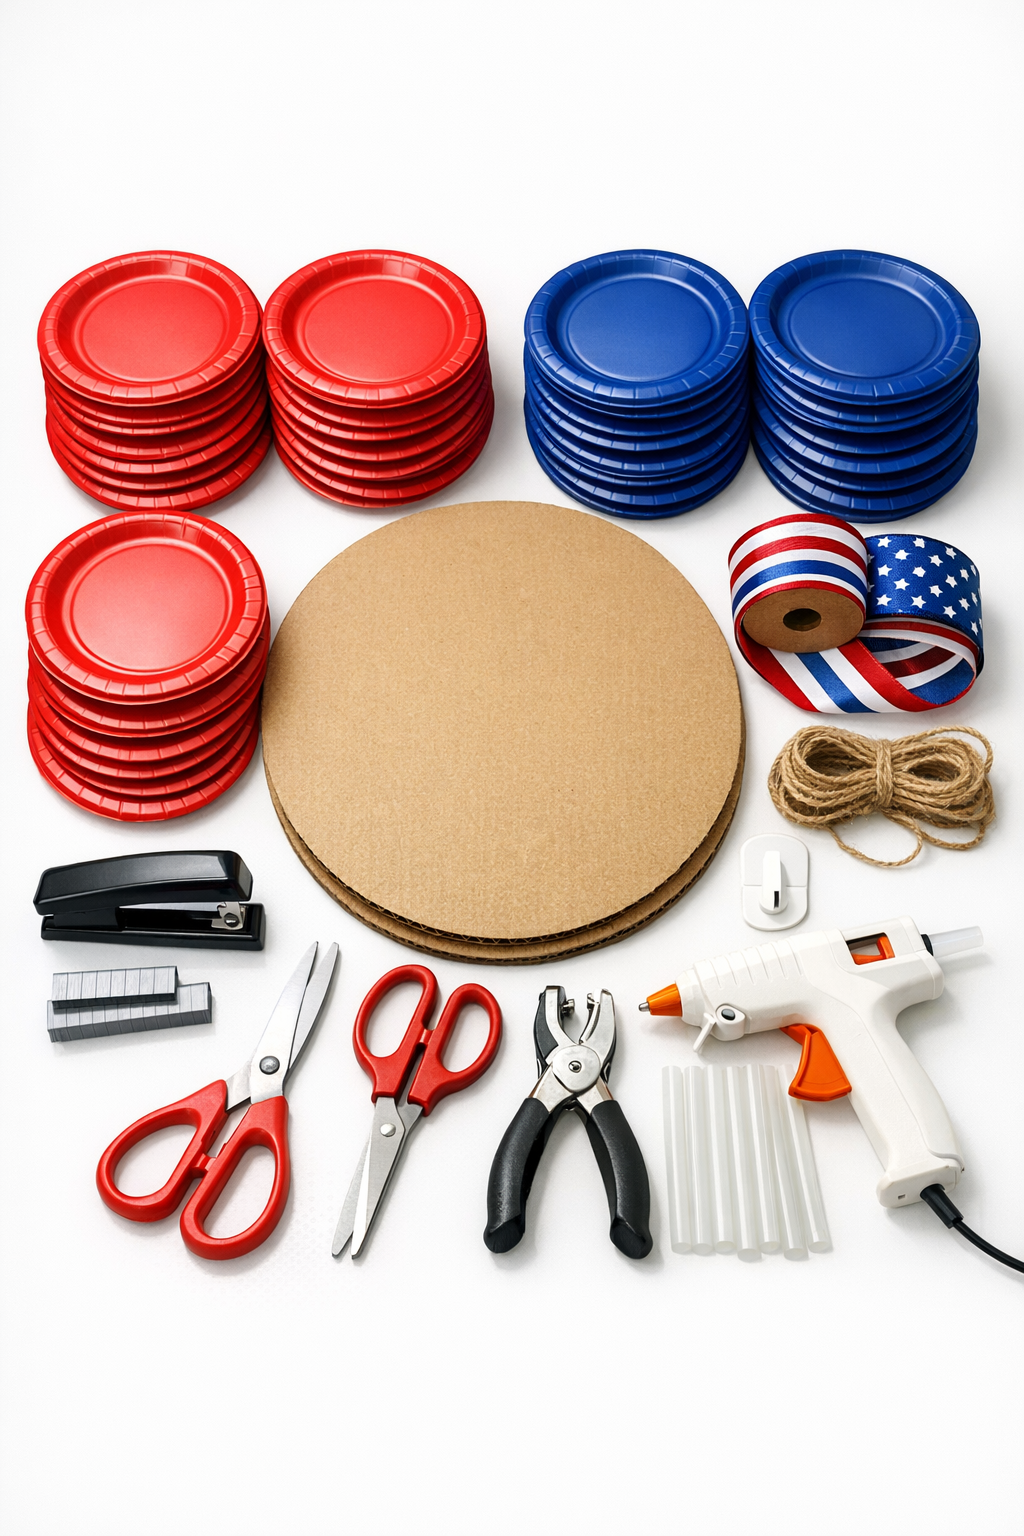
Materials
Instructions
1. Flatten and clean the pizza box if needed, then separate the top from the bottom so you are working with one thick round cardboard piece. Trim away any side flaps until you have a sturdy flat circle.
2. Fold each paper plate in half, then fold it in half again to create a quarter wedge shape with crisp creases. Repeat with all 60 plates so your assembly goes much faster later.
3. Punch two holes near the top edge of the cardboard circle, about 2 inches apart, and thread through the ribbon or twine to make a hanging loop. Knot it securely on the back and tape or glue the knot down flat if needed.
4. Start the outer ring by placing folded plates around the edge of the cardboard with the pointed ends facing toward the center and the rounded folded edges facing outward. Alternate colors or make grouped color blocks, then staple each plate directly to the cardboard.
5. Overlap the outer-ring plates slightly so the cardboard is mostly covered and the rosette looks full. Use 24 plates for this first layer, spacing them evenly as you go.
6. Build a second ring just inside the first, again alternating red and blue plates and offsetting them between the seams of the outer layer. Staple 20 plates in place so the second row fills gaps and adds depth.
7. Add the third inner ring with 12 plates, continuing the same overlap and offset pattern. Keep the pointed ends aimed toward the center so the middle stays neat and symmetrical.
8. Use the final 4 plates to create a tight center cluster, stapling them so they cover the remaining exposed cardboard. If the center feels bulky, use hot glue instead of staples for the last pieces.
9. Check the hanger from the front and fluff any plates that got pressed flat during stapling. Add a small ribbon loop or bow at the top with hot glue if you want a little extra finish.
10. Hang the rosette on your front door using the ribbon loop and an adhesive hook or wreath hanger. Step back and adjust the plate layers until the circle looks full and balanced.
Variations & Tips
Add white accents: If you want a more classic flag-inspired look, swap 8 to 12 of the plates for white ones and use them in the center or in every third section.
Use weather protection: If your door is exposed, lightly spray the finished hanger with a clear craft sealer and let it dry fully before hanging. I would still bring it in during heavy rain since paper plates can soften.
Make it easier to store: Instead of a big bow, keep embellishments flat so the rosette can slide behind a bench or into a large storage bag after the holiday.
Choose sturdy plates: The slightly thicker, coated party plates hold their folds better and look sharper than very flimsy budget packs. That small upgrade makes the finished rosette look much more polished.
Staple smarter: I like to staple near the pointed end of each folded plate so the outer curved edges stay free and dimensional. If a staple shows, tuck the next plate over it and keep moving.
Try other color themes: This same method works for school colors, Christmas red and green, fall oranges and browns, or even baby shower pastels. Once you make one, it is hard not to start planning the next version.