
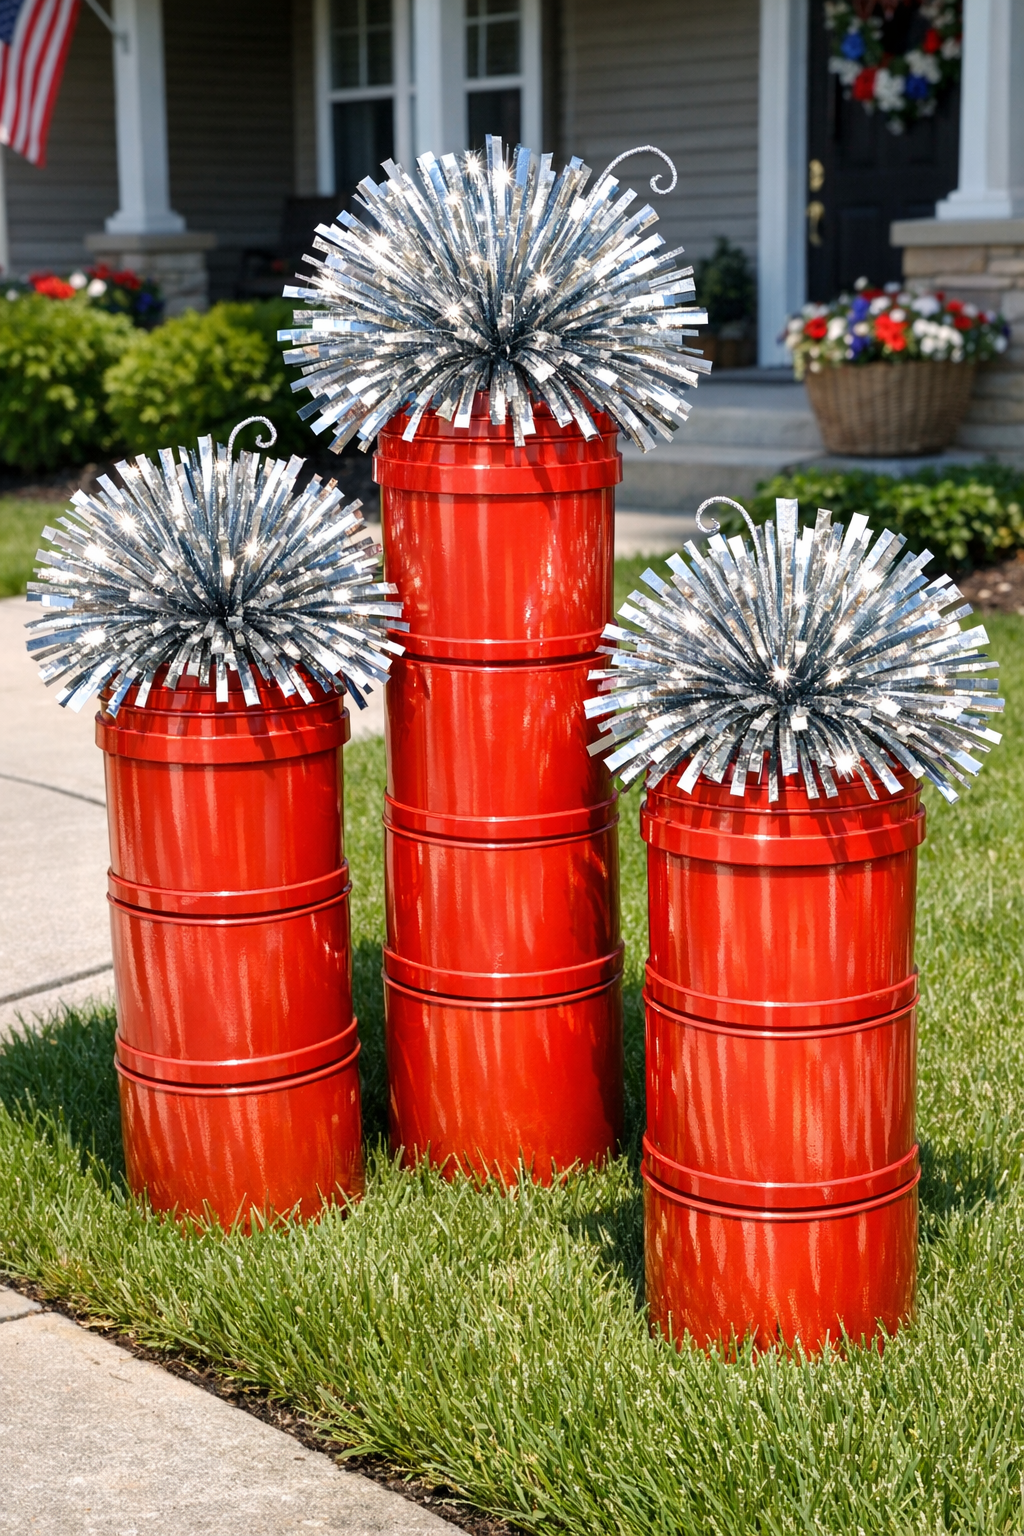
I love a yard project that looks festive from the street but doesn’t eat up an entire weekend, and these giant faux firecrackers absolutely fit that bill. By stacking inexpensive red plastic buckets and topping them with clusters of shiny silver pom-poms, you get a bold, playful decoration that has that fireworks-inspired look without anything messy, noisy, or complicated.
This is a great project for anyone who wants big impact on a budget, especially if you decorate for summer holidays or just like cheerful front porch and lawn décor. I’m always looking for things I can put together after work without dragging out a full workshop, and this one is simple, lightweight, and easy to customize for your own yard.
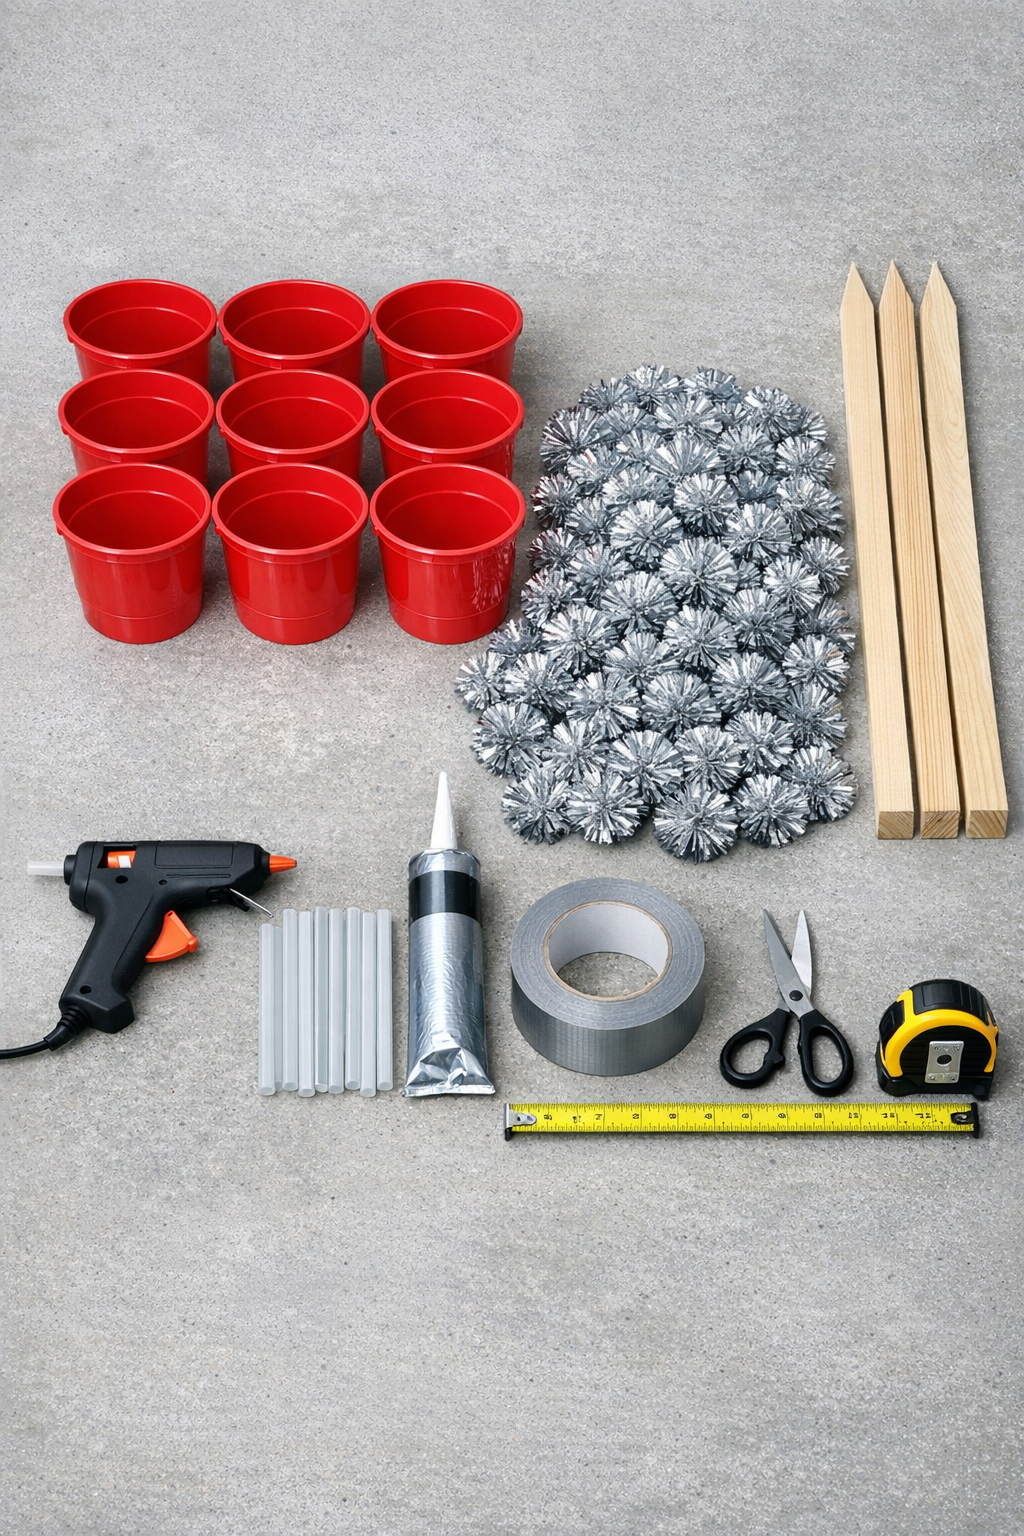
Materials
9 red plastic buckets, 1-gallon size
Instructions
1. Sort the buckets into three groups of three and wipe them clean so glue and tape will stick well. If your yard gets windy, add about 1 cup of pea gravel or sand to the bottom of each bottom bucket before you start stacking.
2. Make the first firecracker body by turning one bucket upside down, running a bead of outdoor adhesive around its base, and centering a second upside-down bucket on top of it. Add a third upside-down bucket the same way to create one tall red cylinder.
3. Wrap a band of silver duct tape around each seam where the buckets meet to reinforce the stack and give it a polished metallic stripe. Press the tape down firmly all the way around so there are no loose edges.
4. Repeat the stacking and taping process twice more so you have three separate giant firecracker bodies. Let the adhesive set according to the package directions before moving them much.
5. Push or secure one 36-inch wooden stake behind the center of each bucket stack so each firecracker can stand upright in the yard. If needed, attach the stack to the stake with a couple of tight wraps of silver duct tape on the back side where it won’t show from the street.
6. Divide the 150 silver pom-poms into three equal piles of 50 so each firecracker gets a full, balanced topper. This is the easiest way to keep them all looking equally full.
7. Apply hot glue around the top rim and upper inside edge of one top bucket, then press in pom-poms a few at a time until the top looks like an overflowing metallic burst. Angle a few upward and outward so it reads more like a sparkling fuse than a flat plug.
8. Repeat with the other two firecrackers, using 50 pom-poms on each one and filling any thin spots before the glue cools. Step back a few feet and fluff the pom-poms so the tops look rounded and full.
9. Place the finished firecrackers in your front yard, along a walkway, or beside the porch, then press the stakes securely into the ground. Space them a few feet apart or cluster them together for a bigger statement.
Variations & Tips
Add height variation: If you want a more dynamic display, make one stack two buckets tall, one three buckets tall, and one four buckets tall instead of keeping all three the same height.
Use stronger support: For very soft soil or windy weather, swap the wooden stakes for metal garden stakes or rebar caps made for yard décor support.
Change the color theme: Red and silver is classic and eye-catching, but red, white, and blue pom-poms or metallic gold accents also look great for summer holidays.
Make setup faster: I like to build the bucket stacks one evening and glue in the pom-poms the next day, especially if I’m squeezing in projects after work. Breaking it into two short sessions makes it feel very manageable.
Keep it weather aware: If rain is in the forecast, use outdoor-safe adhesive wherever possible and bring the pieces into the garage between holidays to help them last longer.
Style the display: These look especially fun grouped near a mailbox, lined along a front walk, or paired with planters and porch flags for a fuller holiday setup.