
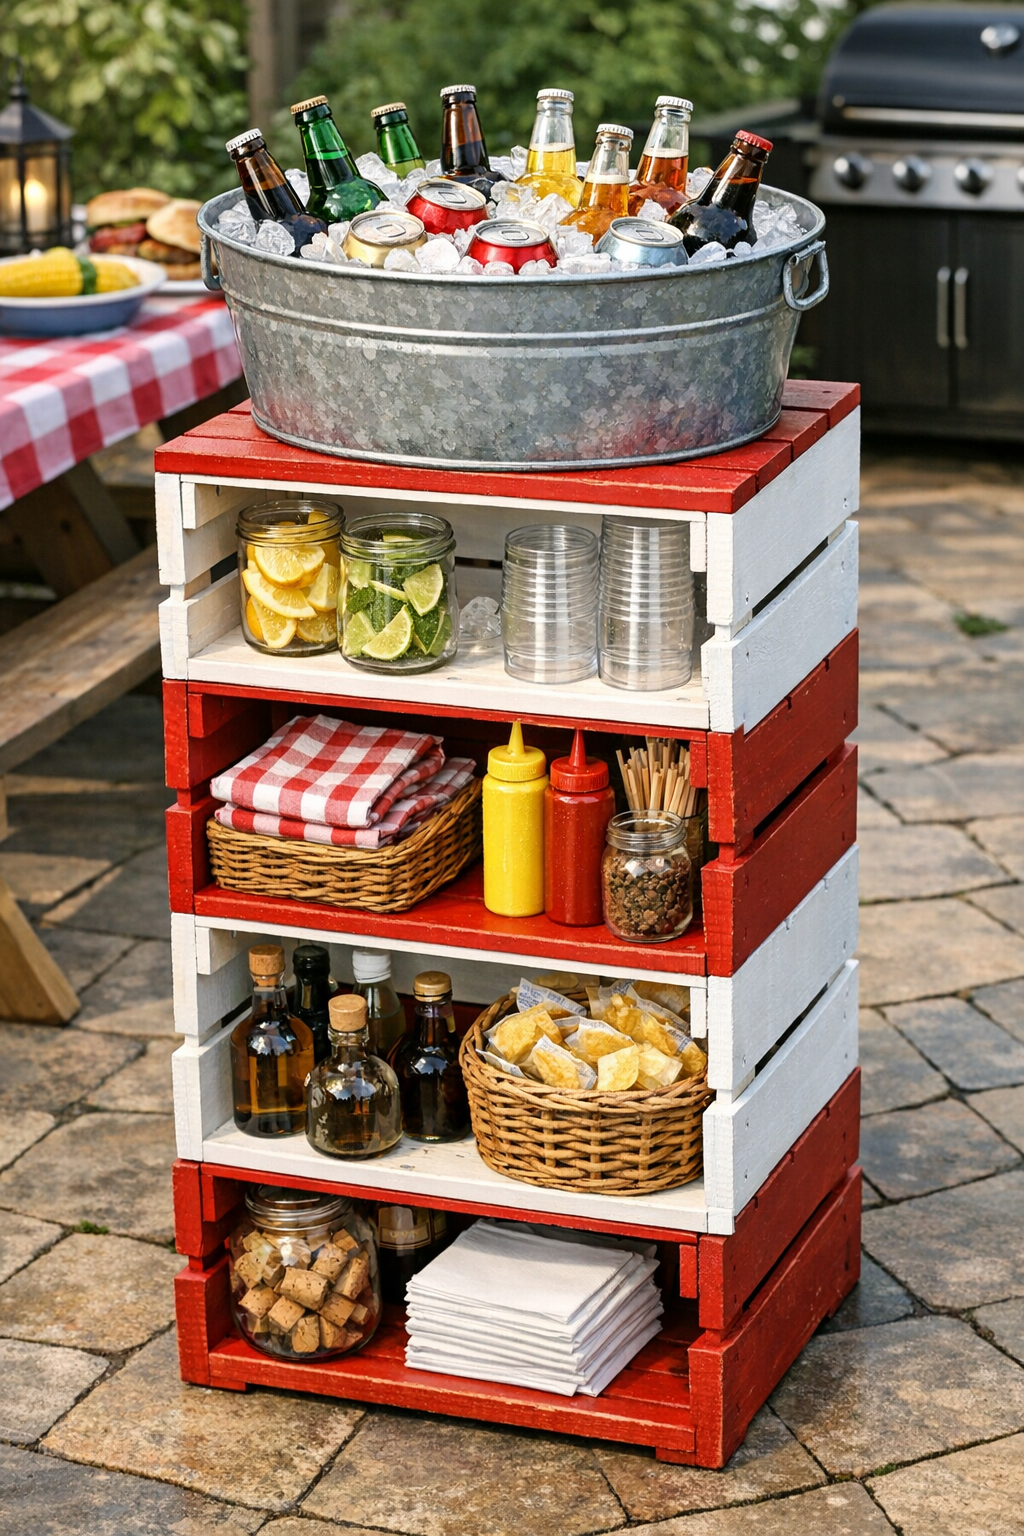
When I’m feeding a crowd in the backyard, I’m always looking for ways to make things feel a little more festive without making extra work for myself. This outdoor drink dispenser stand is one of those projects that looks charming and pulled together, but it’s actually very simple to build. By stacking and painting wooden crates and fitting a galvanized bucket insert on top, you get a sturdy station for bottled drinks, ice, or even lemonade supplies.
I especially love this kind of project for family cookouts, birthday parties, and summer evenings on the patio because it adds height, storage, and a sweet farmhouse look all at once. If you want something budget-friendly that still feels special for guests, this is a wonderful weekend build.
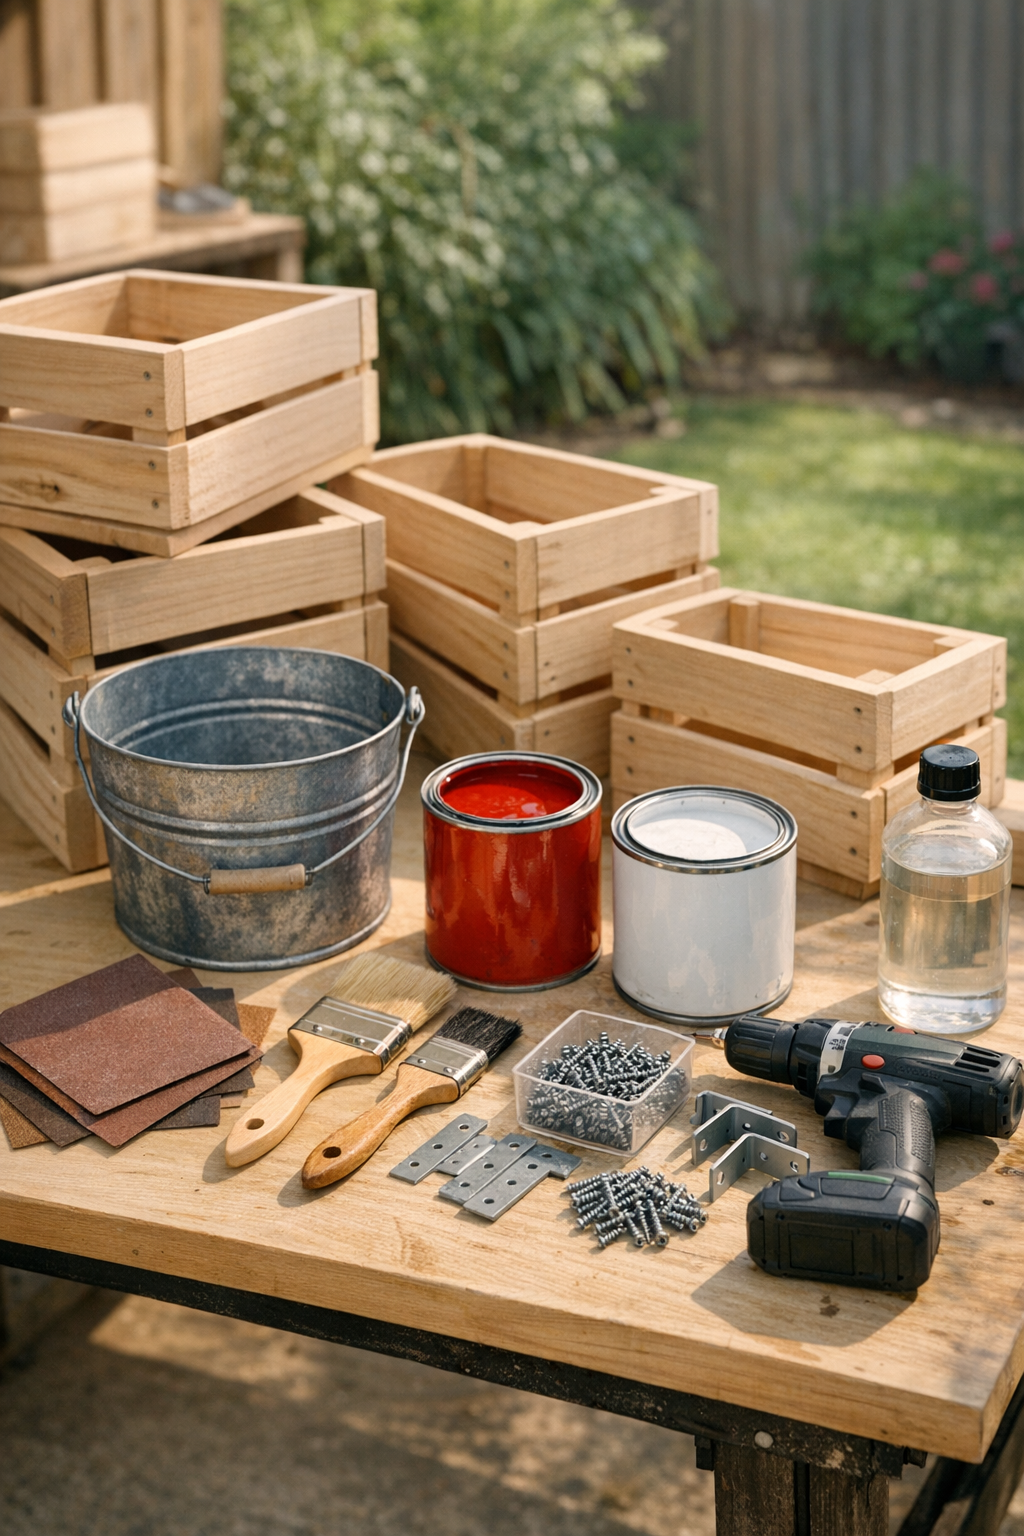
Materials
4 wooden crates, 18 x 12 x 9 inches each
Instructions
1. Set your crates on a drop cloth and check that they are all sturdy, clean, and dry. Sand any rough spots with 120-grit sandpaper, then smooth everything with 220-grit for a paint-ready finish.
2. Apply primer if your crates are raw or very porous, and let it dry completely. This extra step helps the red and white paint cover evenly and hold up better outdoors.
3. Paint two crates red and two crates white, using a brush for corners and a foam roller for broad slats. Let the first coat dry, then add a second coat for solid, even color.
4. Seal the painted crates with a clear outdoor sealer once the paint has cured. Brush on a thin coat and let it dry fully so the finish stands up to sun and splashes.
5. Arrange the crates in a stacked pattern to form the stand, placing two crates on the bottom side by side and two on top turned so the openings face outward for storage. Measure the top center area to make sure the galvanized bucket will sit securely and look balanced.
6. Attach the stacked crates together from the inside using 1 1/4-inch wood screws and L-brackets at the connection points. Keep the hardware tucked inside the crate openings so it stays hidden and the stand feels solid.
7. Set the galvanized bucket on the top center of the crate stack and trace around the base lightly with pencil if you want a guide for placement. If the bucket has a flat enough base, leave it as a removable insert so you can dump melted ice and clean it easily.
8. Test the stand on a flat outdoor surface and press gently on each side to make sure there is no wobble. If needed, adjust the crate placement or add an extra screw at a loose joint before loading it up.
9. Fill the bucket with ice and bottled drinks, or use it to hold canned sodas, sparkling water, or juice boxes for the kids. Tuck napkins, straws, drink tubs, or extra supplies into the open crate cubbies to make serving simple.
Variations & Tips
For picky drinkers: I like to divide the drinks by group, with sparkling water on one side, juice boxes for kids, and sodas on the other. It makes it easier for everyone to grab what they like without digging through the ice.
Color swap: If red and white don’t match your patio, try navy and white, sage green and cream, or all one color for a more classic look. Just be sure to use exterior paint so the finish lasts.
Storage boost: The crate openings are perfect for rolled hand towels, bagged snacks, or extra cups. When I’m hosting, I always use those cubbies so people can help themselves.
Easy drainage: If your bucket tends to hold a lot of melted ice, keep it removable instead of fastening it down. That way you can carry it out, empty it, and refill it in minutes.
Make it more rustic: Lightly distress the painted edges with fine sandpaper after the paint dries. This gives the stand that cozy vintage look that feels right at home in a backyard gathering.
Safety tip: Set the stand on a level patio, deck, or packed ground so it stays stable once the bucket is full. A quick wobble check before guests arrive is always worth it.