
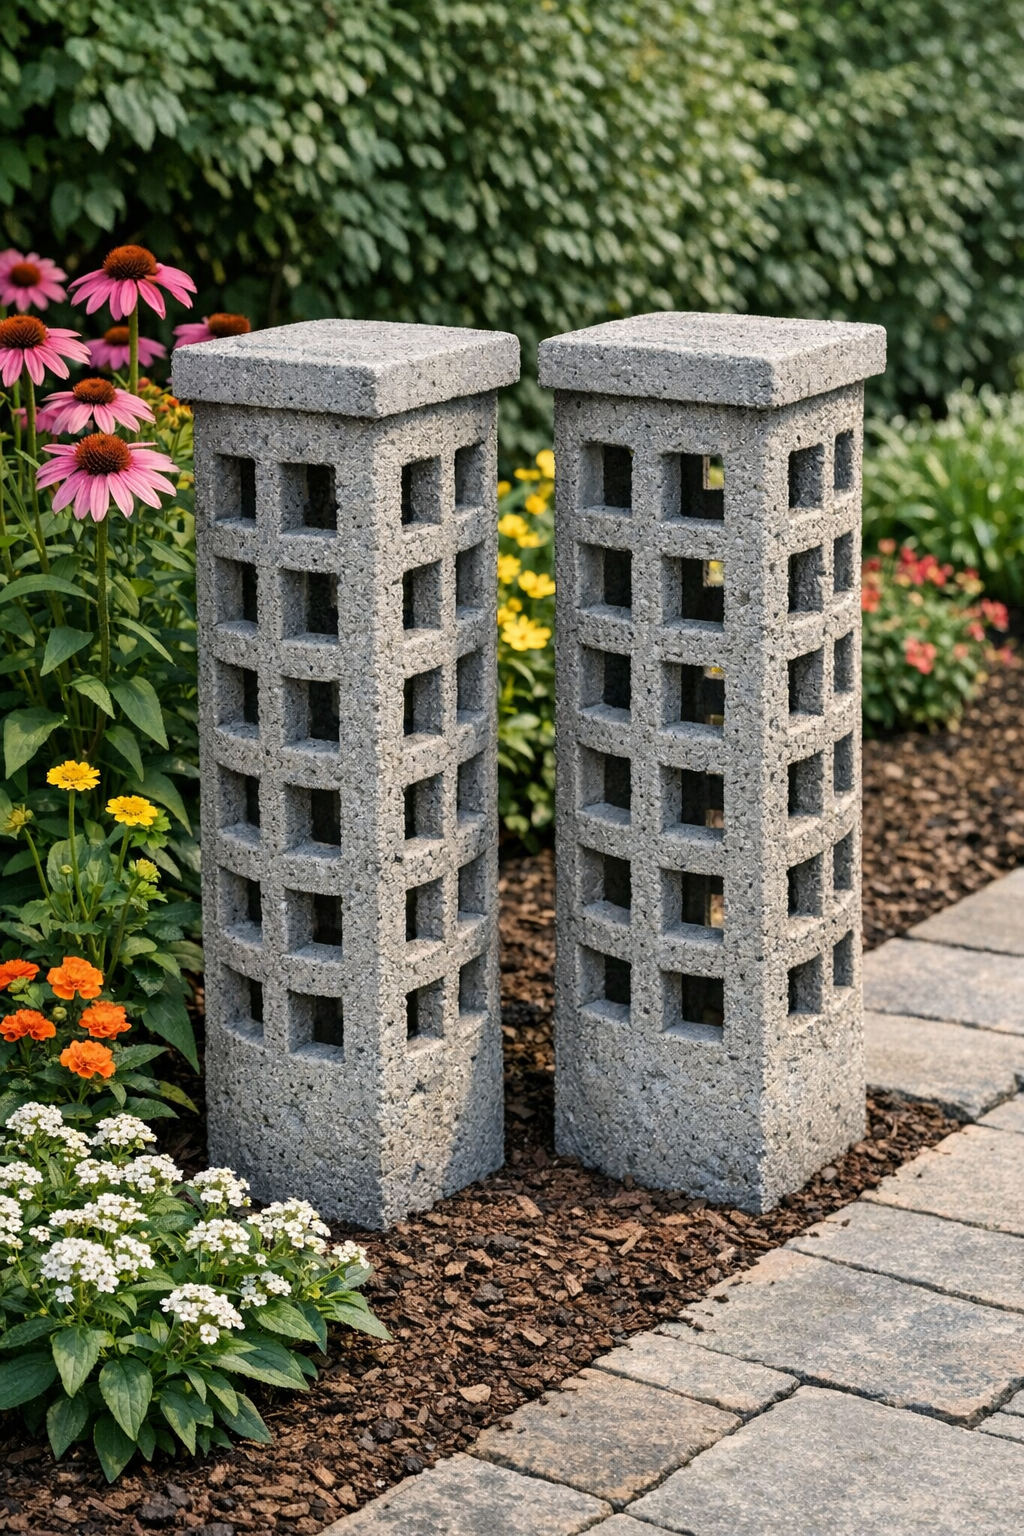
I’ve always had a soft spot for garden pieces that look like they’ve been standing in the yard for years, the kind of things that make a simple flower bed feel settled and special. This project turns a couple of inexpensive plastic laundry baskets into heavy lattice-style yard pillars with a concrete finish, and the transformation is one of those thrift-store miracles that still surprises me every time.
If you enjoy practical outdoor DIY projects and don’t mind getting your hands messy, this is a good one to tackle over a weekend. The method is simple, the supplies are humble, and the finished pillars can flank a walkway, frame a porch step, or stand among flowers like old garden ornaments.
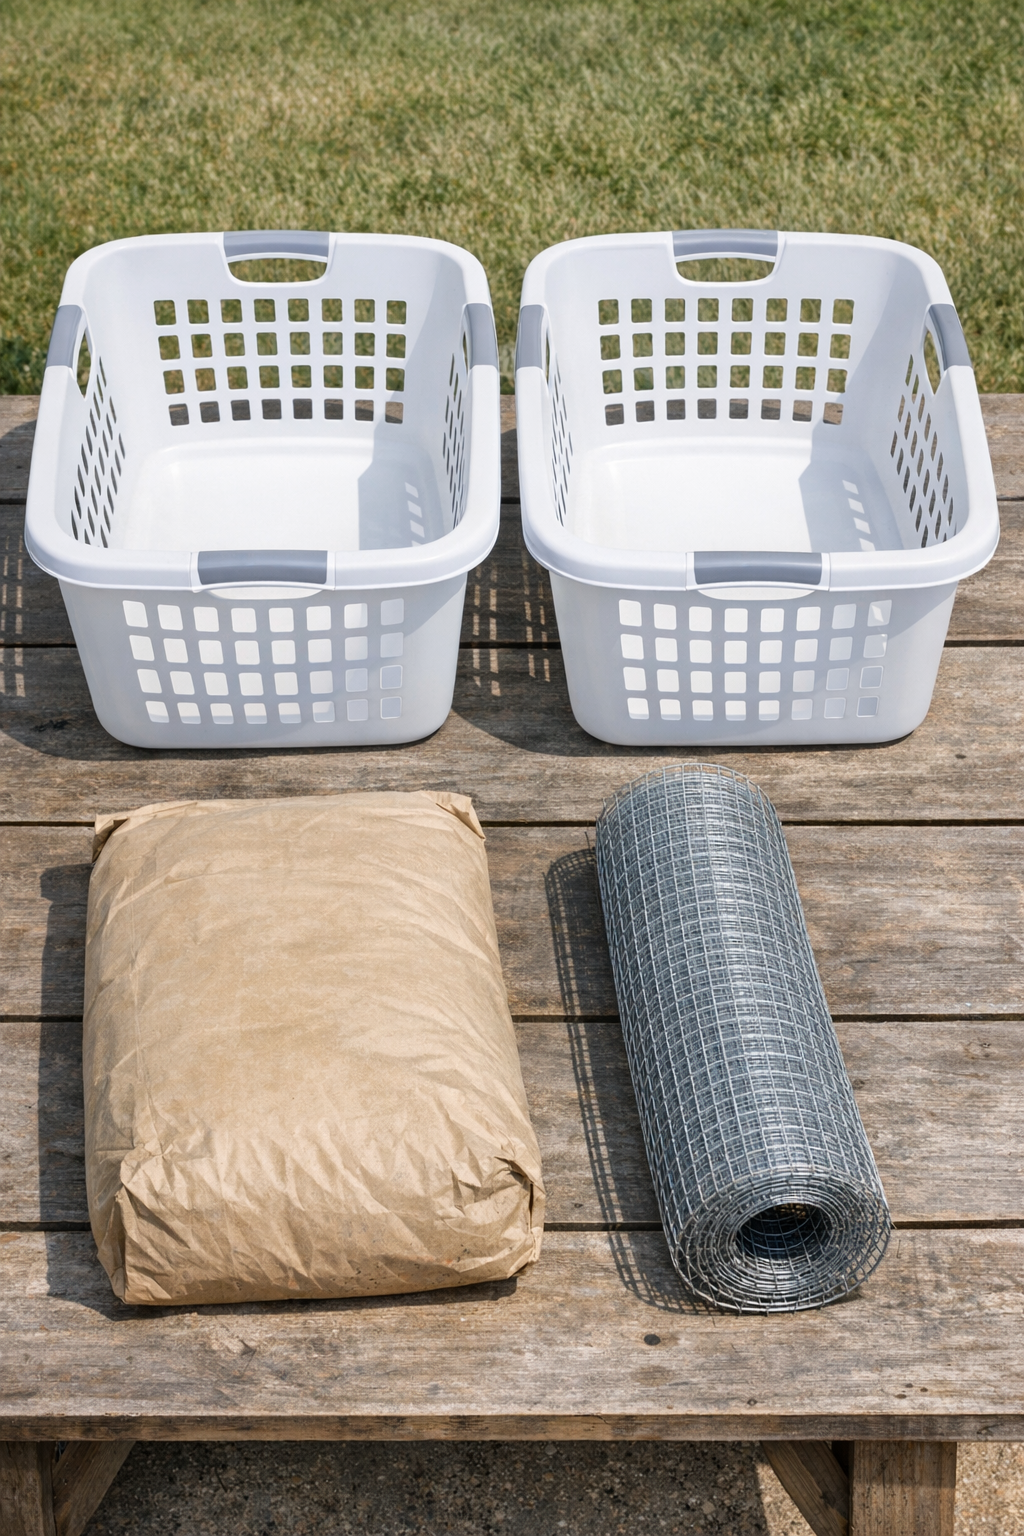
Materials
2 plastic laundry baskets, rectangular or slightly tapered, about 22 to 26 inches tall each
Instructions
1. Set the laundry baskets upside down on a flat work surface and check that they sit level without wobbling. Choose baskets with open lattice sides, since those openings help the cement grab and create the pillar pattern.
2. Cut sections of hardware cloth to wrap around the outside of each basket, leaving enough to cover all four sides. Bend the mesh gently by hand so it follows the basket shape closely.
3. Press the wire mesh snugly around each basket so it sits against the plastic and doesn’t bow outward. Overlap the mesh edges slightly to keep the form tidy and even.
4. Mix the cement with water according to the package directions until it reaches a thick, spreadable consistency, about like stiff oatmeal. Let it rest for a minute, then stir again so it holds to the mesh instead of sliding off.
5. Slather the cement over the mesh-covered baskets with gloved hands or a trowel, pushing it into the wire so the first coat locks onto the form. Keep the layer fairly even, about 1/2 inch thick over the whole outside.
6. Smooth and shape the surface as you go, filling any gaps and keeping the corners straight. If you want a more rustic old-stone look, leave a little texture instead of polishing it flat.
7. Let the first coat firm up until it is no longer sagging, then add extra cement where needed to build a strong shell. Pay special attention to the top and bottom edges so the pillar looks finished from every angle.
8. Leave the pillars undisturbed to cure fully according to the cement mix directions, protecting them from heavy rain while they set. Once hardened, stand them upright and brush away any loose crumbs from the surface.
Variations & Tips
For taller pillars: Use taller laundry baskets of the same style, but keep the cement coat even so the shell cures without weak spots.
For an aged garden look: After curing, lightly dry-brush the surface with exterior gray, beige, or mossy green paint to mimic weathered stone. I’ve done that on planters before, and it gives them that old farmstead charm I love.
For extra stability: Set the finished pillars on level pavers or compacted gravel instead of bare soil so they stay upright and don’t settle unevenly after rain.
For cleaner coverage: Work in two thin-to-medium coats rather than one overly heavy one. That approach usually gives a stronger shell and makes shaping the sides much easier.
For placement: These look especially handsome in pairs at the start of a garden path, beside porch steps, or tucked into perennial beds where their texture contrasts nicely with soft greenery.