
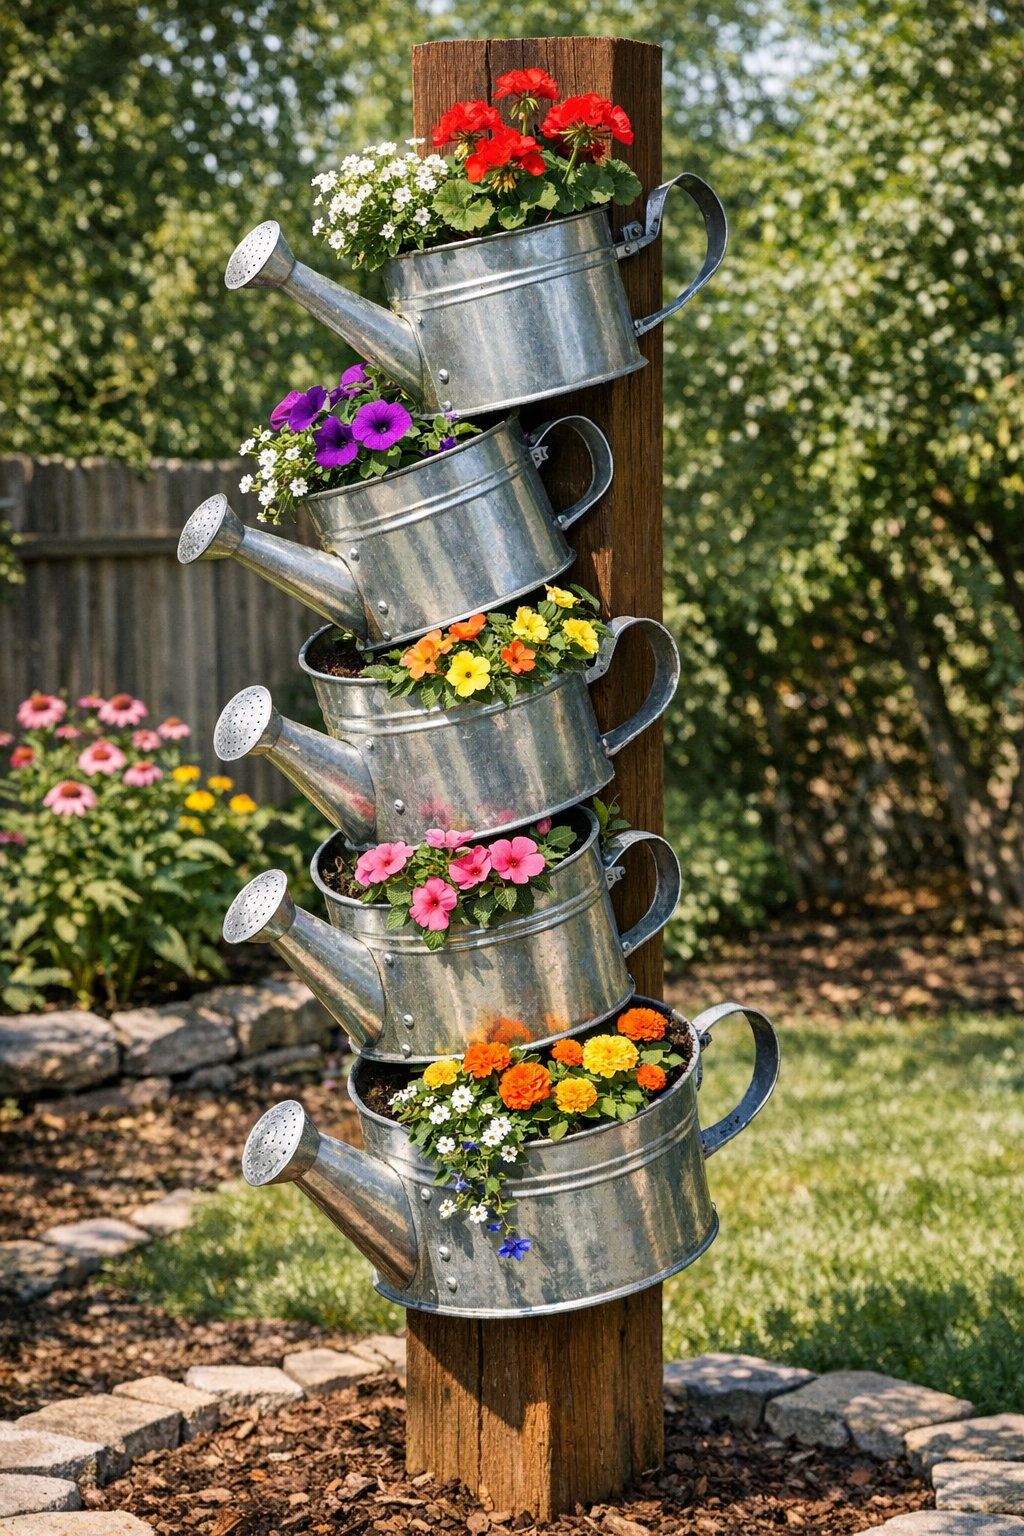
I love a backyard project that looks a little whimsical but is still genuinely useful, and this cascading planter is exactly that. By stacking six vintage silver metal watering cans onto one tall brown wooden post, you get a vertical planter that feels like garden art and saves a surprising amount of space. It’s a fun way to show off trailing flowers, herbs, or even a mix of both if you want something pretty and practical.
This is a great weekend build if you want a statement piece without tackling a huge landscaping project. I’m always looking for ways to make my yard feel more finished without spending every free hour out there, and this one gives big impact for a manageable amount of work.
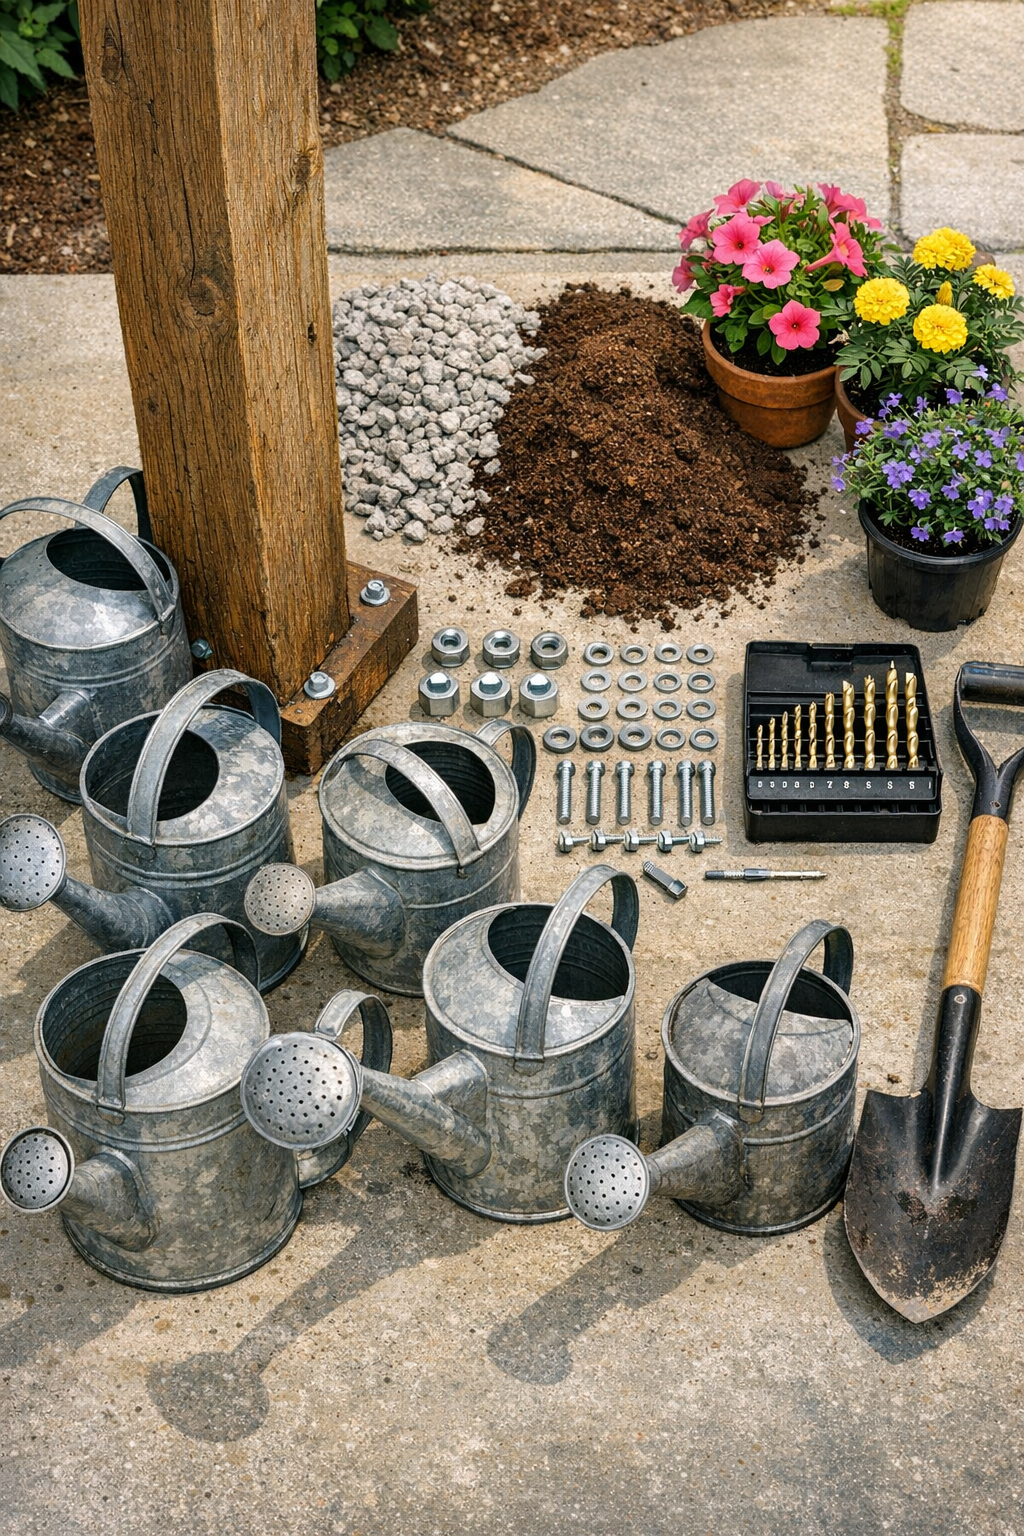
Materials
Instructions
1. Choose a sunny or partly sunny spot with enough room for the watering cans to angle outward without blocking a walkway. Mark the location and make sure the ground is fairly level.
2. If your post is unfinished, stain or paint it brown and let it dry completely before assembly. I like doing this first because touch-ups are much easier before the cans are attached.
3. Dig a hole about 18 to 24 inches deep and roughly 10 to 12 inches wide for the wooden post. Set the post in the hole and check that it stands straight on all sides.
4. Backfill the hole firmly with soil mixed with gravel, tamping every few inches so the post stays solid. Recheck for plumb as you fill, because a straight post makes the whole planter look polished.
5. Arrange the six watering cans on the ground in the order you want them mounted, rotating each one slightly so the spouts will create a cascading spiral effect. Aim for about 10 to 12 inches of vertical spacing between cans.
6. Mark two bolt holes on the back side of each watering can where it will contact the post, placing the holes a couple of inches apart for stability. Add matching marks on the post as you go, moving upward in a gentle spiral.
7. Drill drainage holes in the bottom of each watering can, using 4 to 6 small holes per can so excess water can escape. This step matters a lot if you don’t want soggy roots after a summer storm.
8. Drill the mounting holes through each watering can at the marked spots, then drill matching holes through the wooden post. Work one can at a time to keep the alignment clean.
9. Bolt the lowest watering can onto the post with two bolts, using a washer on each side of the metal and tightening with lock nuts. Angle the can slightly upward so the soil stays in place but the planted top still shows nicely.
10. Continue attaching the remaining five watering cans, rotating each one around the post to build the stacked cascading look. Step back every couple of cans to check the spacing and visual balance before tightening fully.
11. Add a 1-inch layer of gravel to the bottom of each watering can for drainage, then fill each one about two-thirds full with potting mix. Press the soil lightly so it settles without compacting too much.
12. Remove your plants from their nursery pots and tuck them into the watering cans, using trailing flowers near the top and fuller plants lower down if you want a lush waterfall effect. Add more potting mix around the roots and leave about 1 inch of space below the rim.
13. Water each can gently until moisture runs from the drainage holes, then wipe away any spilled soil from the metal. For the first week, check daily since elevated planters dry out faster than in-ground beds.
Variations & Tips
Plant choice: Trailing petunias, calibrachoa, sweet potato vine, and ivy all work beautifully here. If you cook a lot like I do, you can also mix in herbs such as thyme, oregano, and creeping rosemary.
Rustic finish: If your watering cans have a naturally aged look, leave them as-is for character. If they’re mismatched, a gentle cleaning helps them look collected instead of chaotic.
Extra stability: In windy yards, set the post in fast-setting concrete instead of tamped soil and gravel. It takes a little more effort up front, but the structure will feel much sturdier long term.
Watering tip: Because each container is fairly small, they can dry out quickly in peak summer heat. I usually check vertical planters during my evening walk around the yard, which makes maintenance easier to remember on busy workdays.
Seasonal swap: Change the planting with the seasons to keep the display fresh. In spring I’d use bright annuals, in summer I’d go lush and trailing, and in fall I’d switch to ornamental kale, pansies, or small mums.
Drainage reminder: Don’t skip the drainage holes or gravel layer. Cute planters are still planters, and healthy roots always matter more than looks.